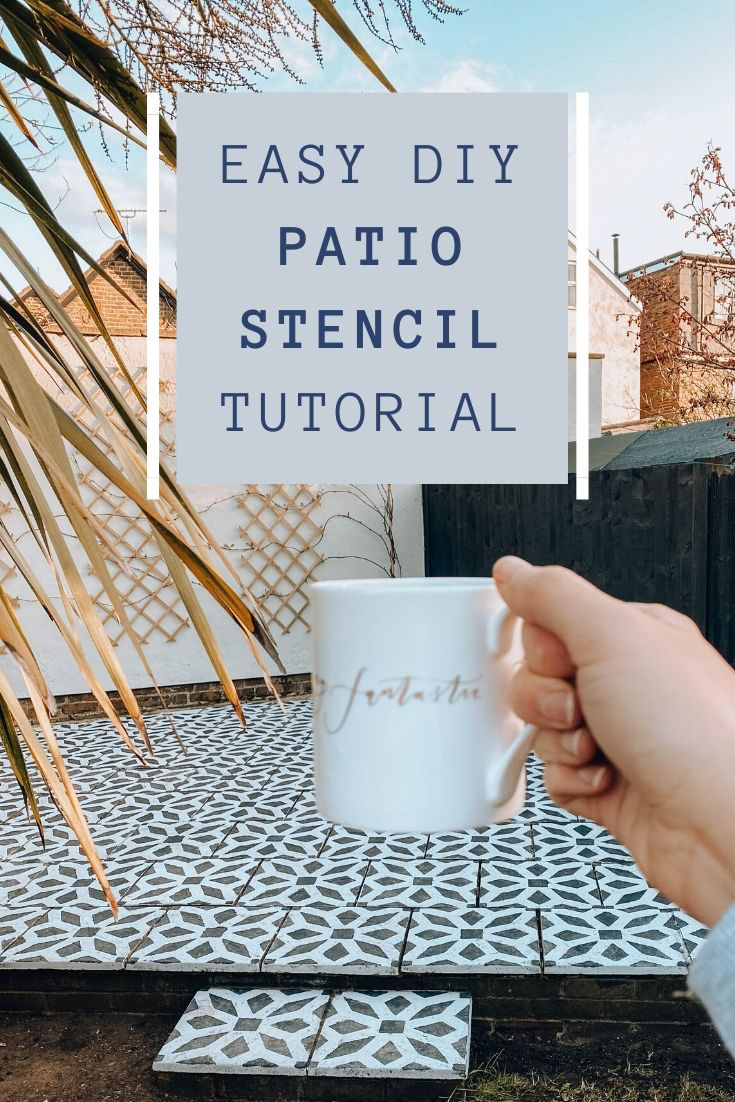
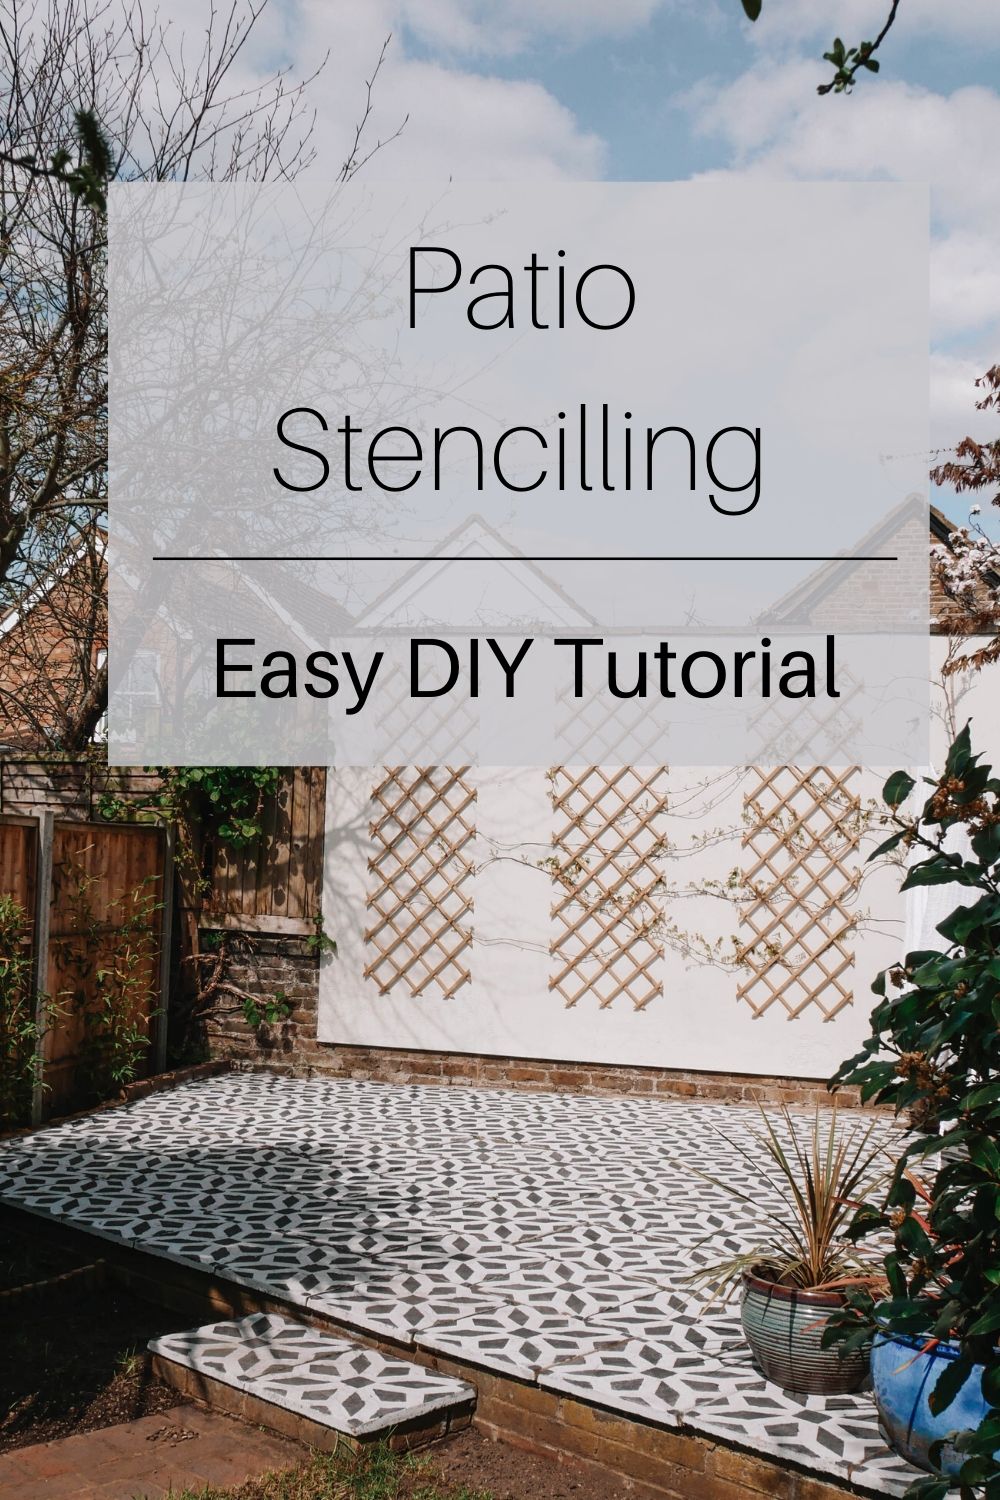
If there is one DIY hack we’ve done in our home that has saved us a great deal of money, been a fairly seamless and straightforward job and has been a huge transformation it is absolutely stencilling our very worn looking patio.
The initial plans were to have decking laid over the patio but it begun to look like a larger than life task with uneven patio slabs, mounting labour/material costs and not to mention the fact neither of us had the first clue about how to lay decking.
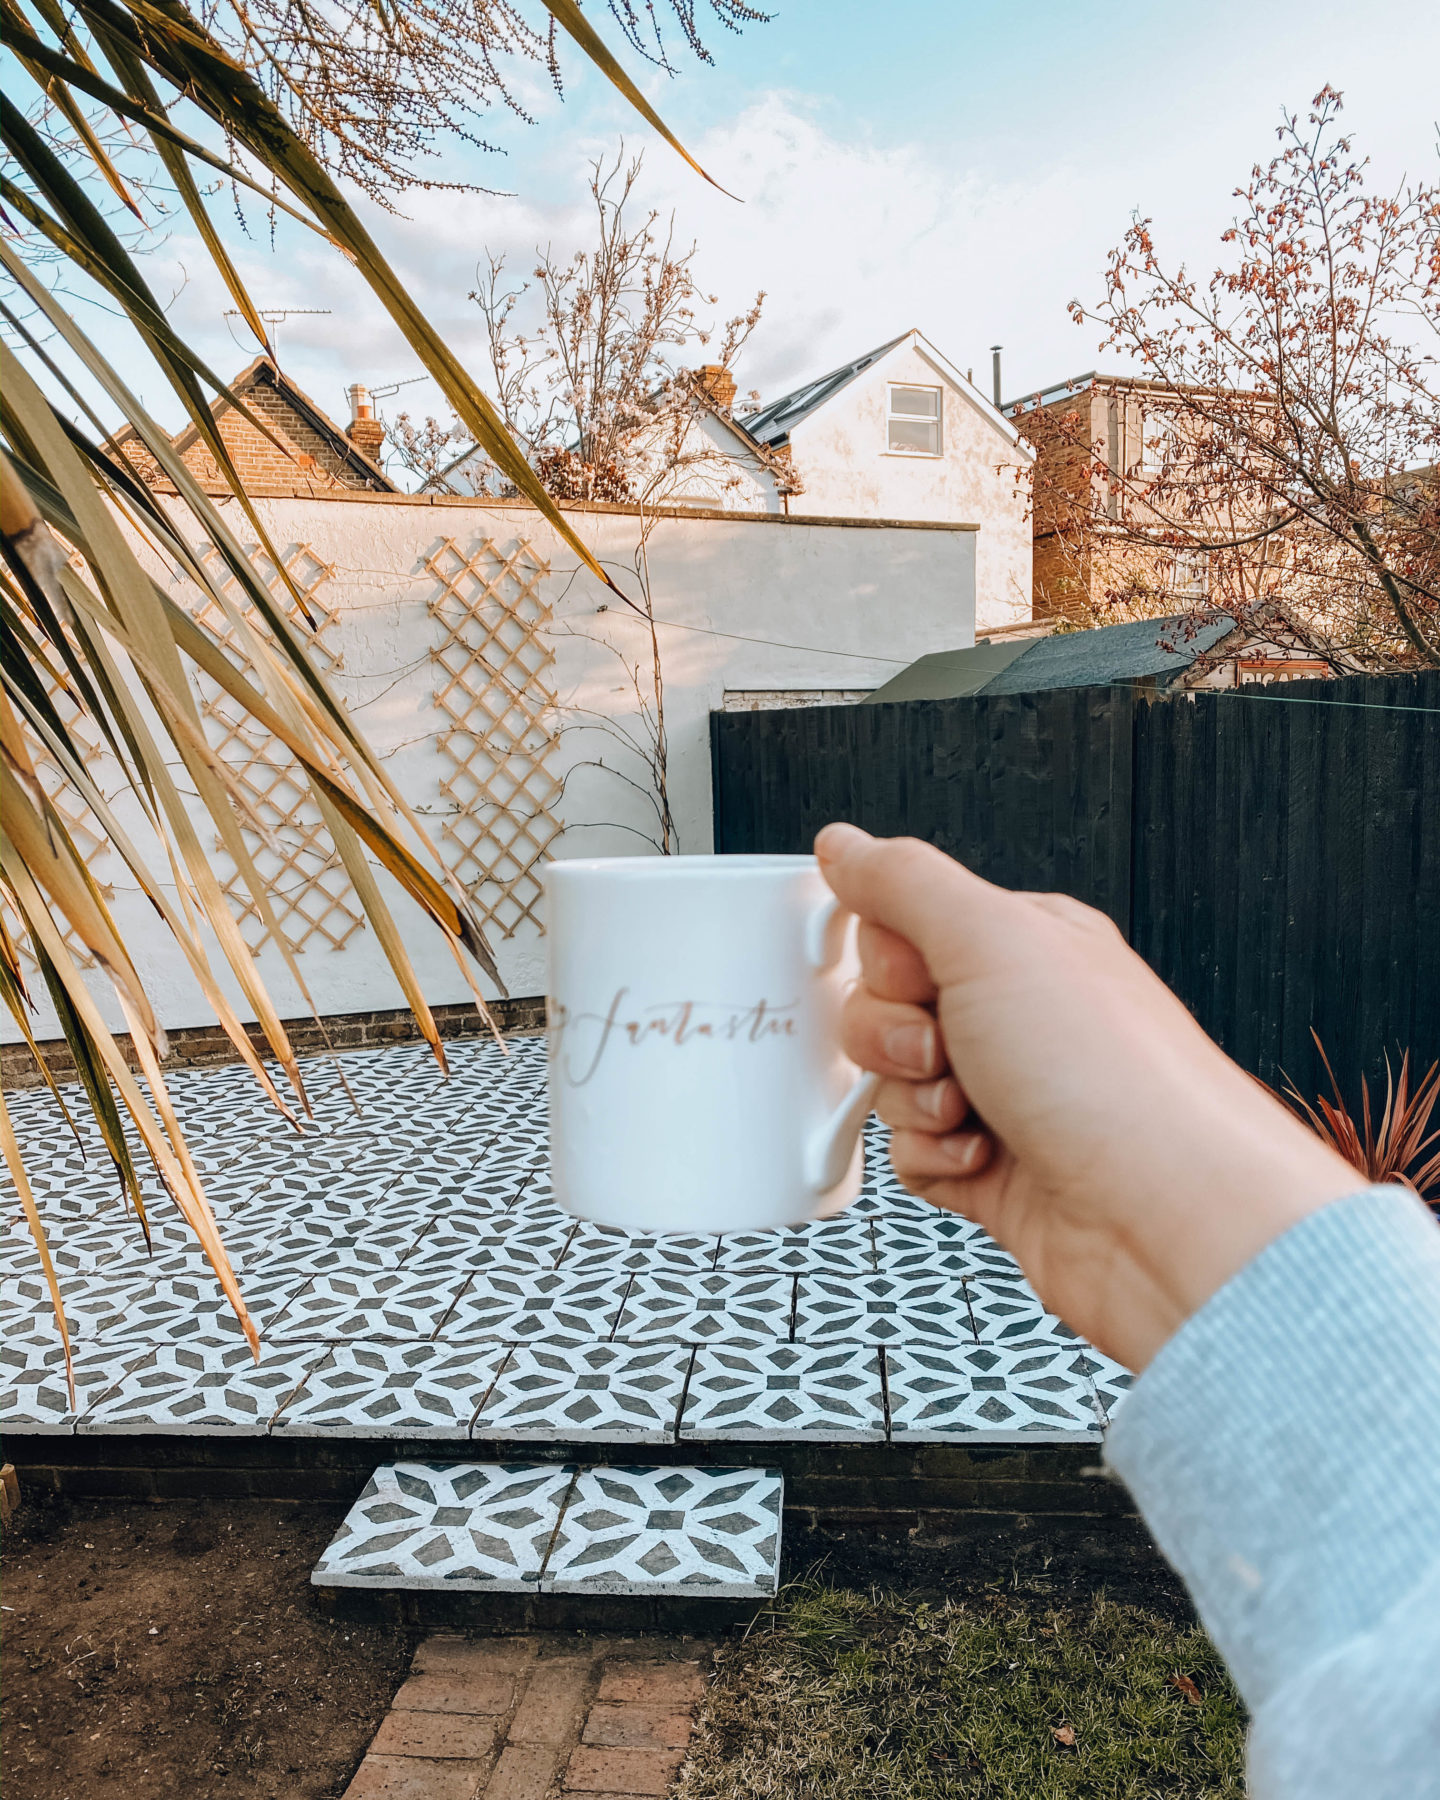
A few suggestions over on Instagram lead me to believe that it was absolutely possible to attempt a stencil job on our patio, and hey if it turned out to be a disaster we’d stick to our original plan and just deck over it. Well, much to my surprise it turned out to be an utterly fantastic result.
We did the job over a weekend and it was fairly simple.
Preparation is key to getting this job done as easily as possible. Make sure you have everything you need beforehand.
Total Cost: under £100
Click on the names of each product for links to buy.
You’ll Need:
- Bristle brush
- Paintbrush
- Primer
- Grey base paint
- Black Stencil Paint
- Patio Sealant (not essential)
- Sponge
- Stencil
- Frog Tape
Firstly you’ll need a couple of days forecast of good / dry weather to make sure that it doesn’t rain whilst painting. It ended up snowing at one point during our painting stint, but we got there in the end.
Preparation is key to getting this job done as easily as possible. Make sure you have everything you need beforehand.
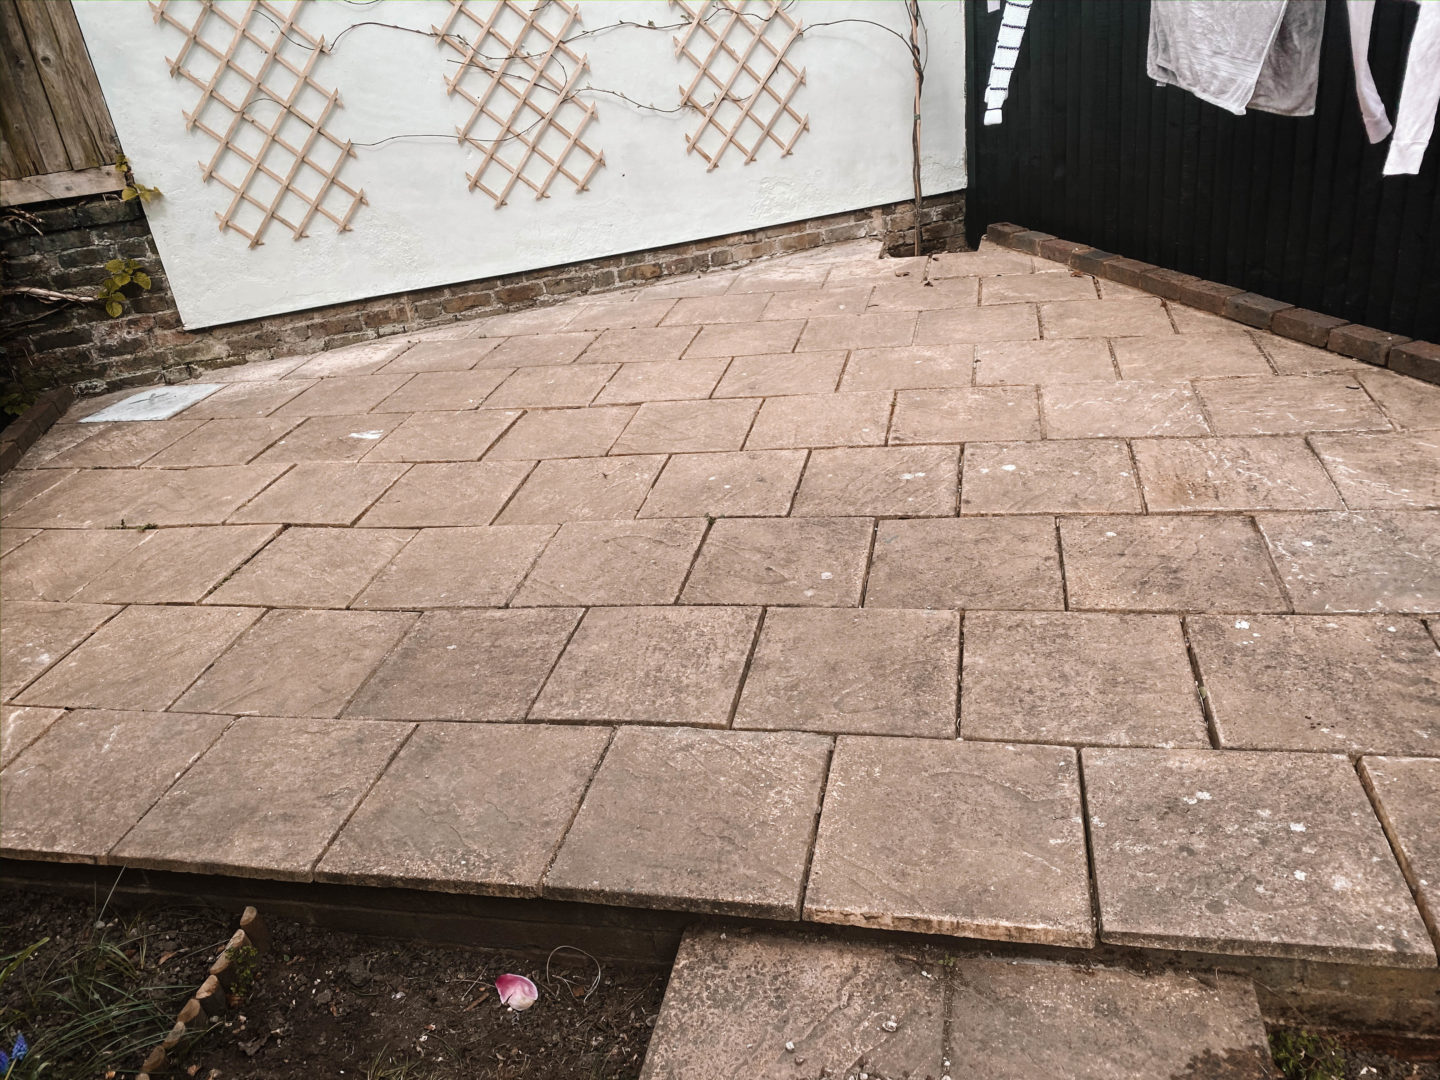
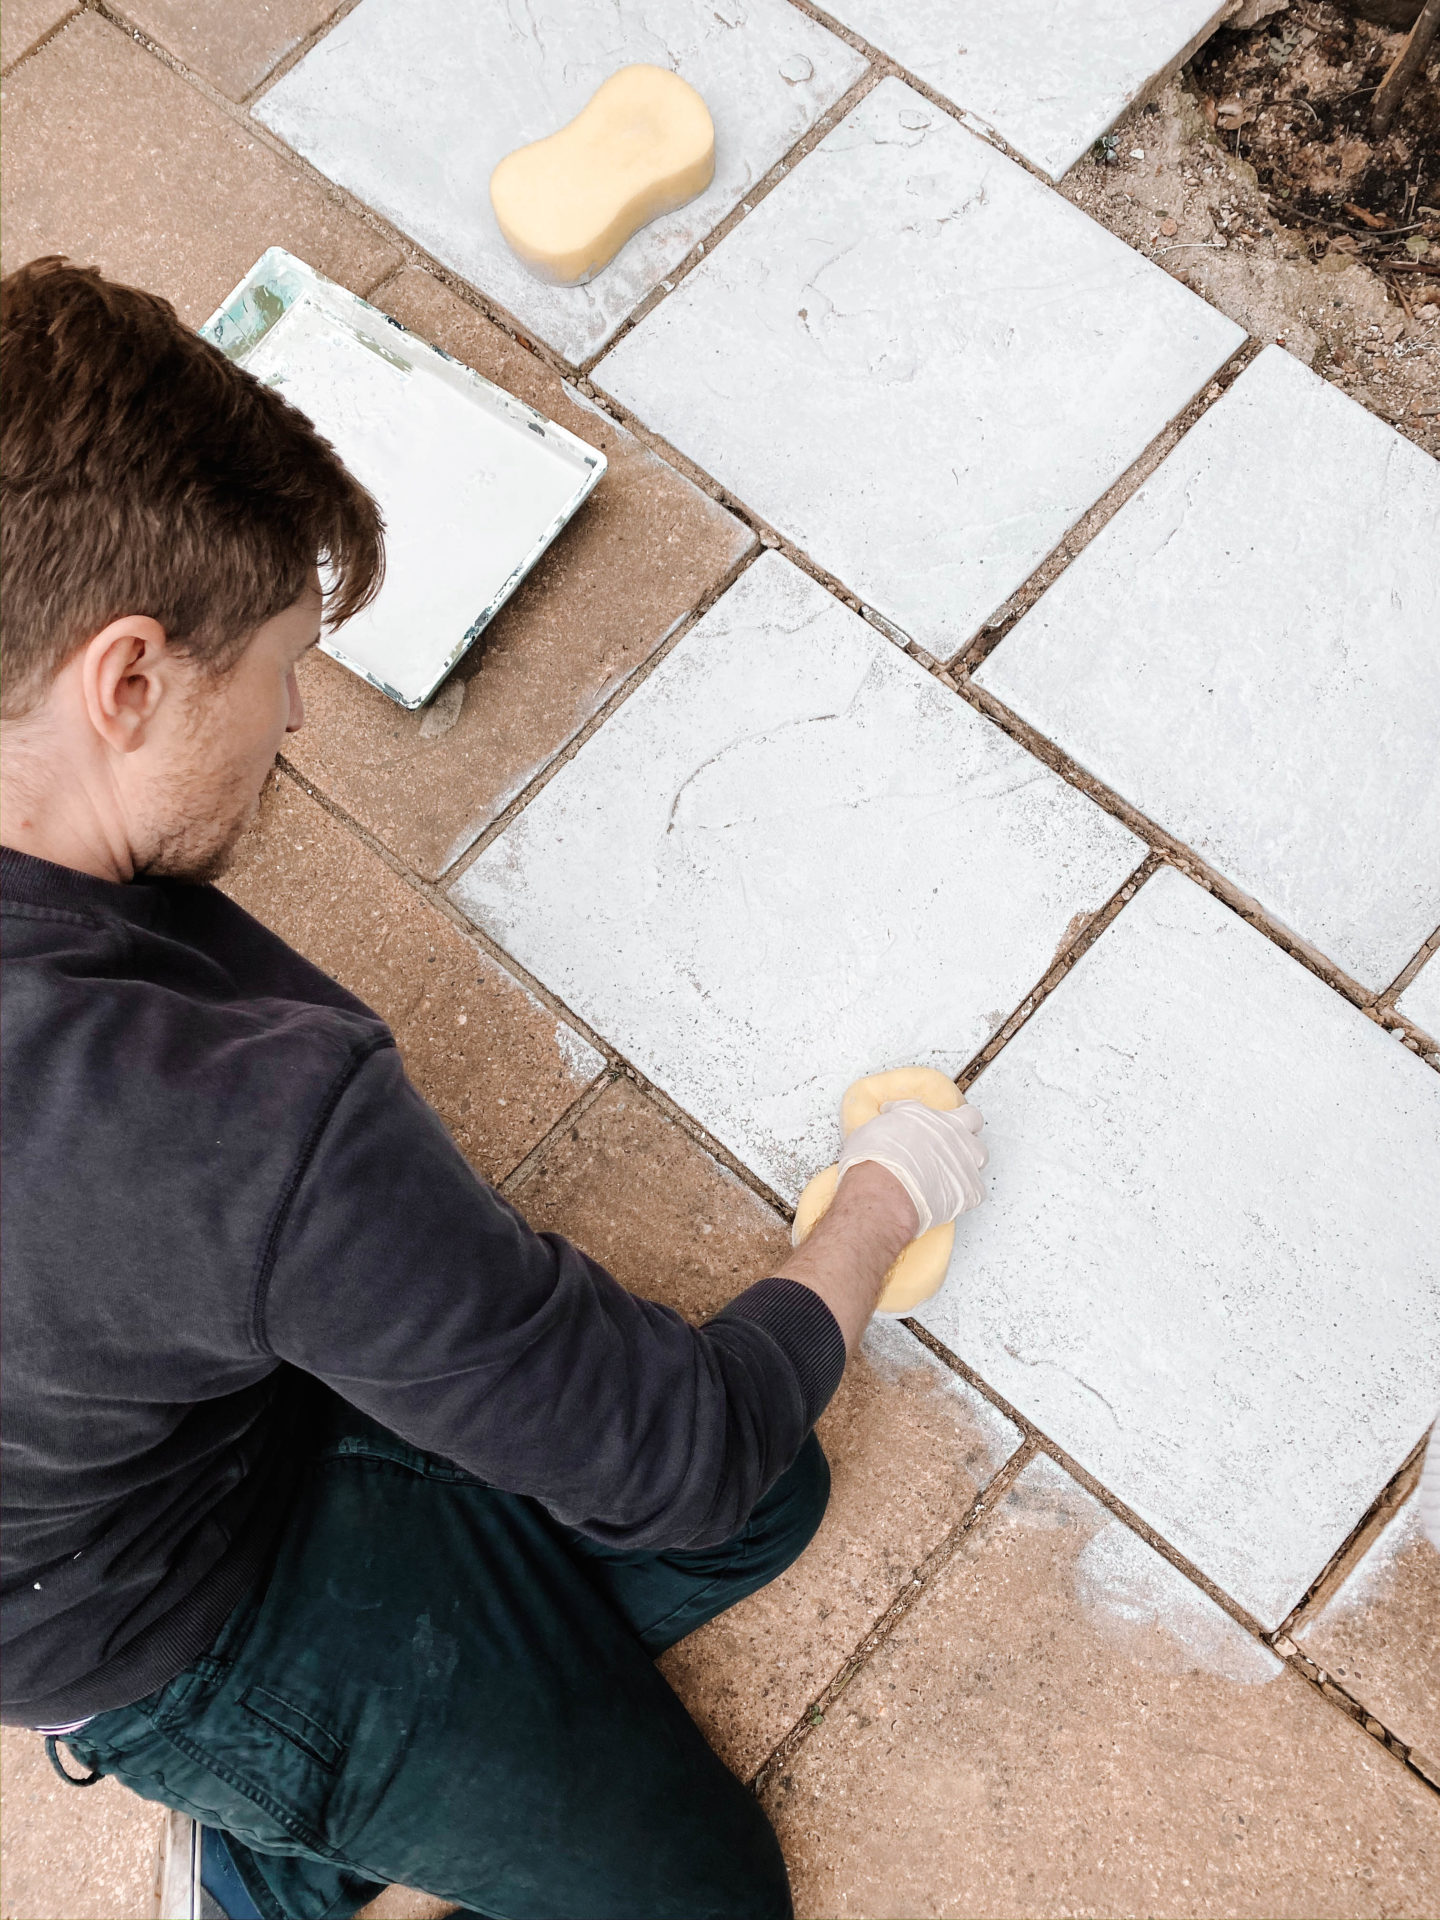
Firstly you’ll need to power wash or scrub the patio clean. It’s important that the paint can stick to the stone with no interference. We used a power hose six months before to clean off the green moss. During our paint prep we used a very strong bristle brush to clean any further build up. The patio had been de-weeded and thoroughly swept before we began painting. We tended to the weeds in the patio grooves but never filled in the grooves and are prepared for a lifetime of de-weeding instead. If any of your slabs are damaged or have cracks in them then tend to this before you begin painting.
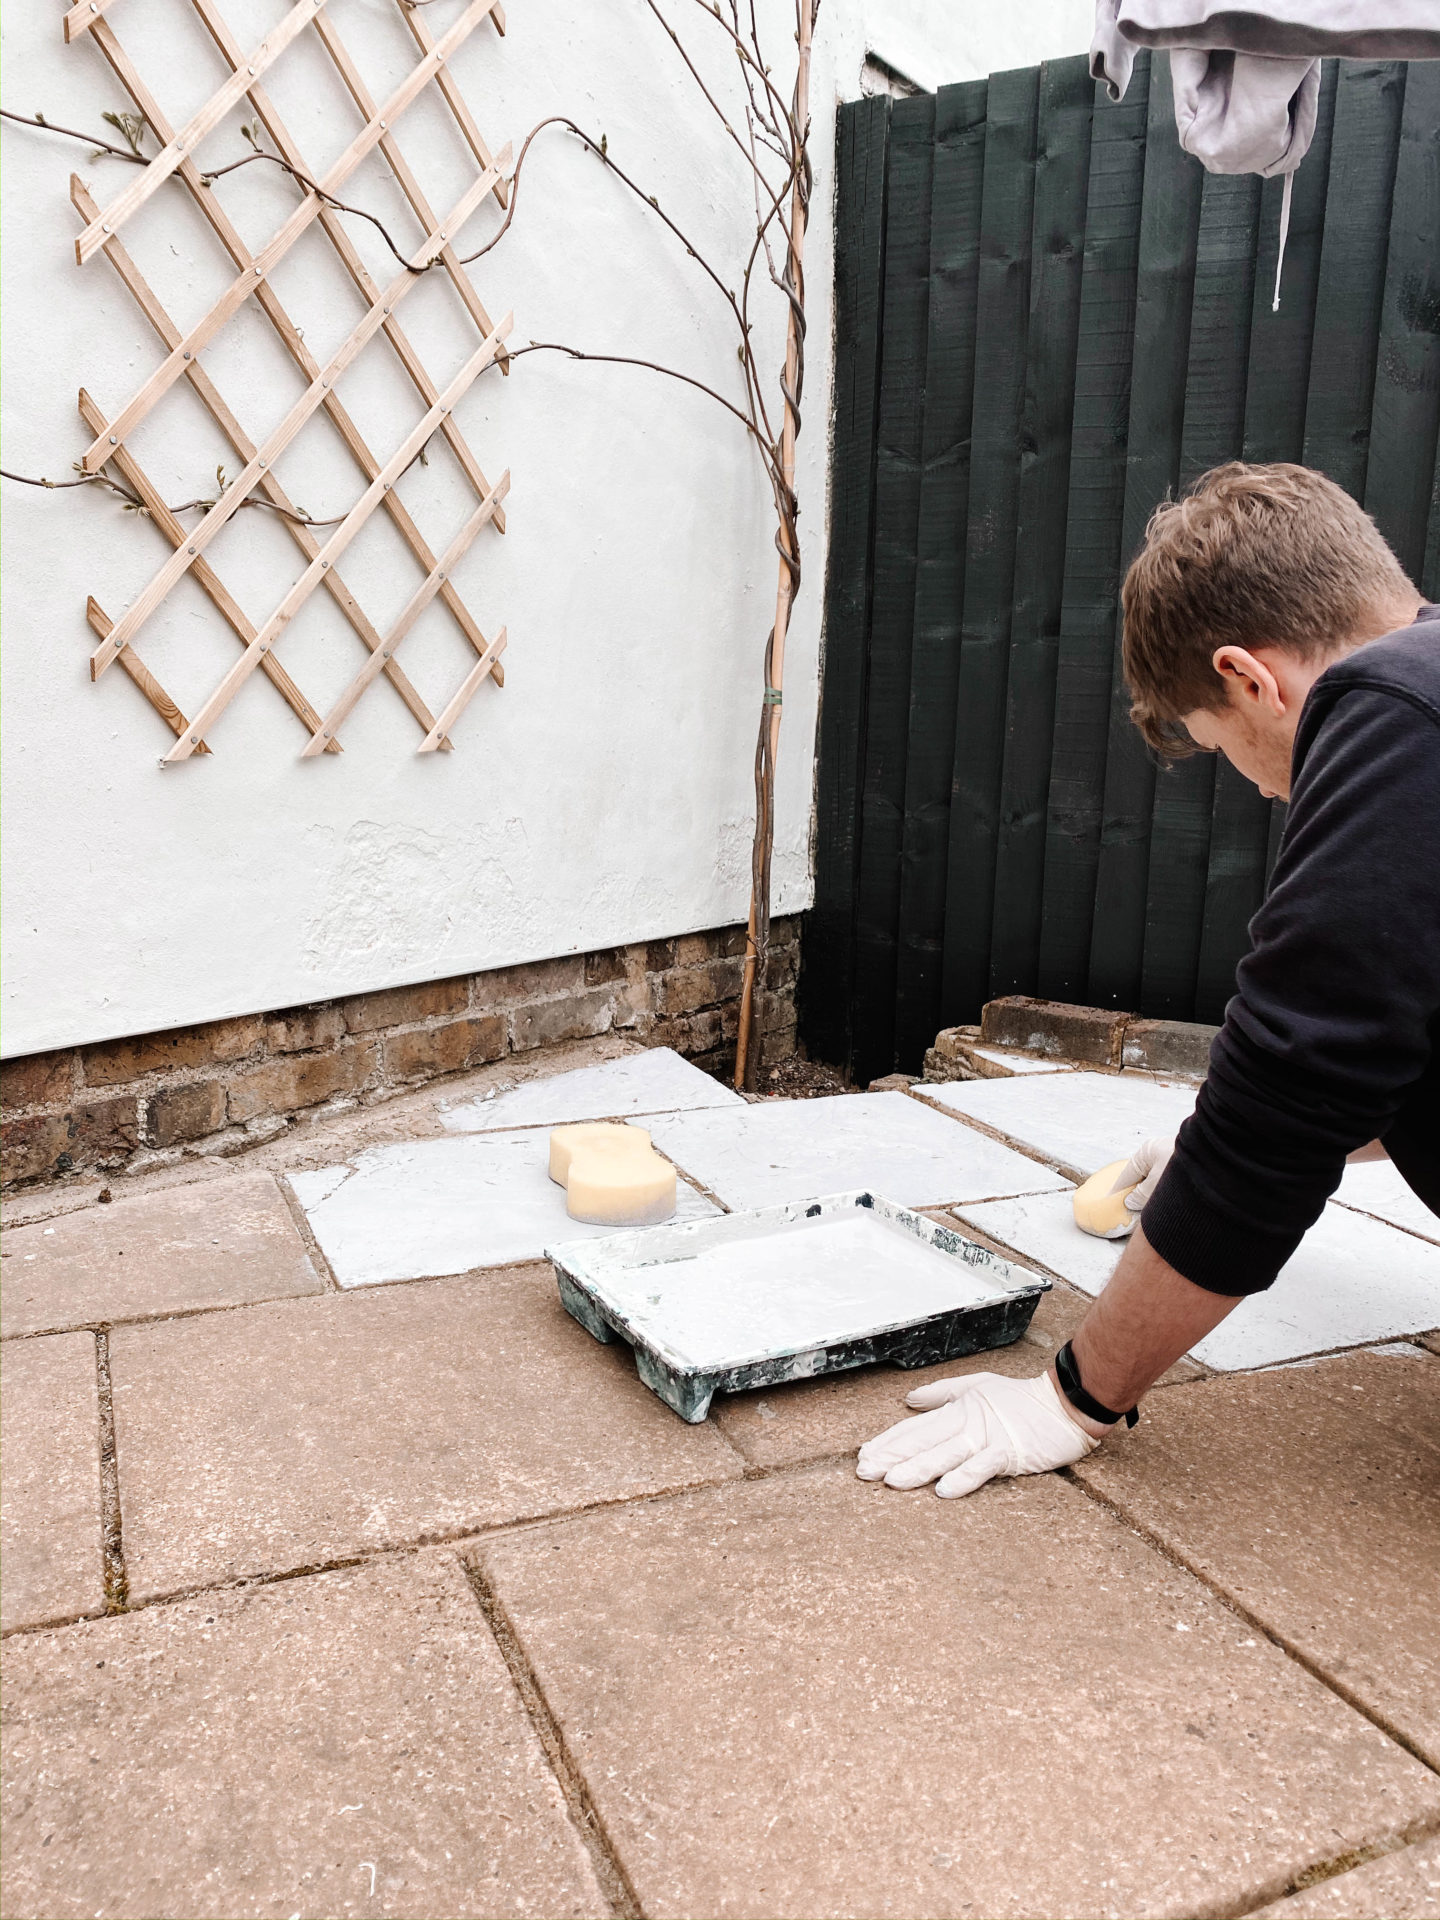
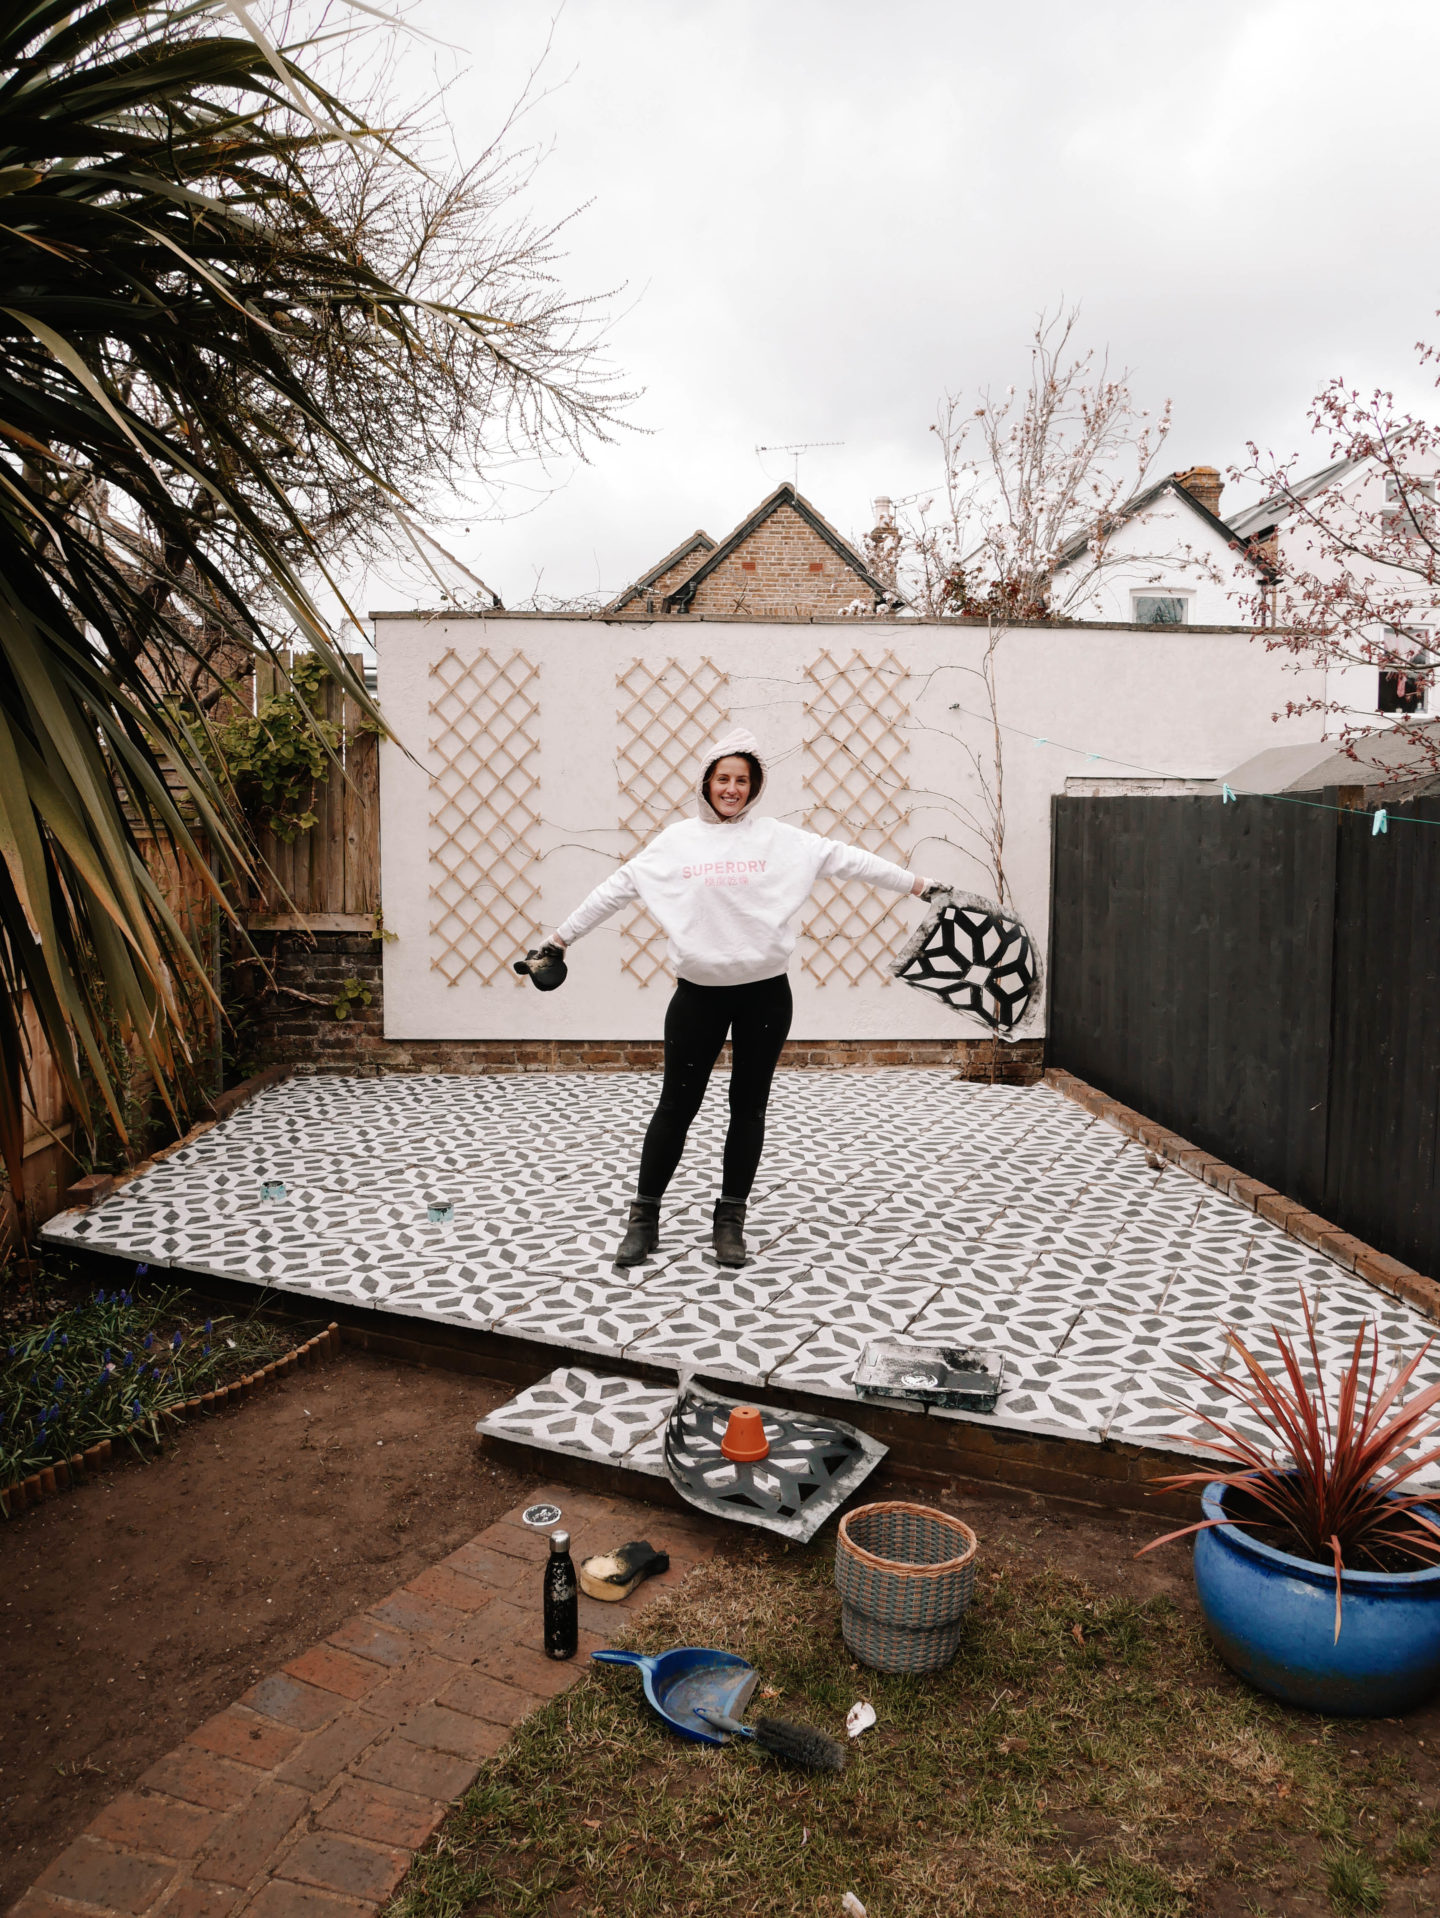
We sponged on all the paint. This was our preference as we wanted a more “rustic” look for the finished result. It actually was SO quick to apply with a big sponge and the Sandtex mason paint actually still went on with a very full coverage. The paint is guaranteed to be “rainproof” within the hour, however we waited a full 24 hours before stencilling. The paint we used is guaranteed for 15 years and is weather proof. We haven’t sealed the top yet but plan to with the Wickes Paving Sealer.
We did the job in spring so it’s yet to endure a winter. We anticipate the moss will grow back over winter and hopefully the weather paint will be resistant to deep cleaning next spring. If you want to pressure wash to clean the patio after it’s painted (which I would advise against) do it on a very low setting.
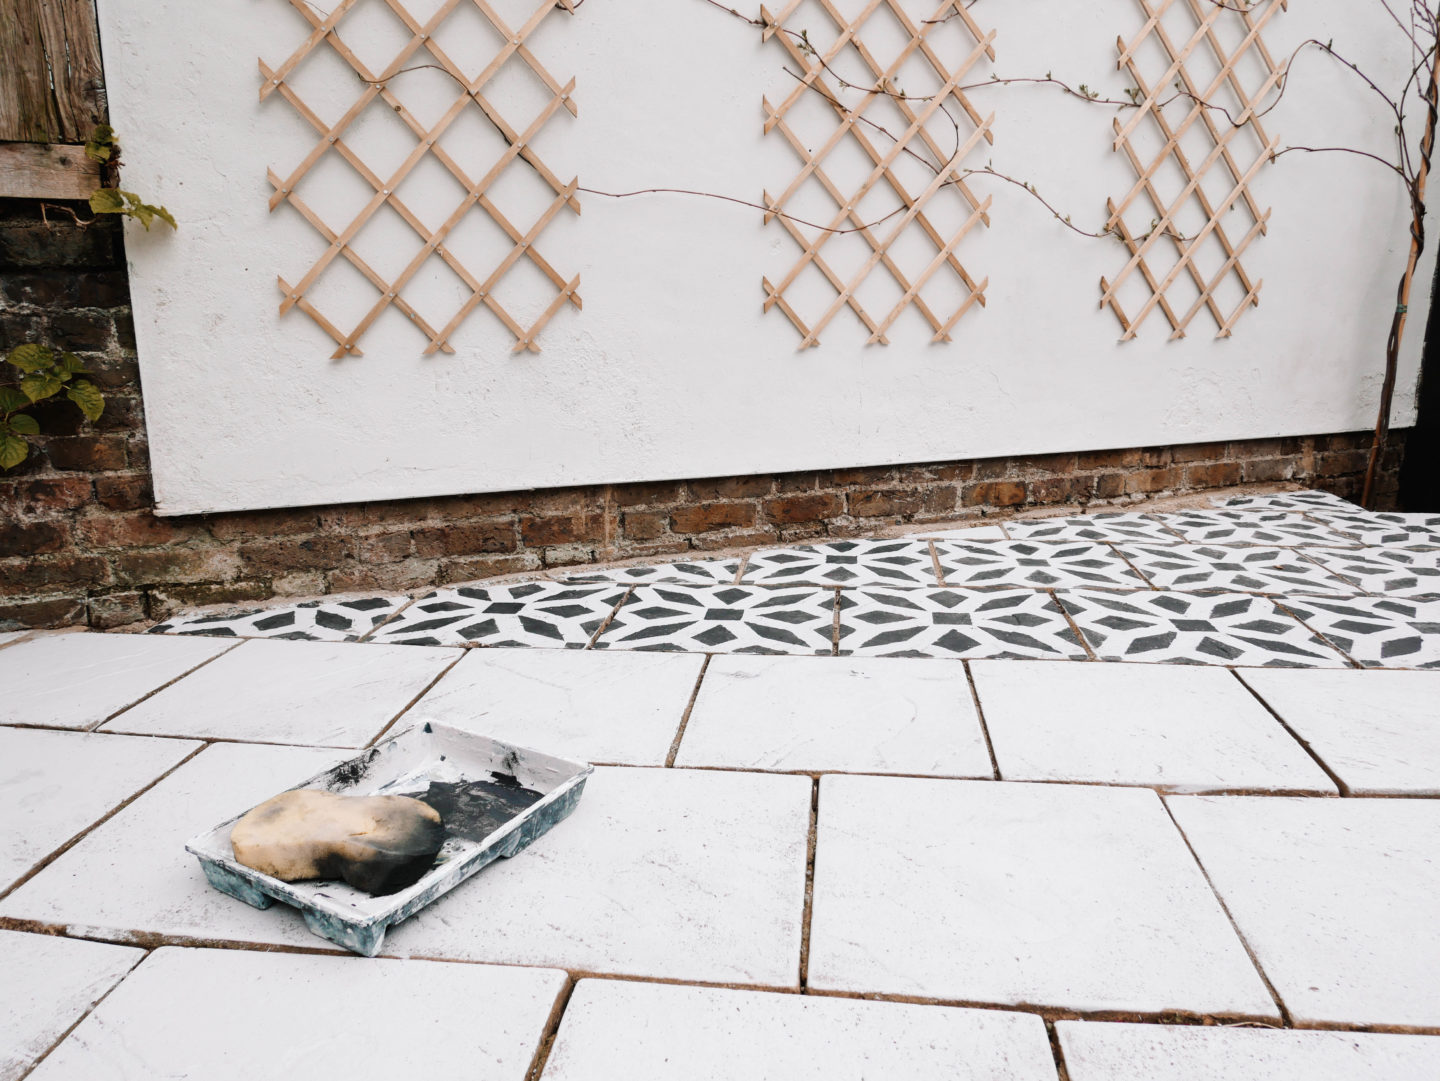
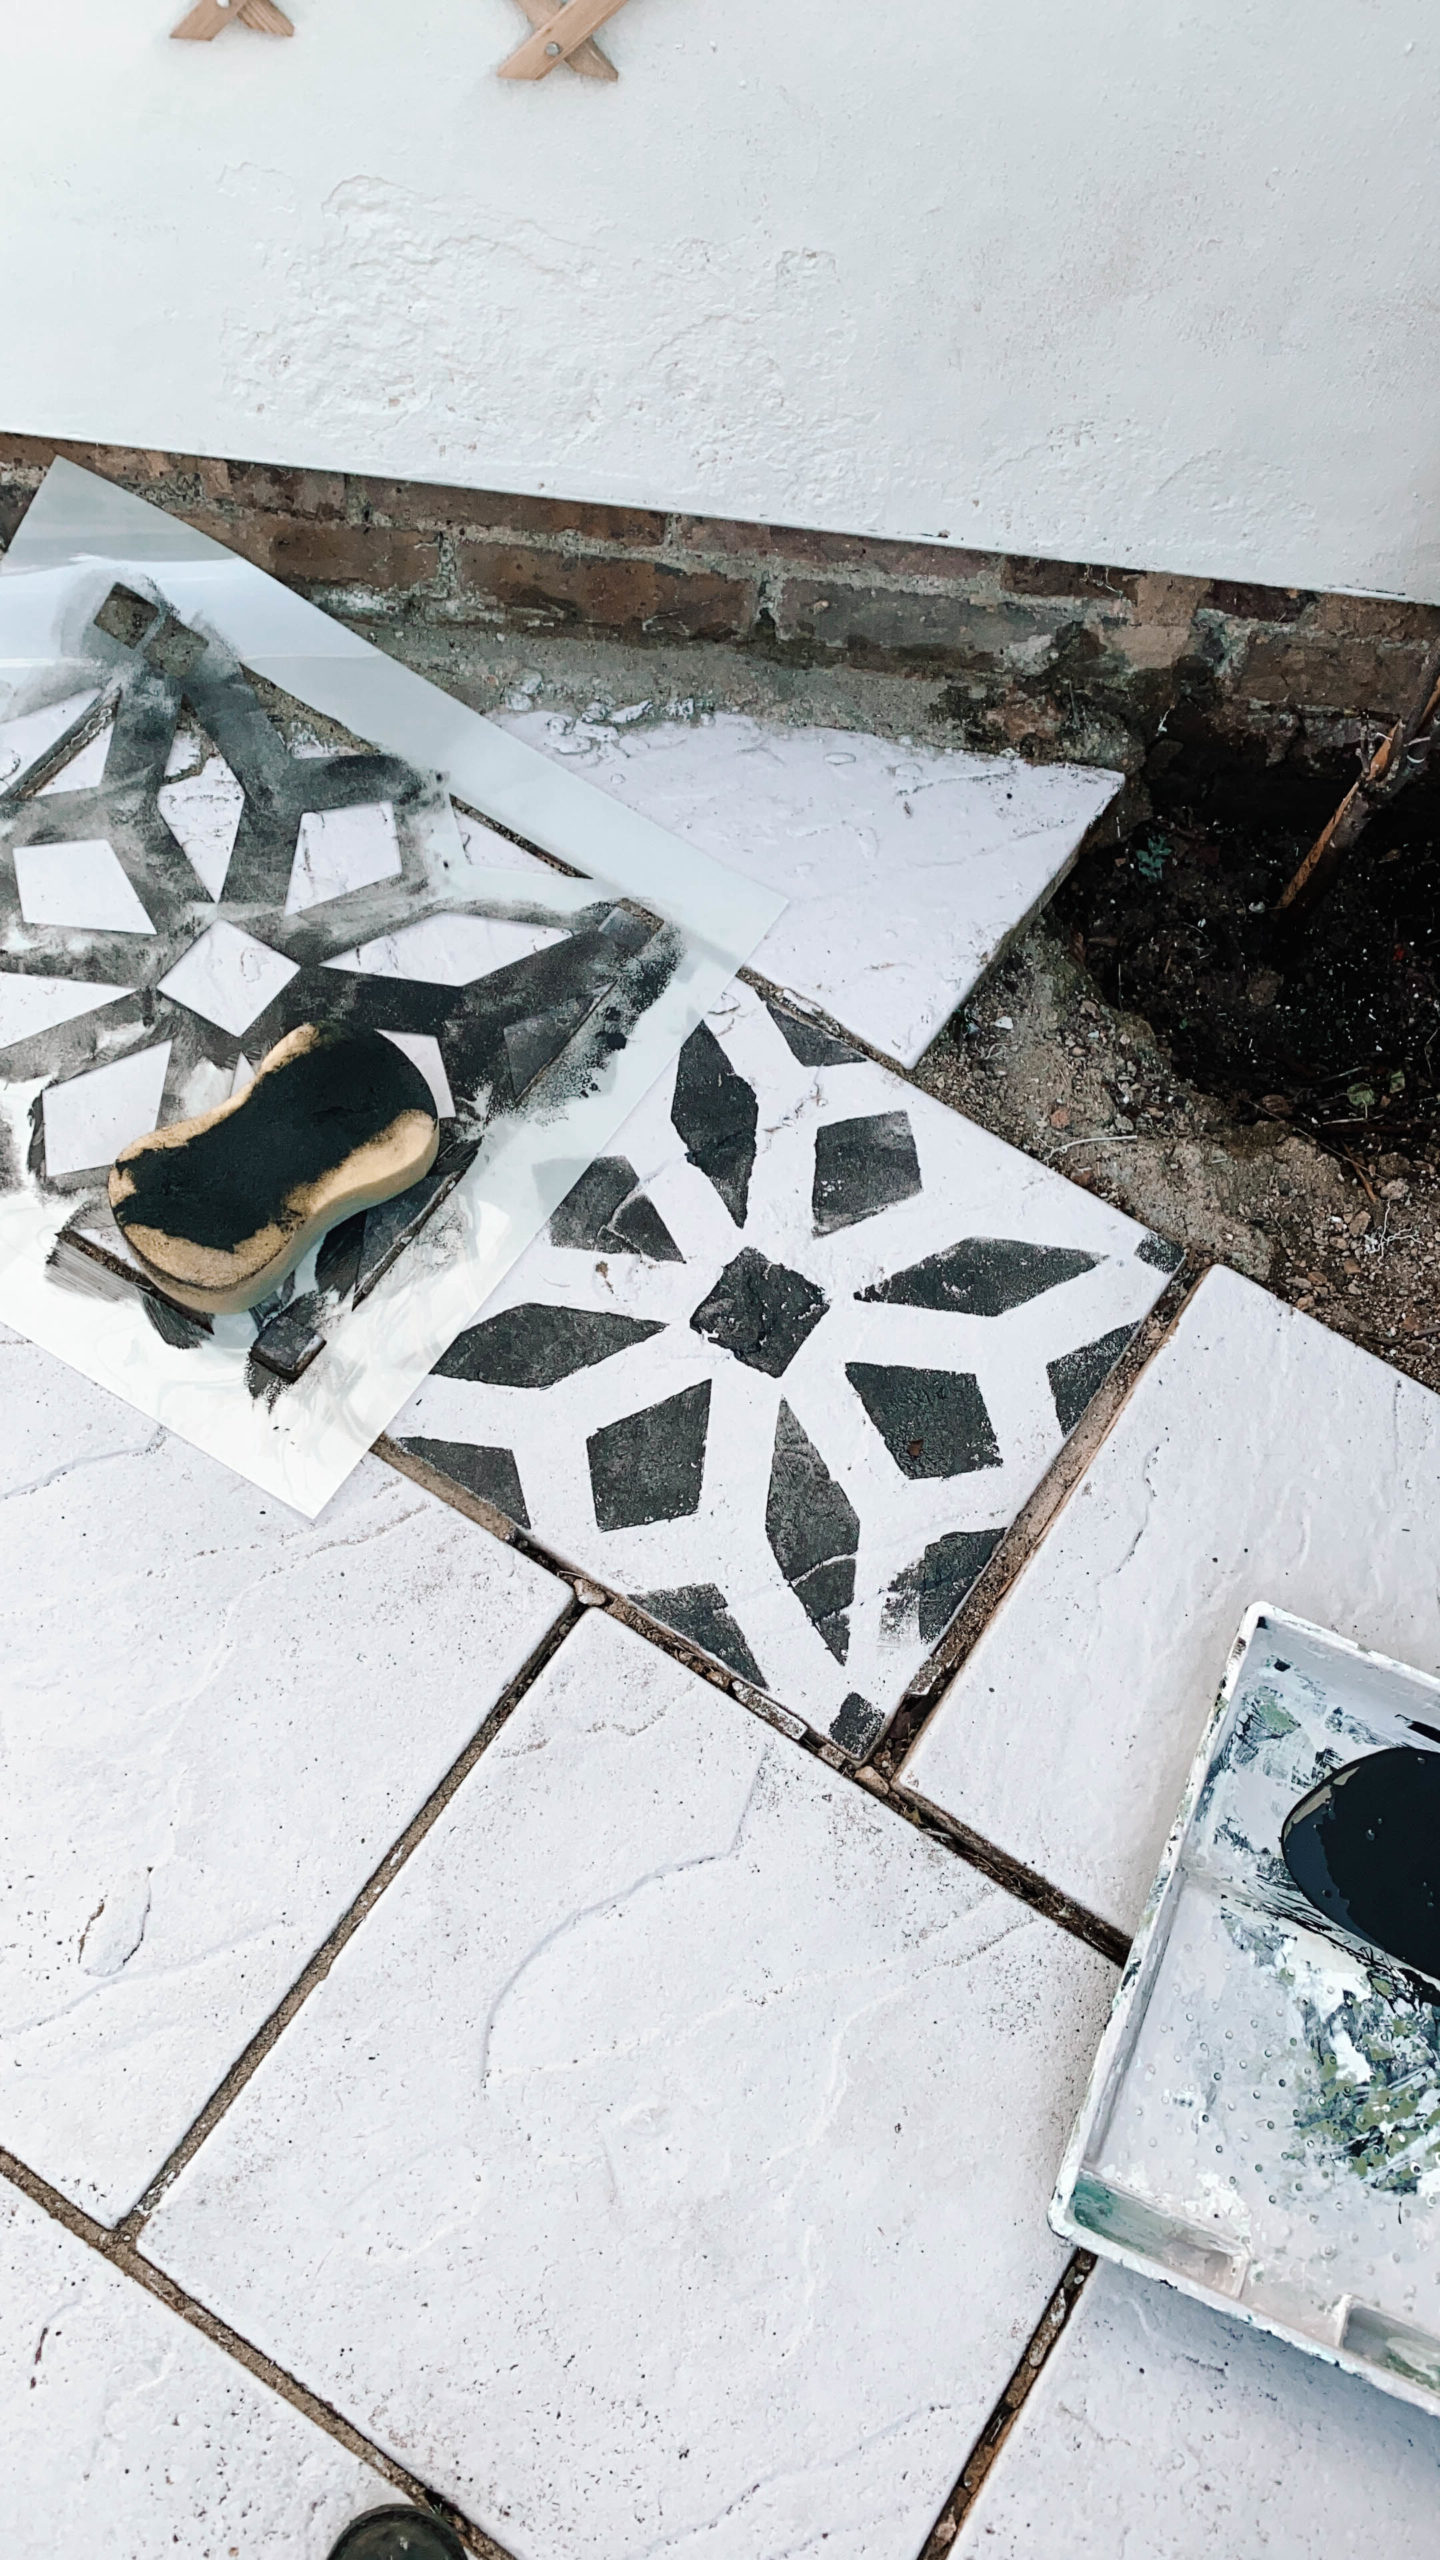
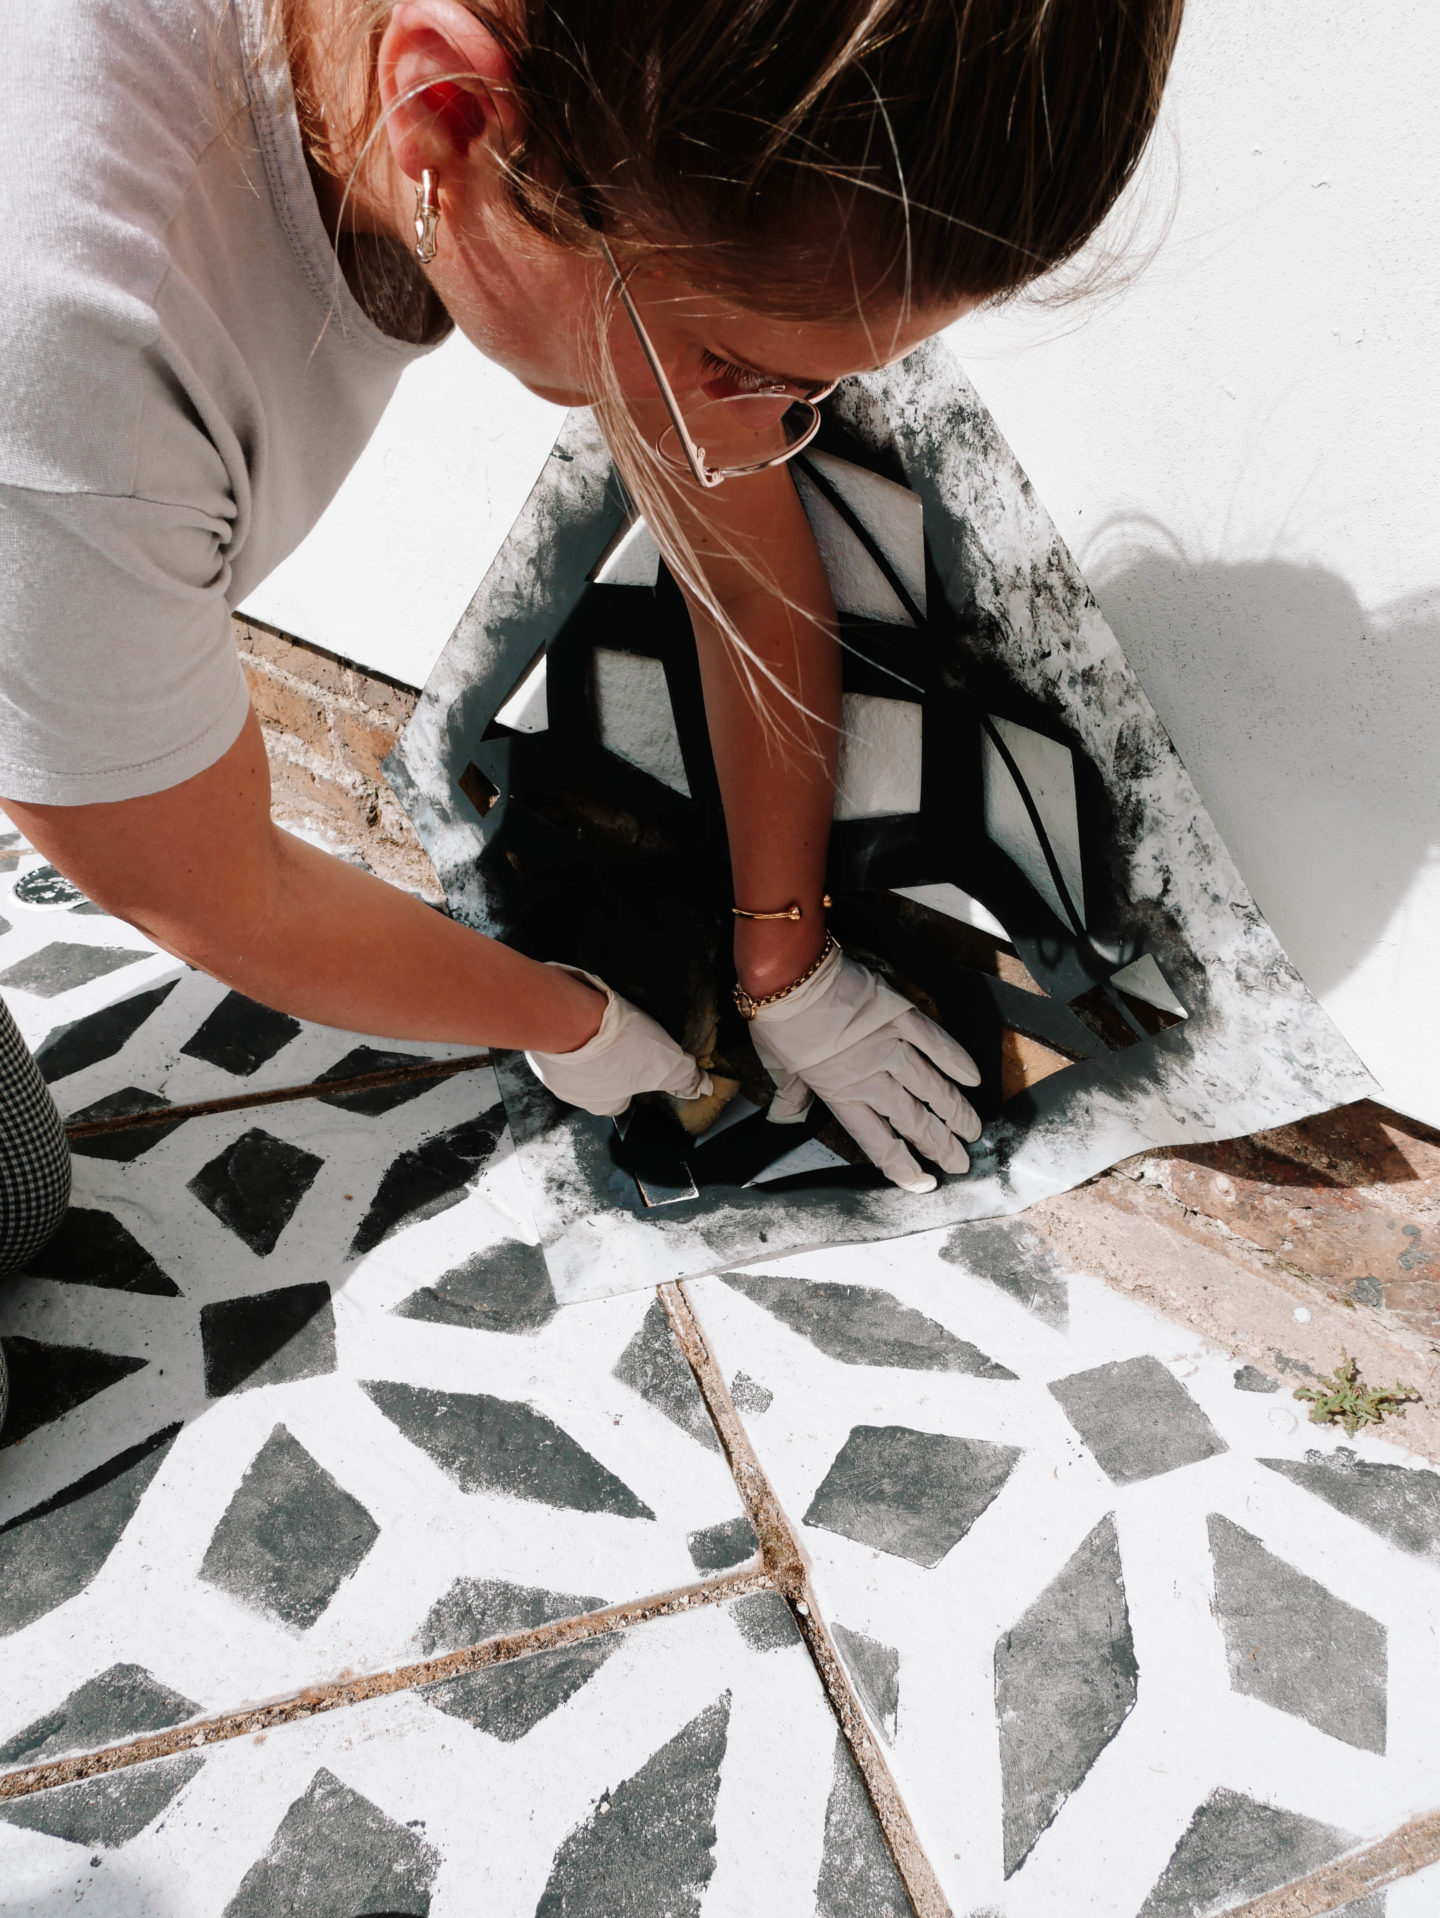
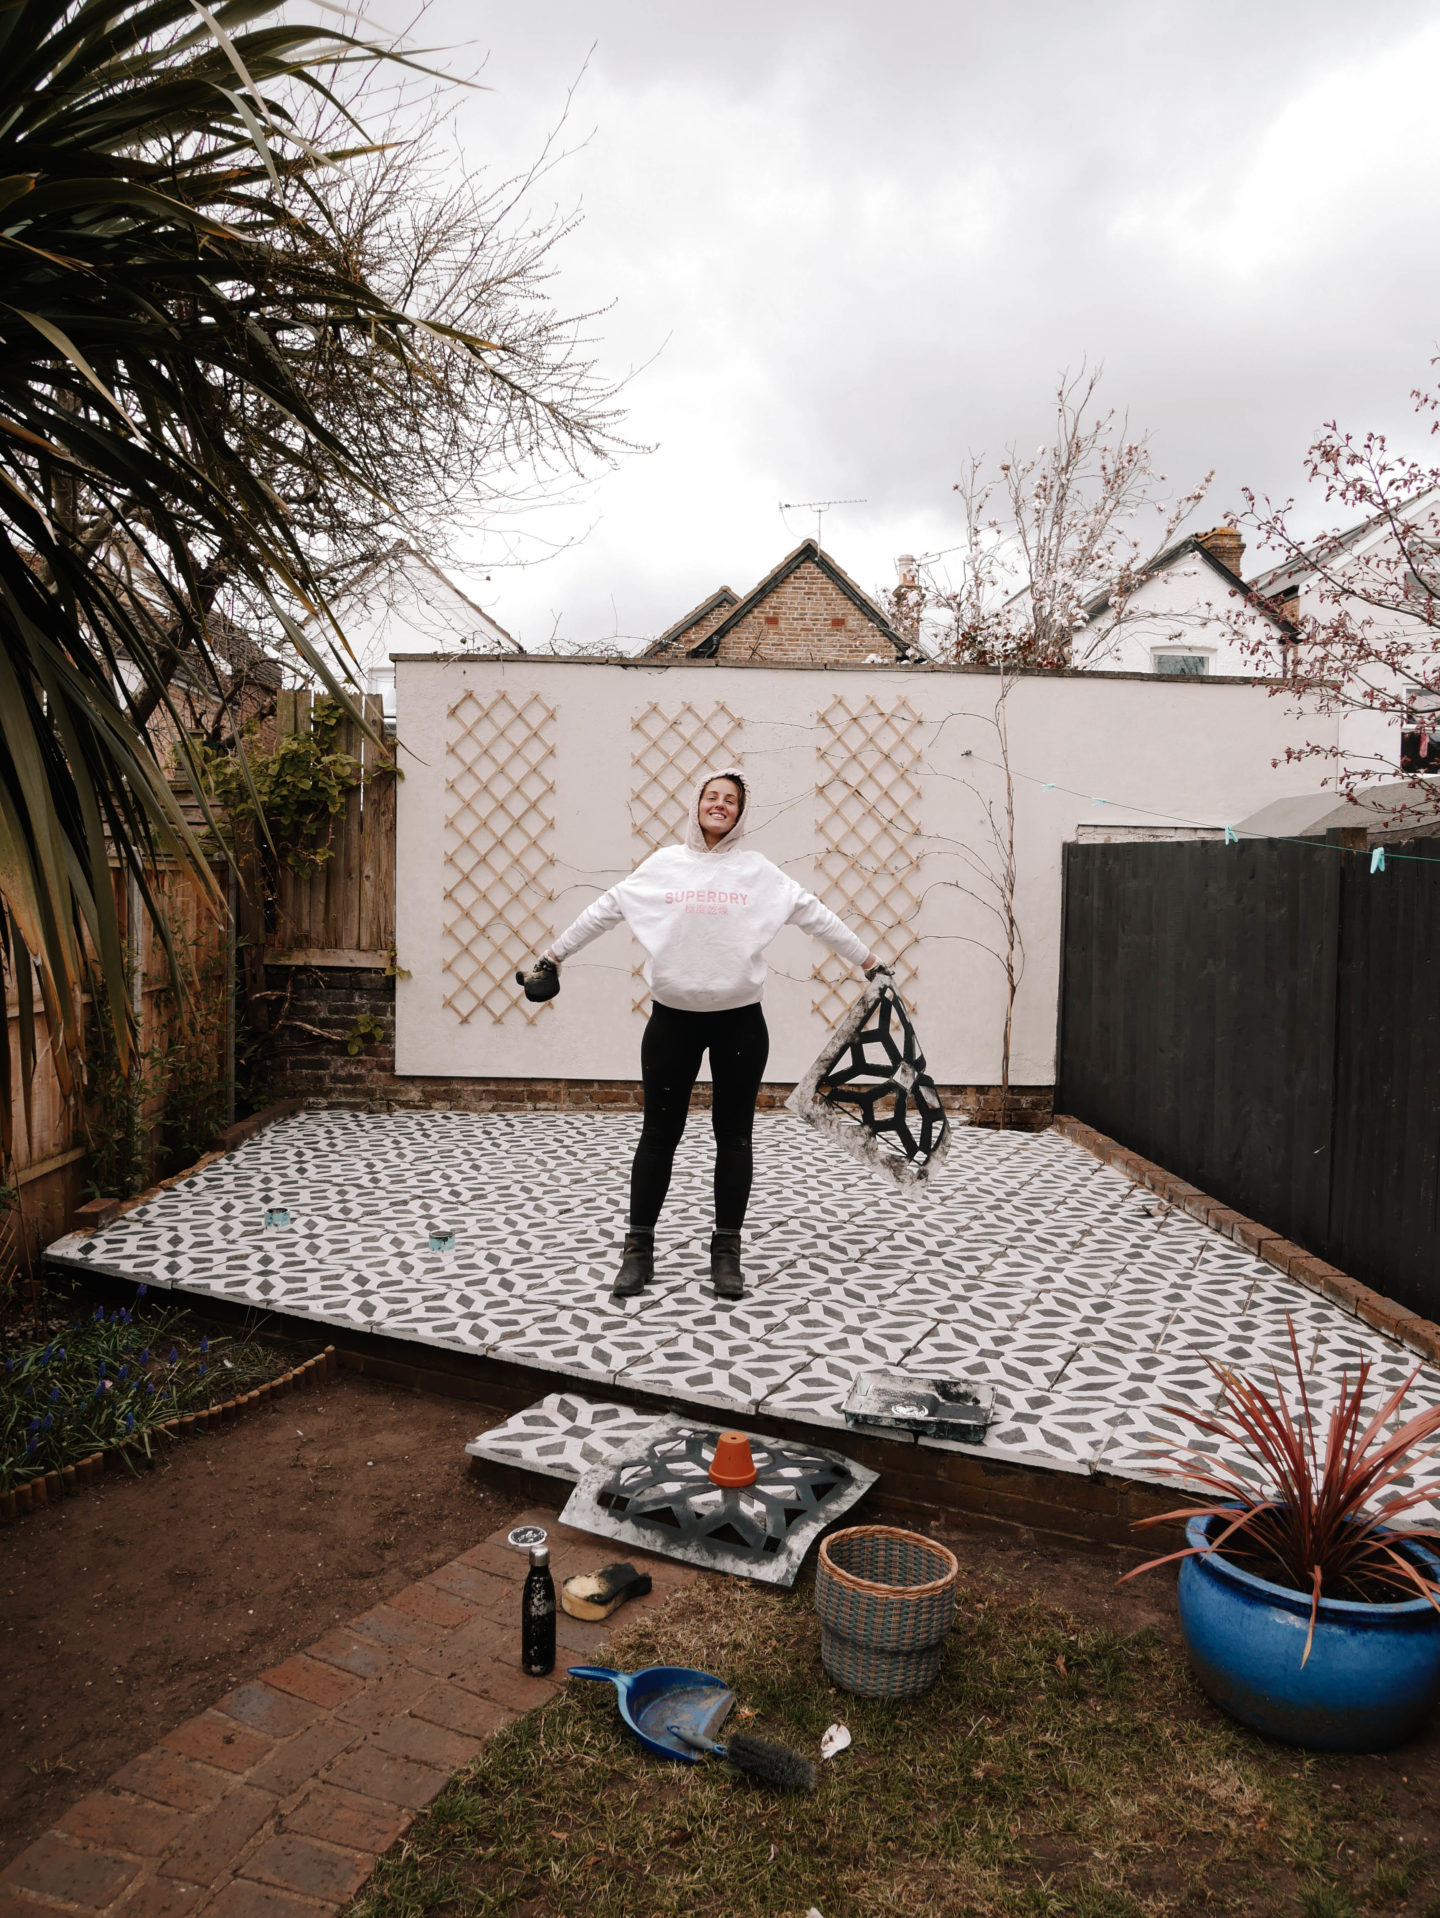
The stencil was bought on Etsy by a brand called Dizzy Duck Designs. They have numerous stencil sizes available. We ordered the 45cm stencil which was 1cm bigger than our paving slabs, however it was the closest size possible. If you can, order the stencil size to be exact because it is less fiddly when applying the paint. It was super straightforward to use the stencil, even on the tiles at the edges of the patio that weren’t whole. The stencil is flexible plastic and once in position if held well, even if that meant half of the stencil hitched against the wall for fiddly corners. A smaller stencil is sent with the order too which is perfect for smaller, hard to reach tiles.
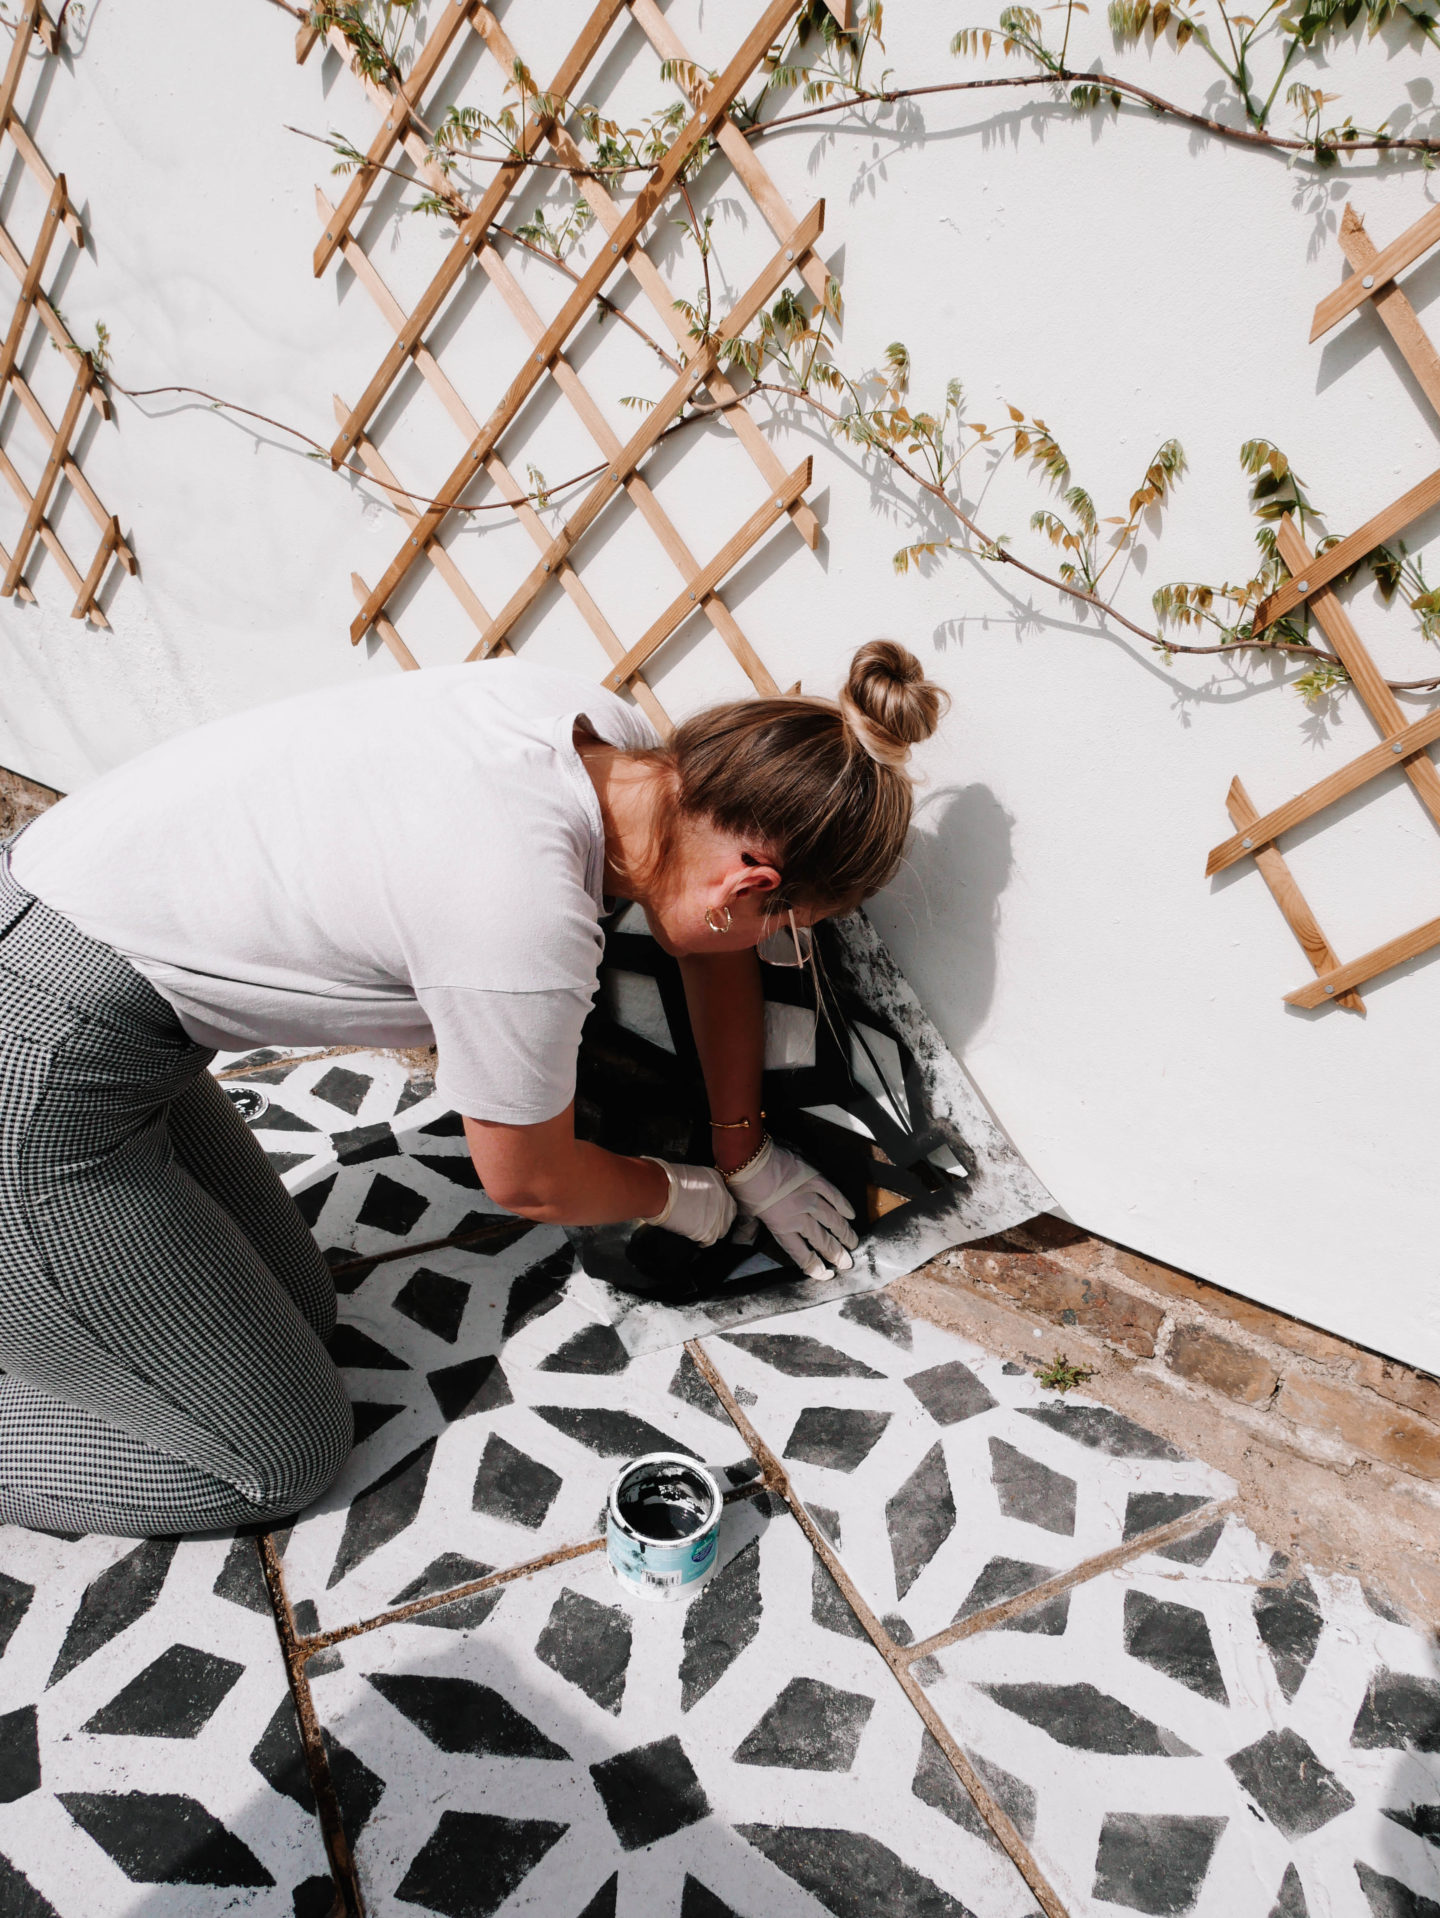
Start in a corner and work your way out. We started in the top right hand corner of the patio and did the stencilling line by line.
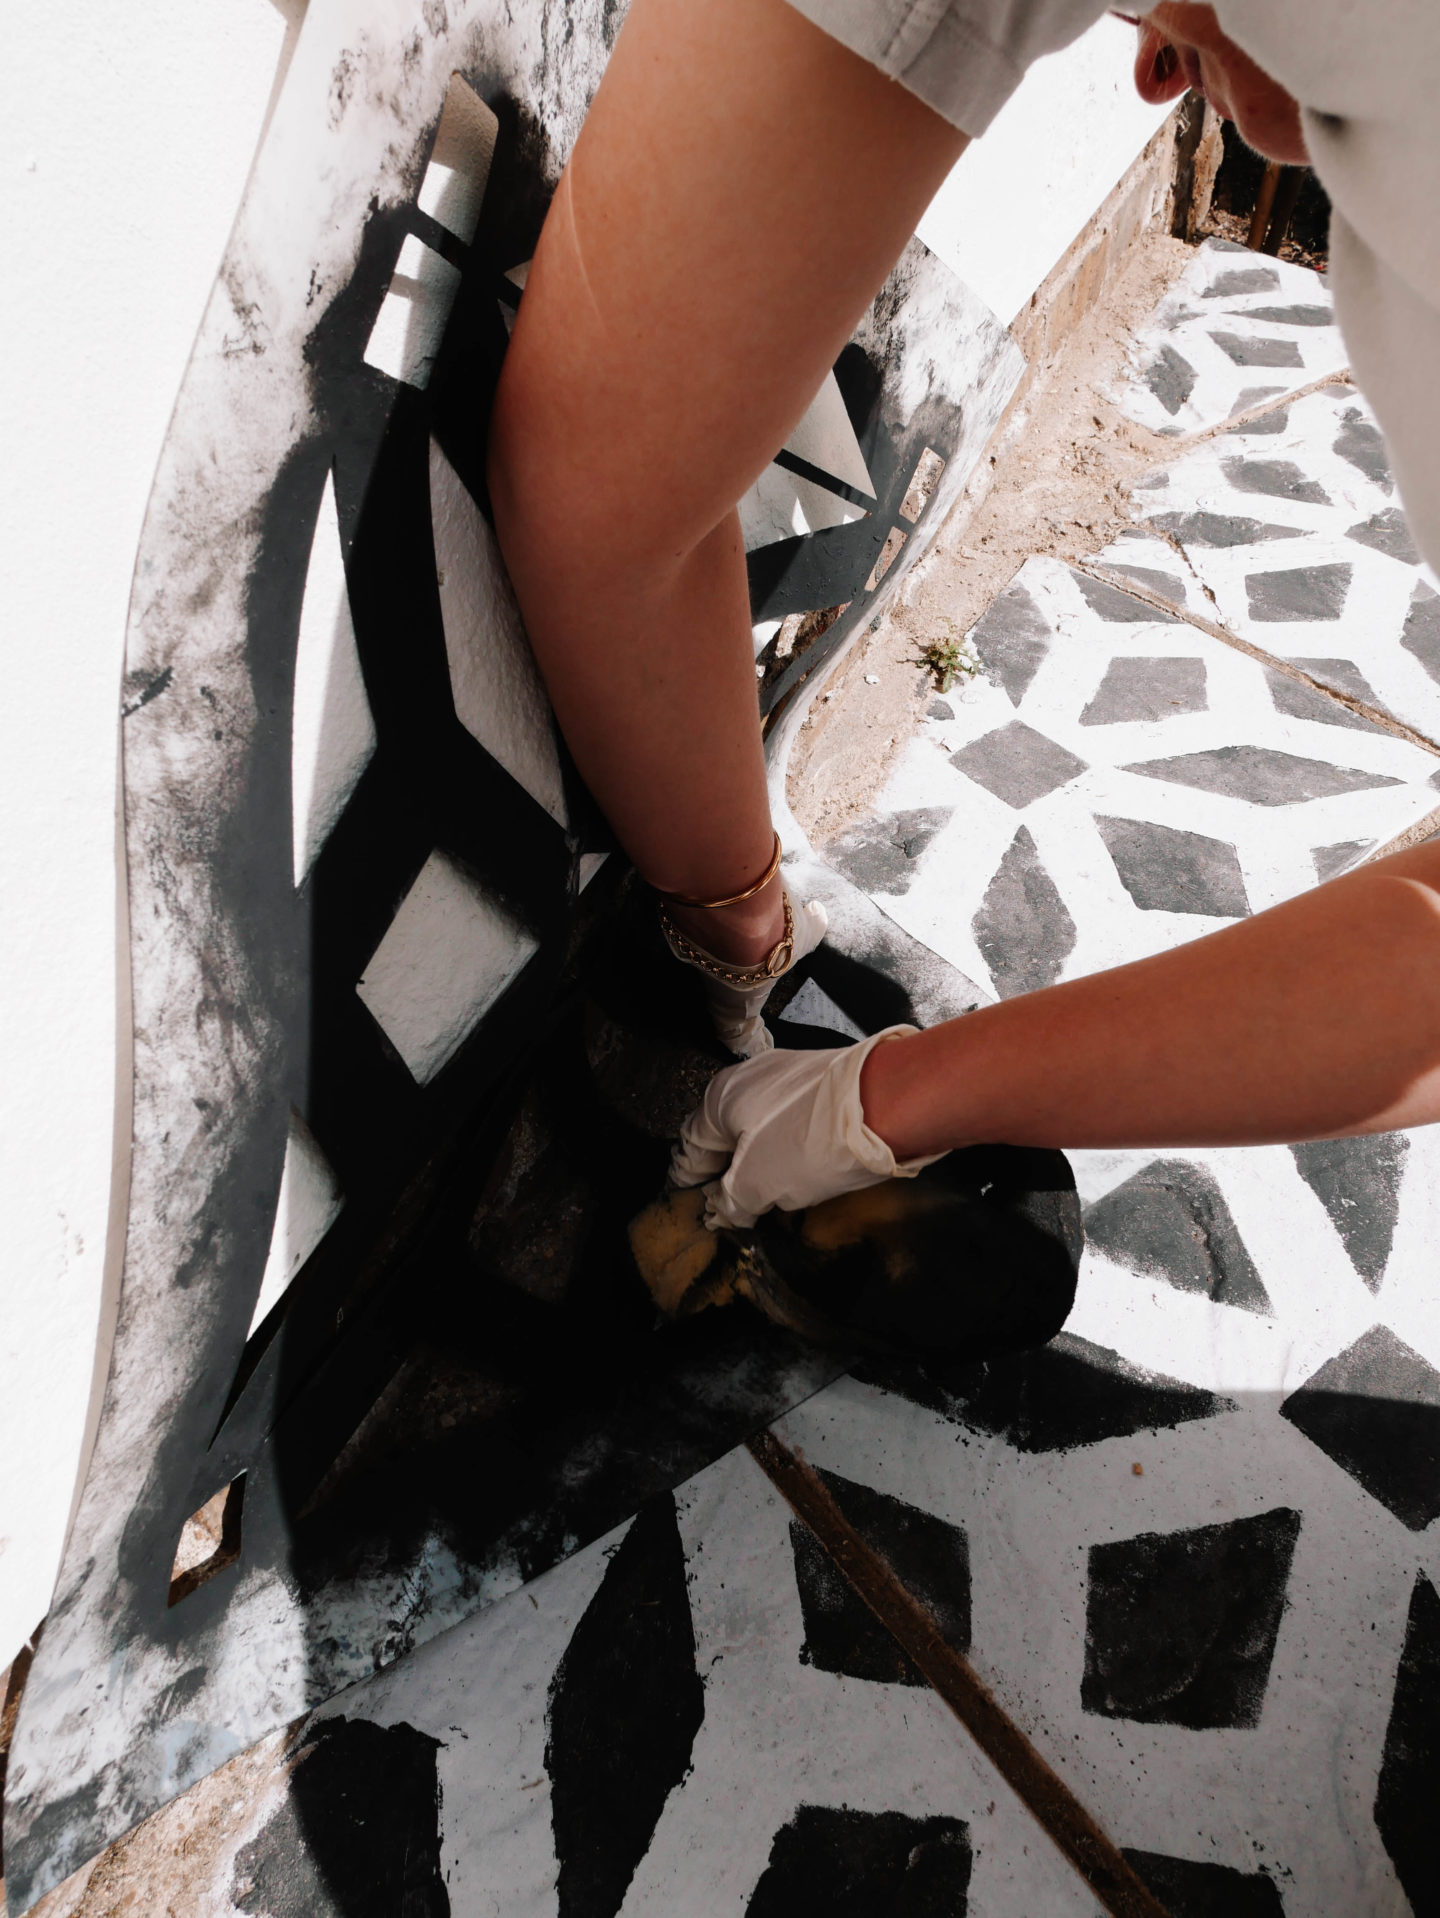
You can stick down the stencil with frog tape on each paving slab, we didn’t do this and just held it down as we sponged. If you stick it down there’s no danger of the wind blowing the stencil about whilst painting, however it will double the amount of time it takes to stencil. It sounds dramatic to describe the task as back breaking but it really does take its toll especially if you want to complete it in one day. All I can say is if we weren’t in isolation I’d have booked in for a full body massage at a local spa after this days work.
The stencil did tend to get clogged up with excess paint which would seep around the edges of the stencil design and cause a bleed on a few tiles. I would recommend wiping down the stencil with a clean sponge or paper towels every so often. The paint dries very quickly, however be careful when laying the stencil down on the new tile to make sure it doesn’t brush over any wet paint and smudge the design.
QUICK STEP BY STEP:
- Your patio has been cleaned and is dry
- Apply a primer (dries very quickly)
- Roller or sponge the base paint and leave for 24 hours
- Start stencilling in one corner and work your way out
- Go slowly and methodically so you don’t smudge the paint
- Clean the stencil regularly to avoid the paint clogging on the stencil and bleeding on to the slabs
- Once dry apply a top coat sealant (optional)
- Take a step back and admire your fantastic DIY work and ENJOY your fabulous new patio!
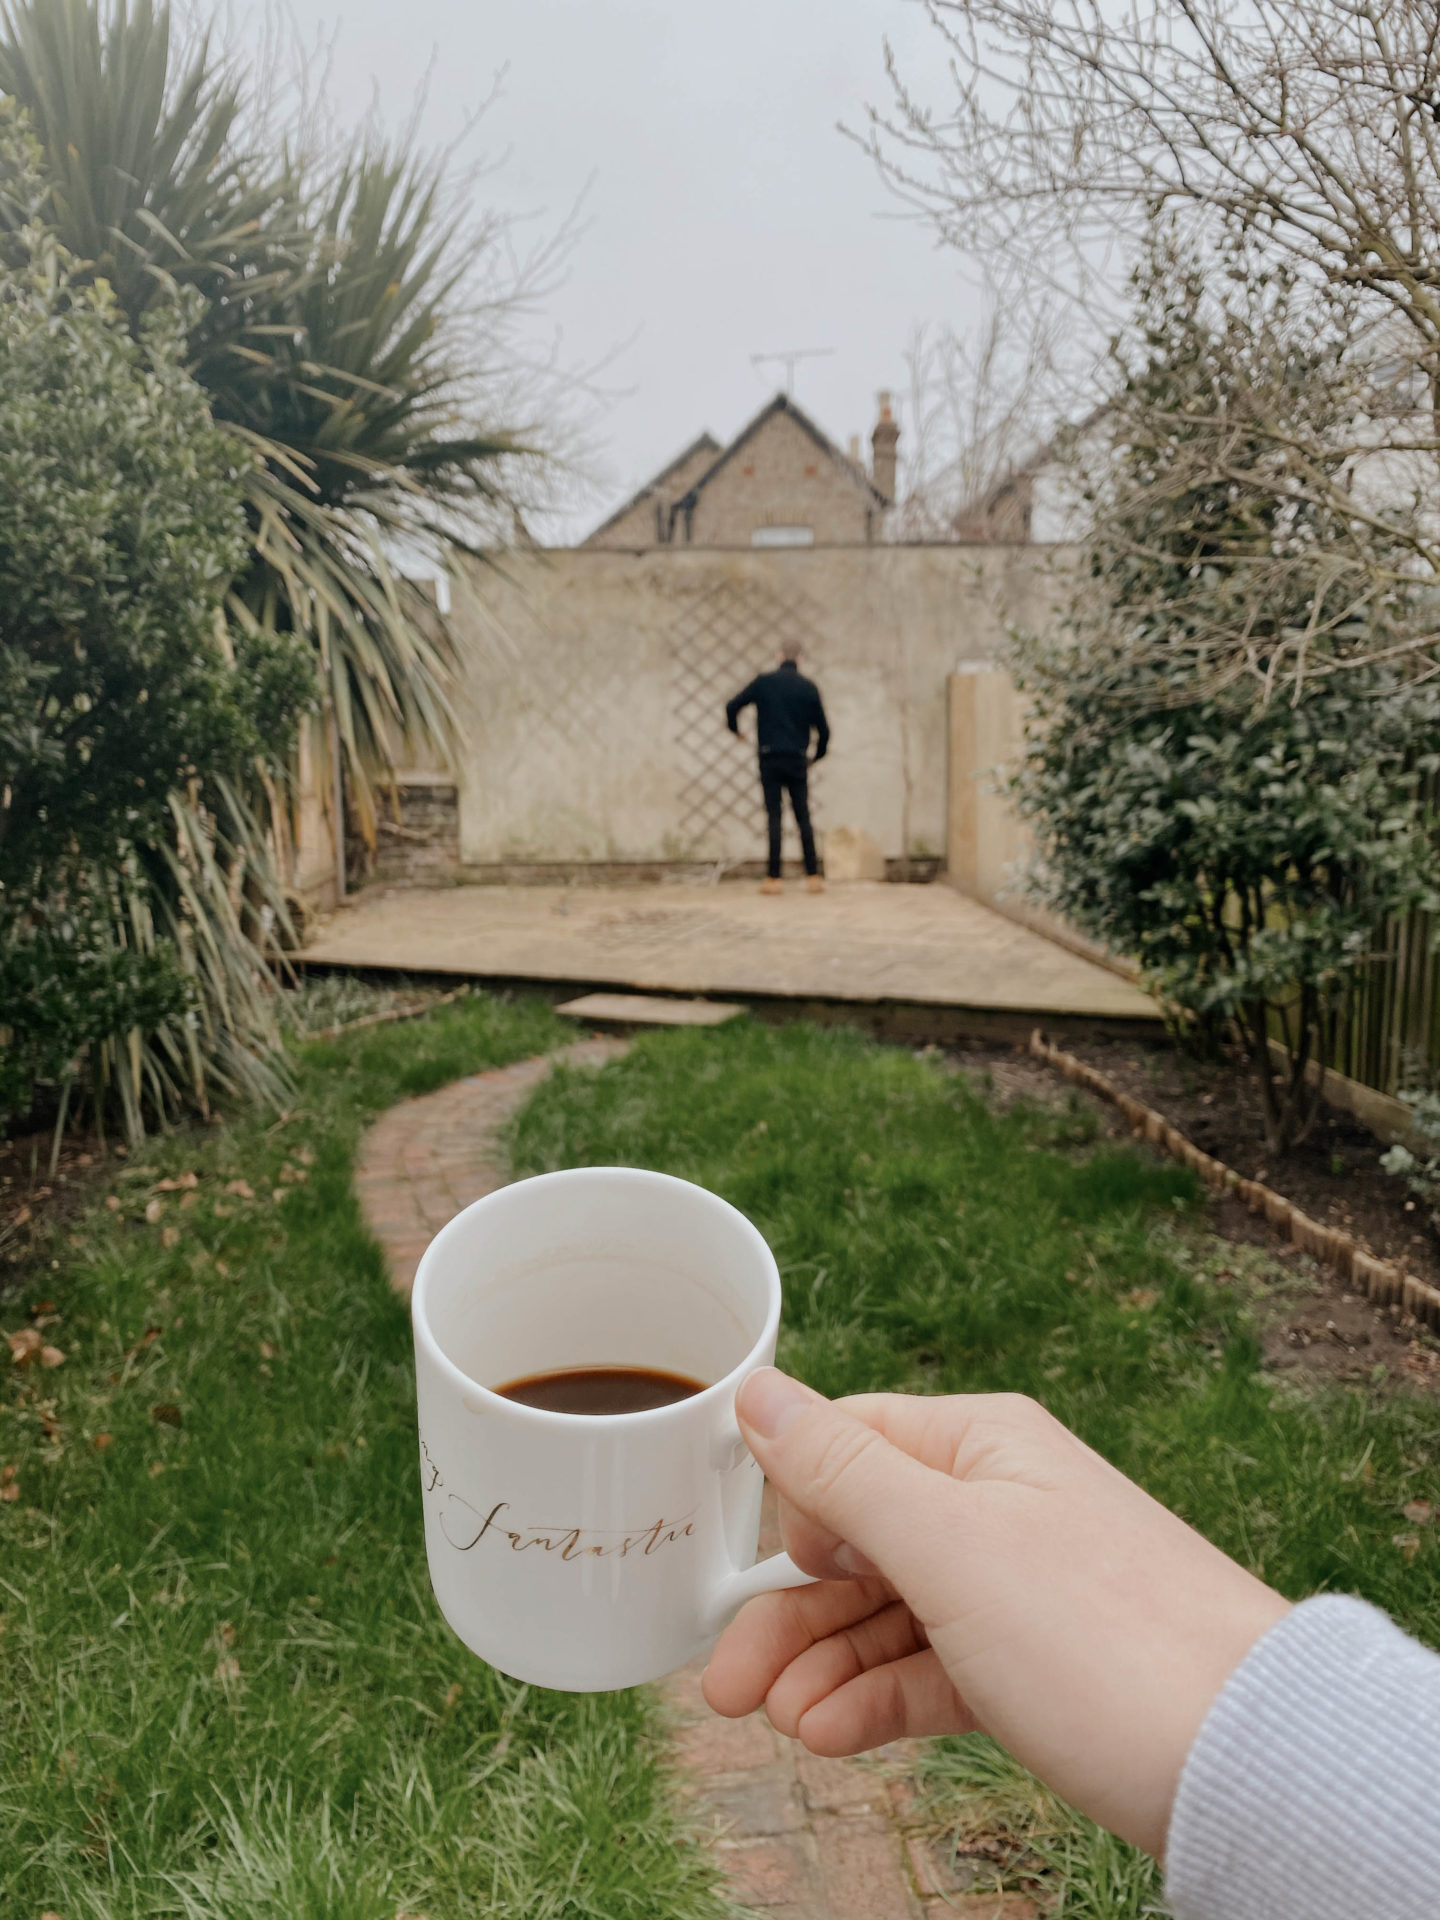

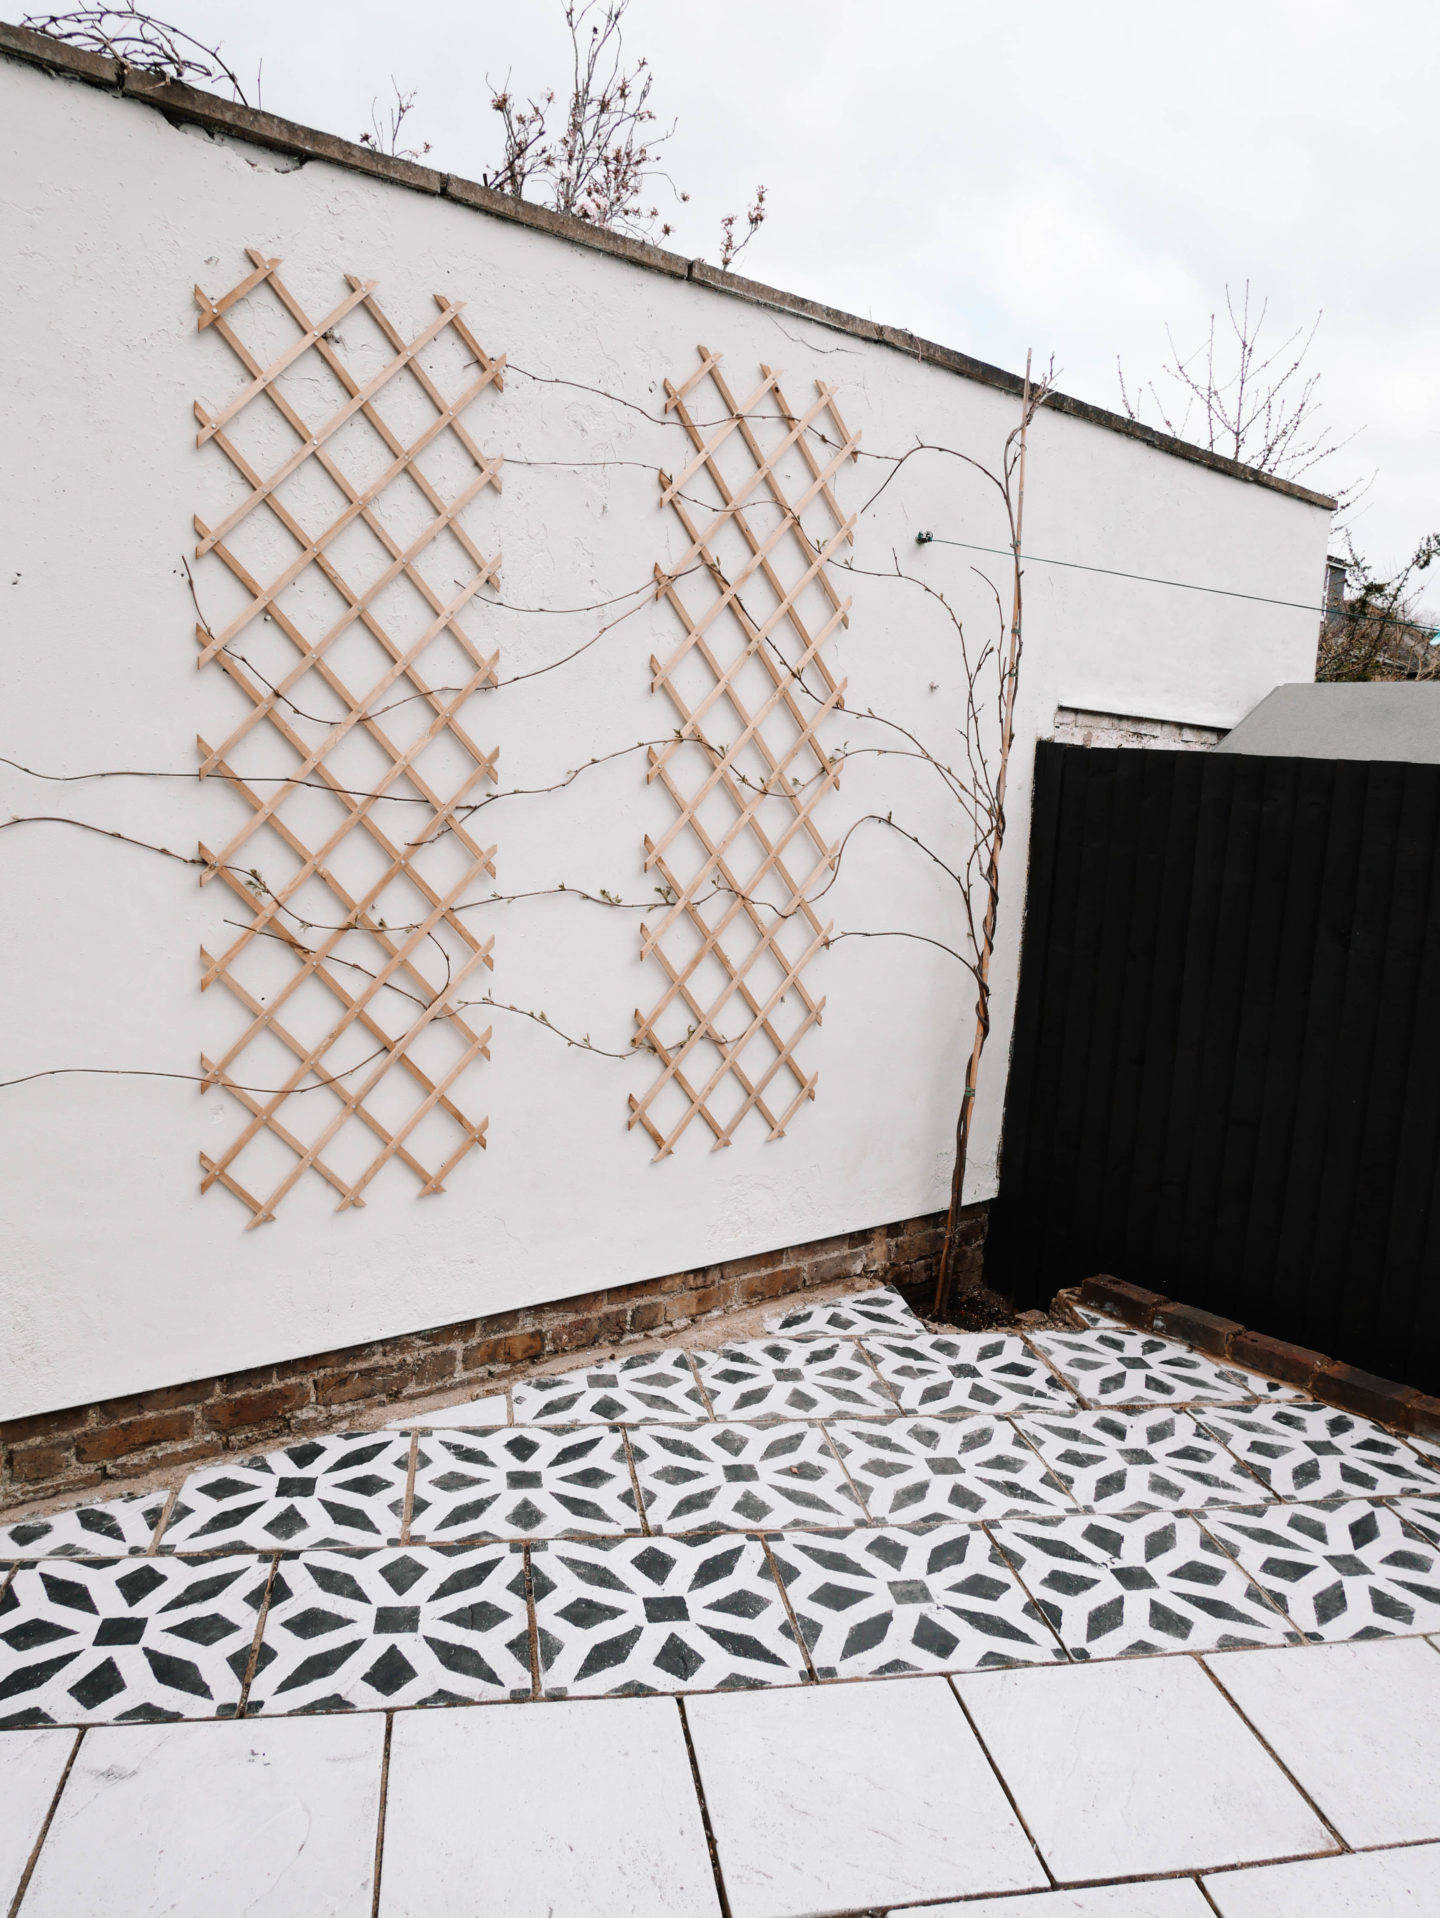
(We also painted our fence and back wall during this glow up with Valspar paints)
The result is fantastic. It’s an optical illusion with the design that you can no longer see where some of our patio slabs are uneven. We are so happy with the result and cannot believe that a £100 DIY job has completely transformed our patio area. This job would look great on any patio regardless of size or space. There are so many stencil templates to choose from. So whatever your style, whether it be ornate or abstract there will be something to suit all tastes.
Things I would do differently next time:
There really isn’t that much I’d change about our process of doing it however two things that could’ve made it easier are:
- Check official weather reports beforehand and not naively go with Apple weather app which never forecasted the snow that arrived halfway through our paint job.
- Clean the stencil more often so no bleeds.
- Ask Freddie to help me before the final 4 slabs needed painting. It is SO much more motivating having two people do it. Dizzy Duck Designs do a buy one get one free on the stencils anyway so it really is a no brainer.
YouTube Tutorial
Enjoyed this post? Pin me for later!

Love it!! I just bought a stencil and about to try and wrap mine up! Would you seal you think?! I used a concrete patio stain that’s like white paint.. I’d love it to stay white forever which I know it won’t .. I’d settle for just a year or 2!
Also what is planted with the long vines so neat! Wisteria?
aww thanks! we haven’t sealed it yet and tbh don’t think we will. the Sandtex paint has a 15 year guarantee – I realise that’s for walls and not for the footfall of a floor but its three months old now and has weathered February March and April and is still perfect. I think maybe just a power hose over it once a year will keep it looking good. And yes it’s a wisteria. She’s a year old and she is now blooming beautiful!!!
You need to prep area nice in clean prime the whole area your wanting to do you can use grey price if you want to stencil white takes 4 hours to dry need 2 coats primer wait till dries second coat then do stencilling once dry s, weep with soft brush then get roller paint tray use sealer let it dry must weight 4 hours between coats next coat repeat samame as first step sealer 4 hours last seal after dry can walk on it
Could you please tell me which brand of paint and the color as well?
Hi, looking to do this but wonder if you really need to prime or could get away without doing it ?
Did you just do one coat of the grey base?
Thanks
This looks amazing, well done!! I’m about to start ours in the next few days, Can I ask you what primer you used and if you feel that it’s important thing to do before putting the paint down? I’ve read a couple of “how to’s” but this is the first time I’ve heard a primer mentioned.
It’s a great source of knowledge; I think it will be helpful for lot of people who are looking for learning more about the patios tencil. I love this blog and really happy to come across this exceptionally well written content. Thank you very much for sharing this article.
Great post. I found you on youtube and wanted me info, so jumped on your blog! What size stencil did you go for?
Thank you for sharing your project. Very honest and it turned out fantastic I love it and going to try it on my garden path tgat my late grandfather laid and designed literally decades ago. ?❤️ Xxx
Can this be done with just the white stencilling after jet washing the patio? I’m just being lazy thinking of skipping a base colour!
Can this be done with just the white stencilling after jet washing the patio? I’m just being lazy thinking of skipping a base colour! Yours looks amazing.
Author
Absolutely! it definitely doesn’t need both colours if you’re happy having the natural colour of the stone to be one of your two colours 🙂
We anticipate the moss will grow back over winter and hopefully the weather paint will be resistant to deep cleaning next spring. Thank you!
Looks great…how has the durability been since you completed it? I may give this a go ready for the spring and save some money! If it lasts a couple of years I would be pleased.
What primer did you use before painting the base coat?