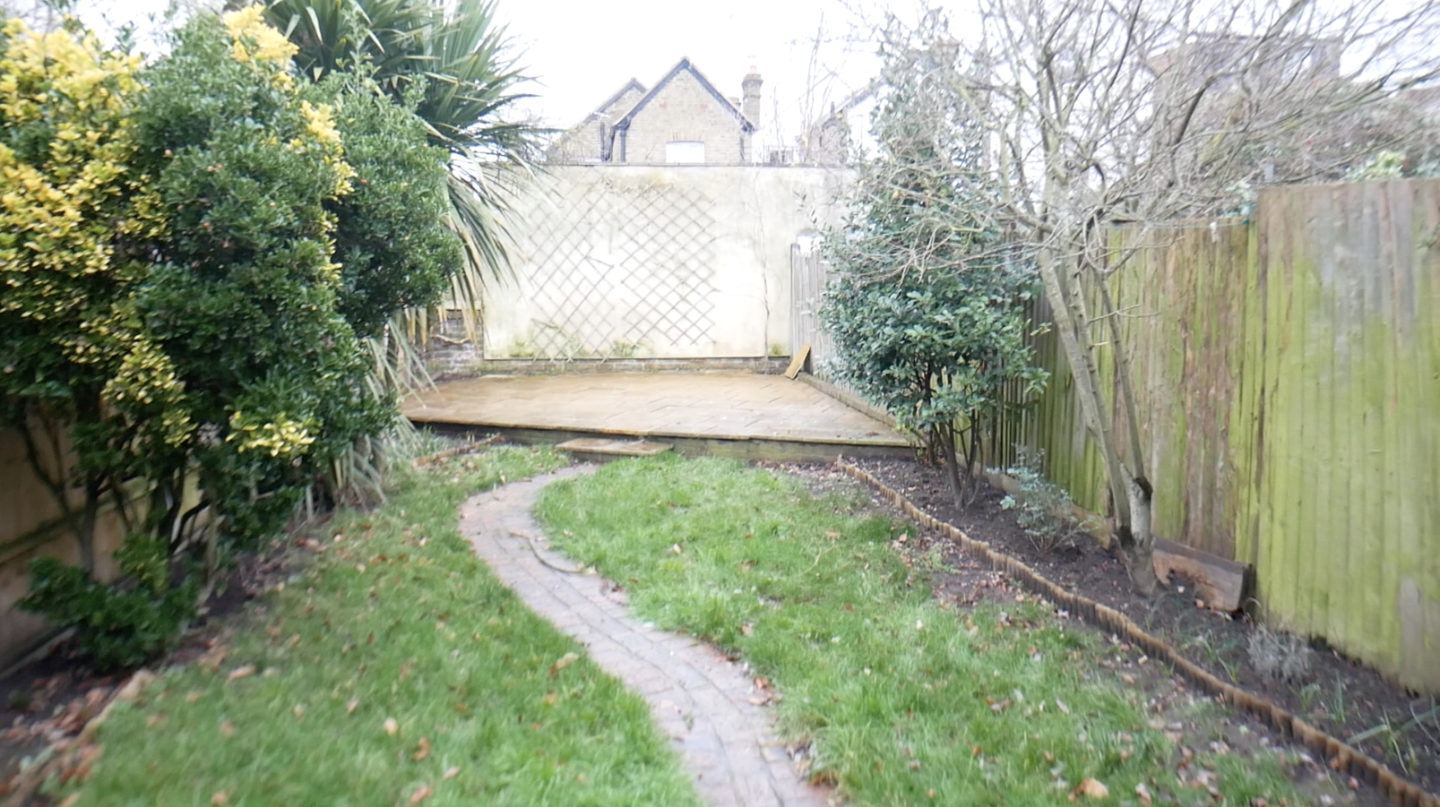
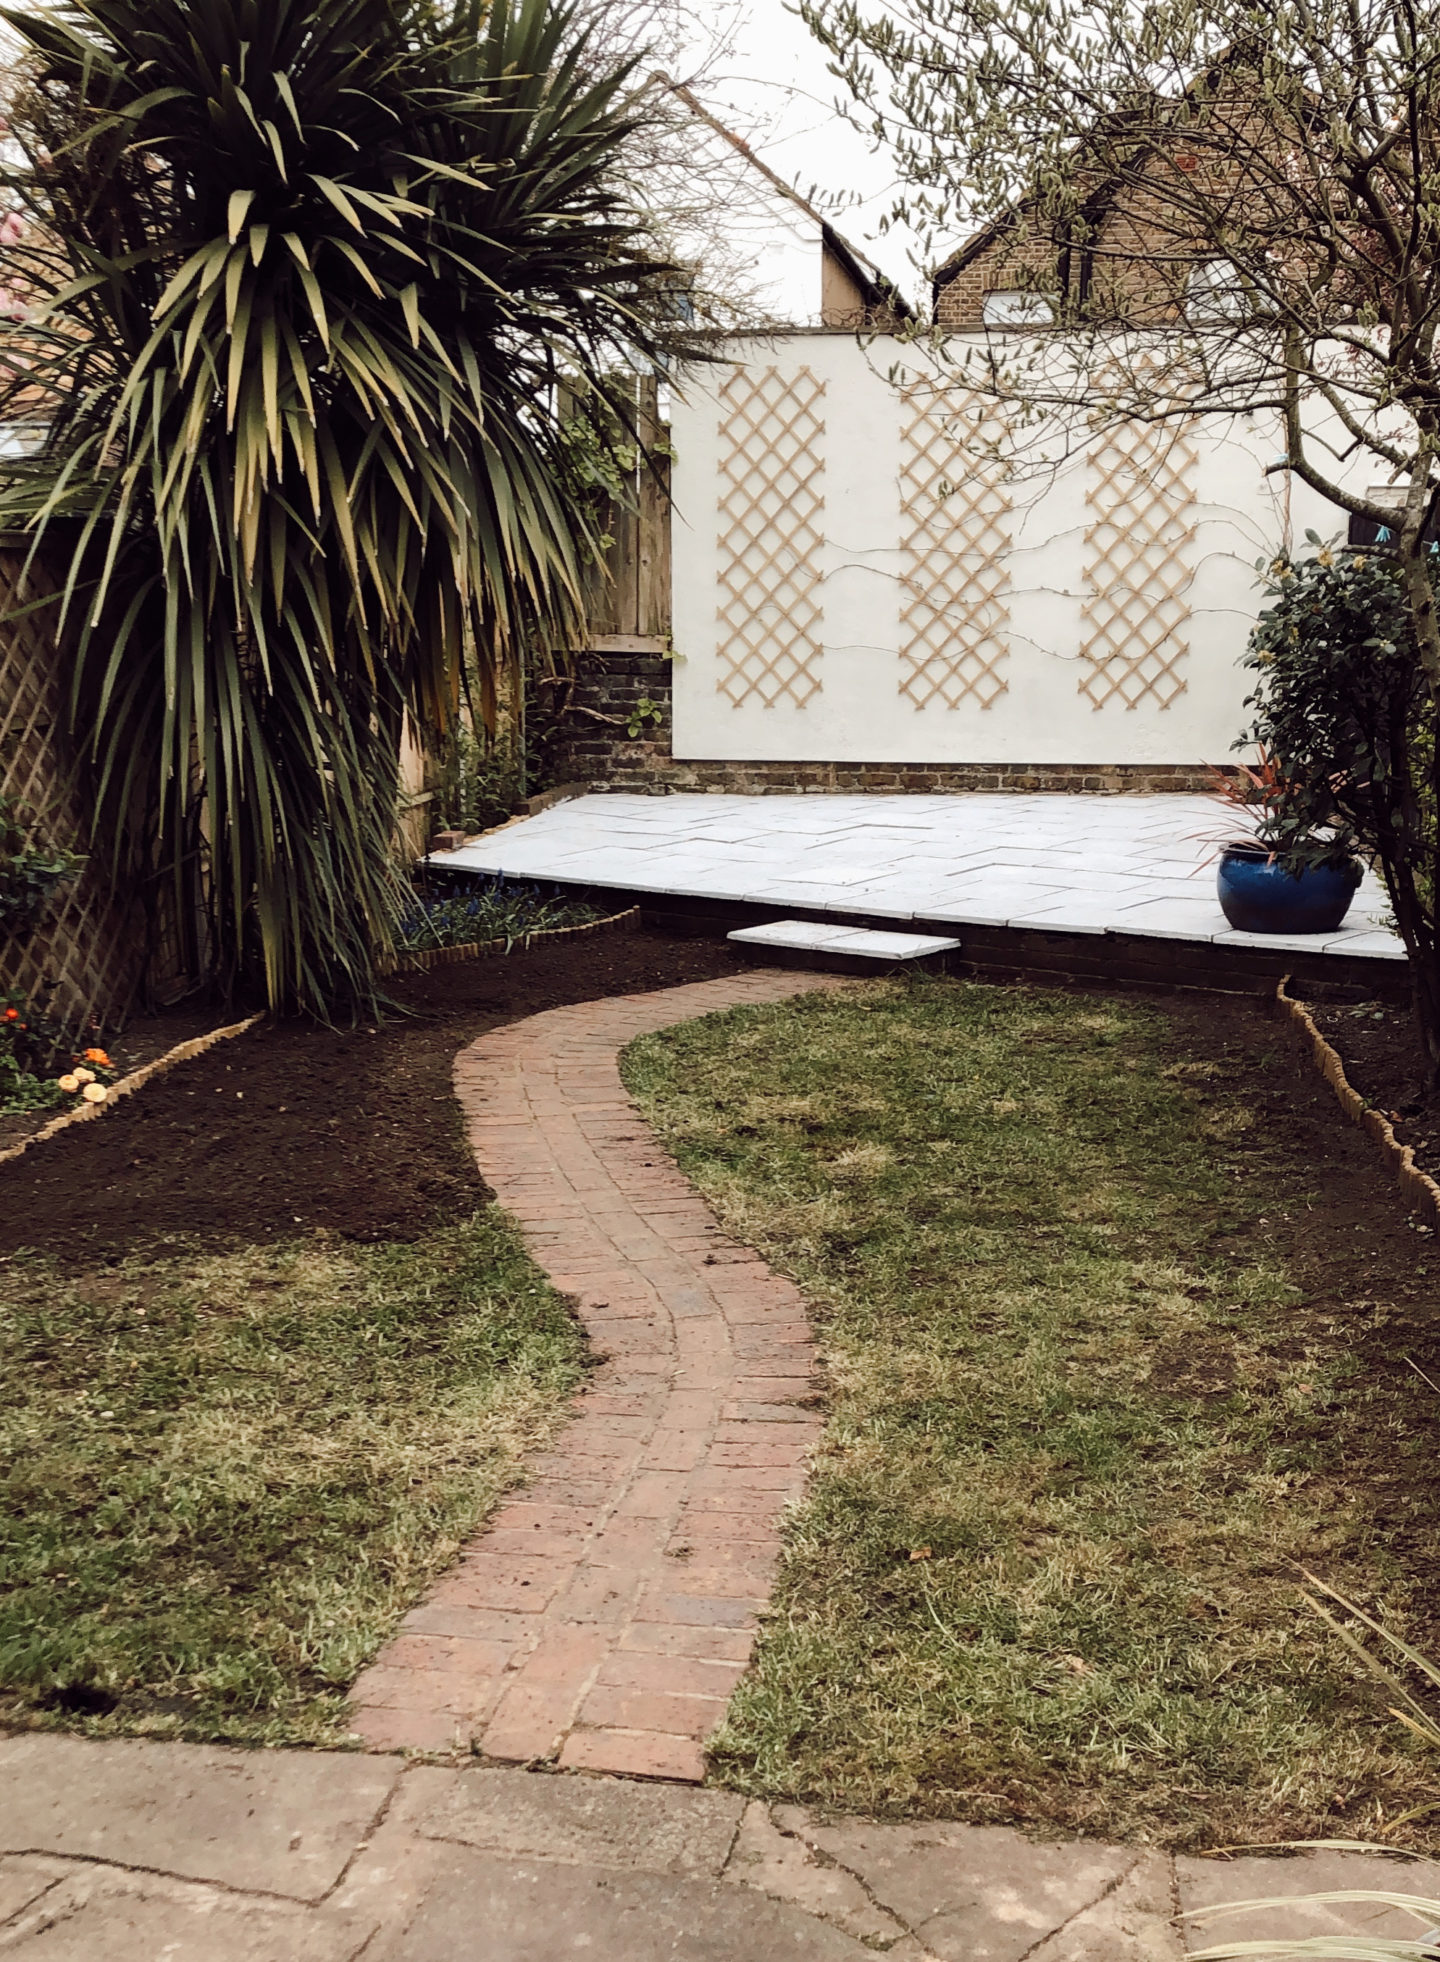
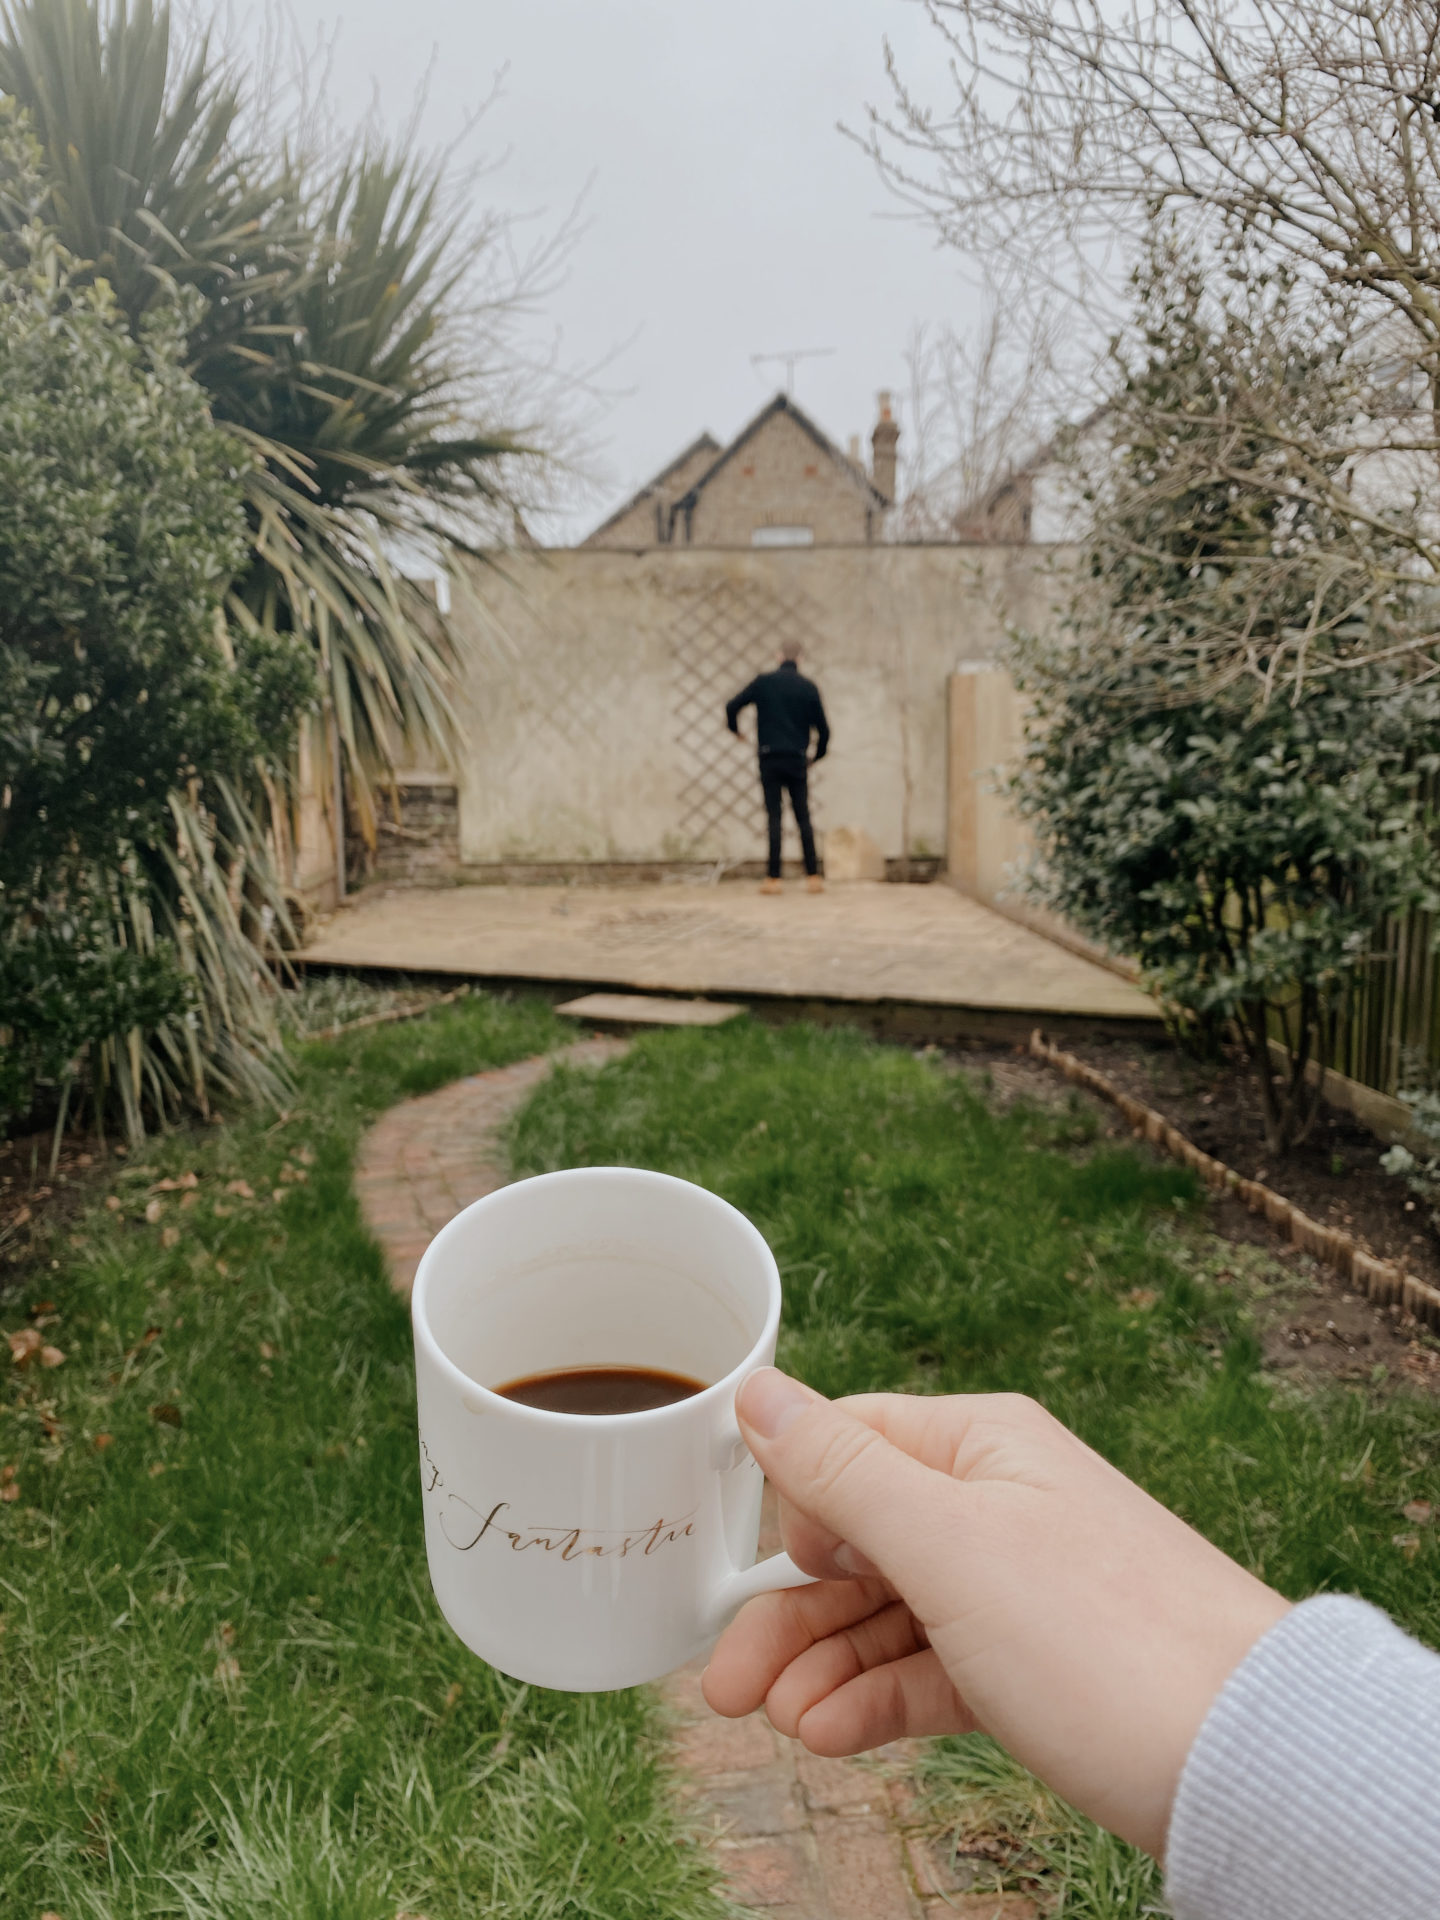
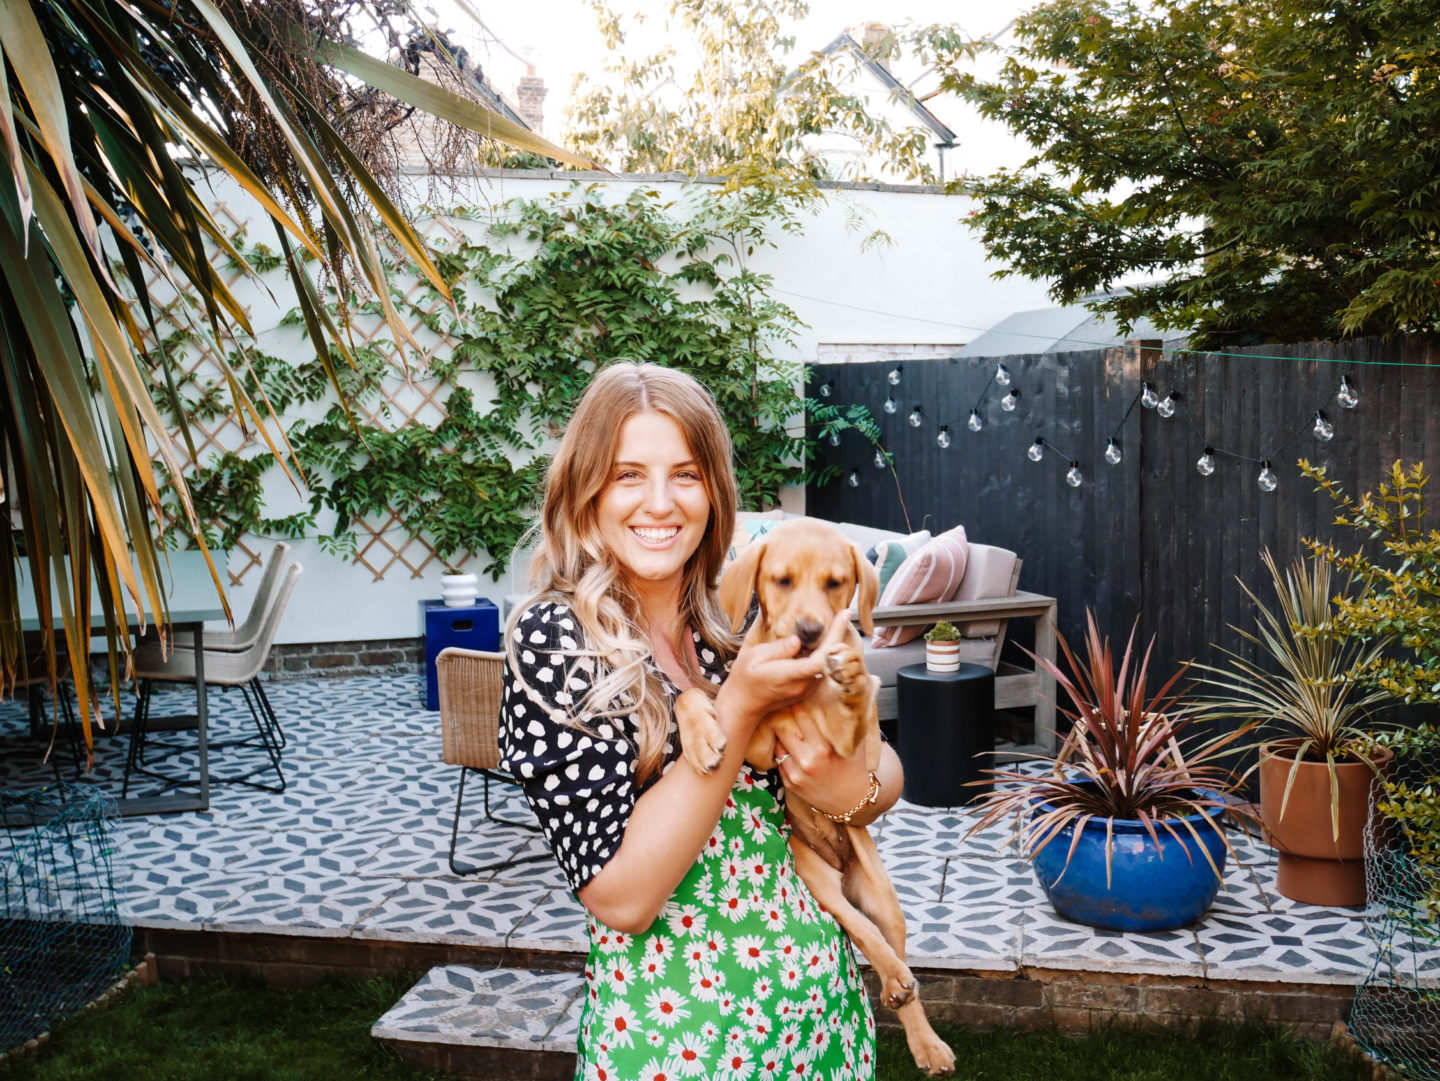
We started our garden project nine months ago and as summer 2020 comes into bloom it finally feels like a finished garden. It has been a real journey of trial and error, dedicating countless hours, numerous trips to the garden centre and loosing entire weekends to the cause, but….. just as we ease into what has so far turned out to be a glorious spring and summer (in garden terms!) it all seems worth it as our little slice of the outside feels complete.
This post has been written in collaboration with West Elm and furniture items have been gifted as part of the campaign.
Below I’m sharing the process of everything we did to turn our garden from drab to fab!
Plants/Lawn:
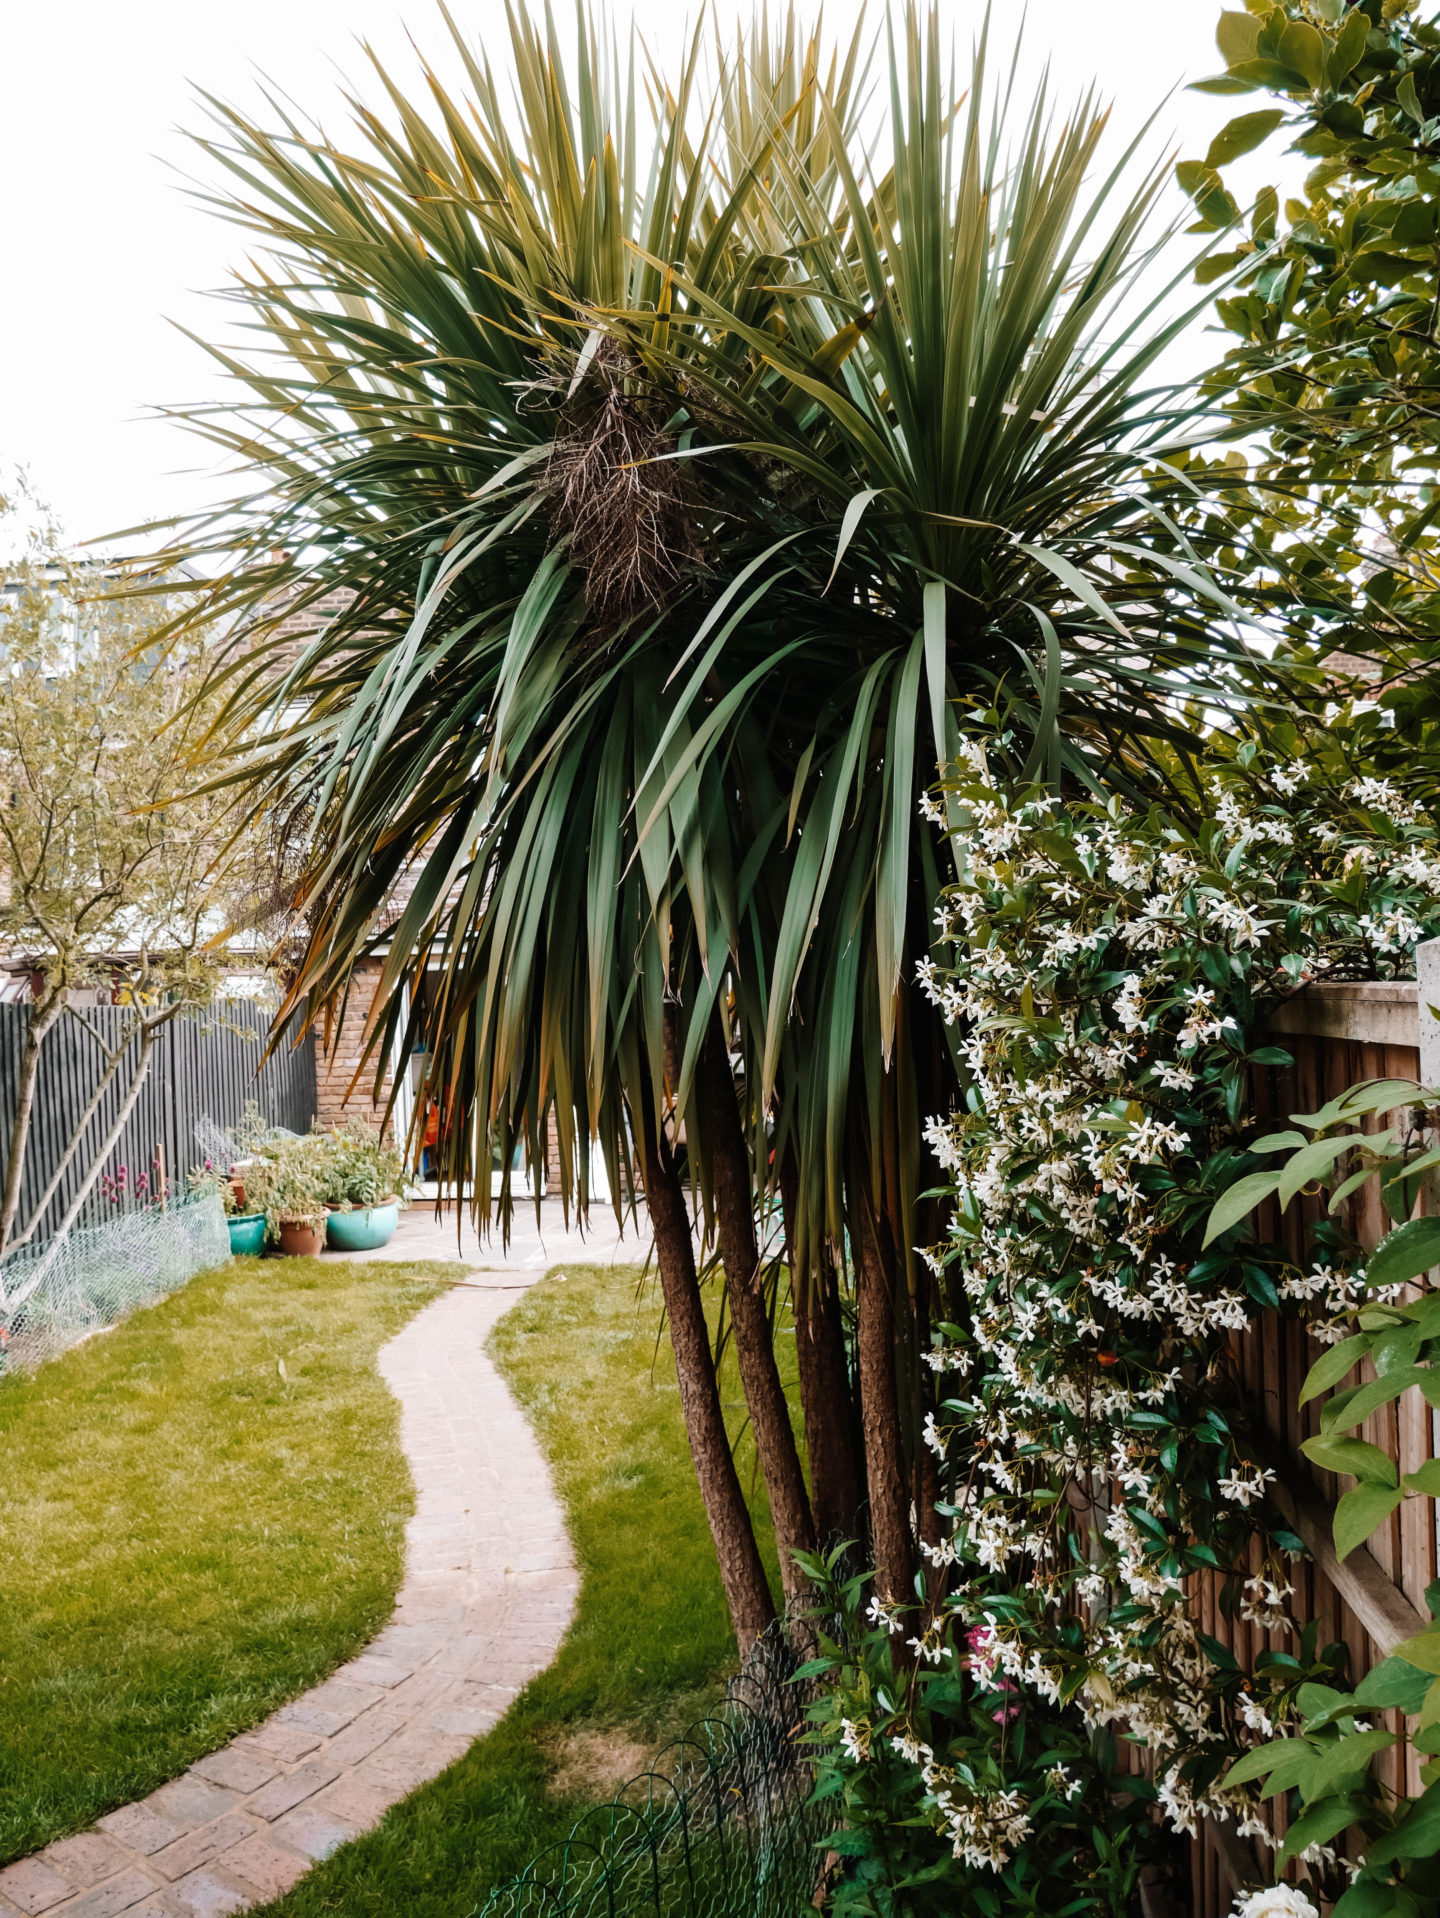
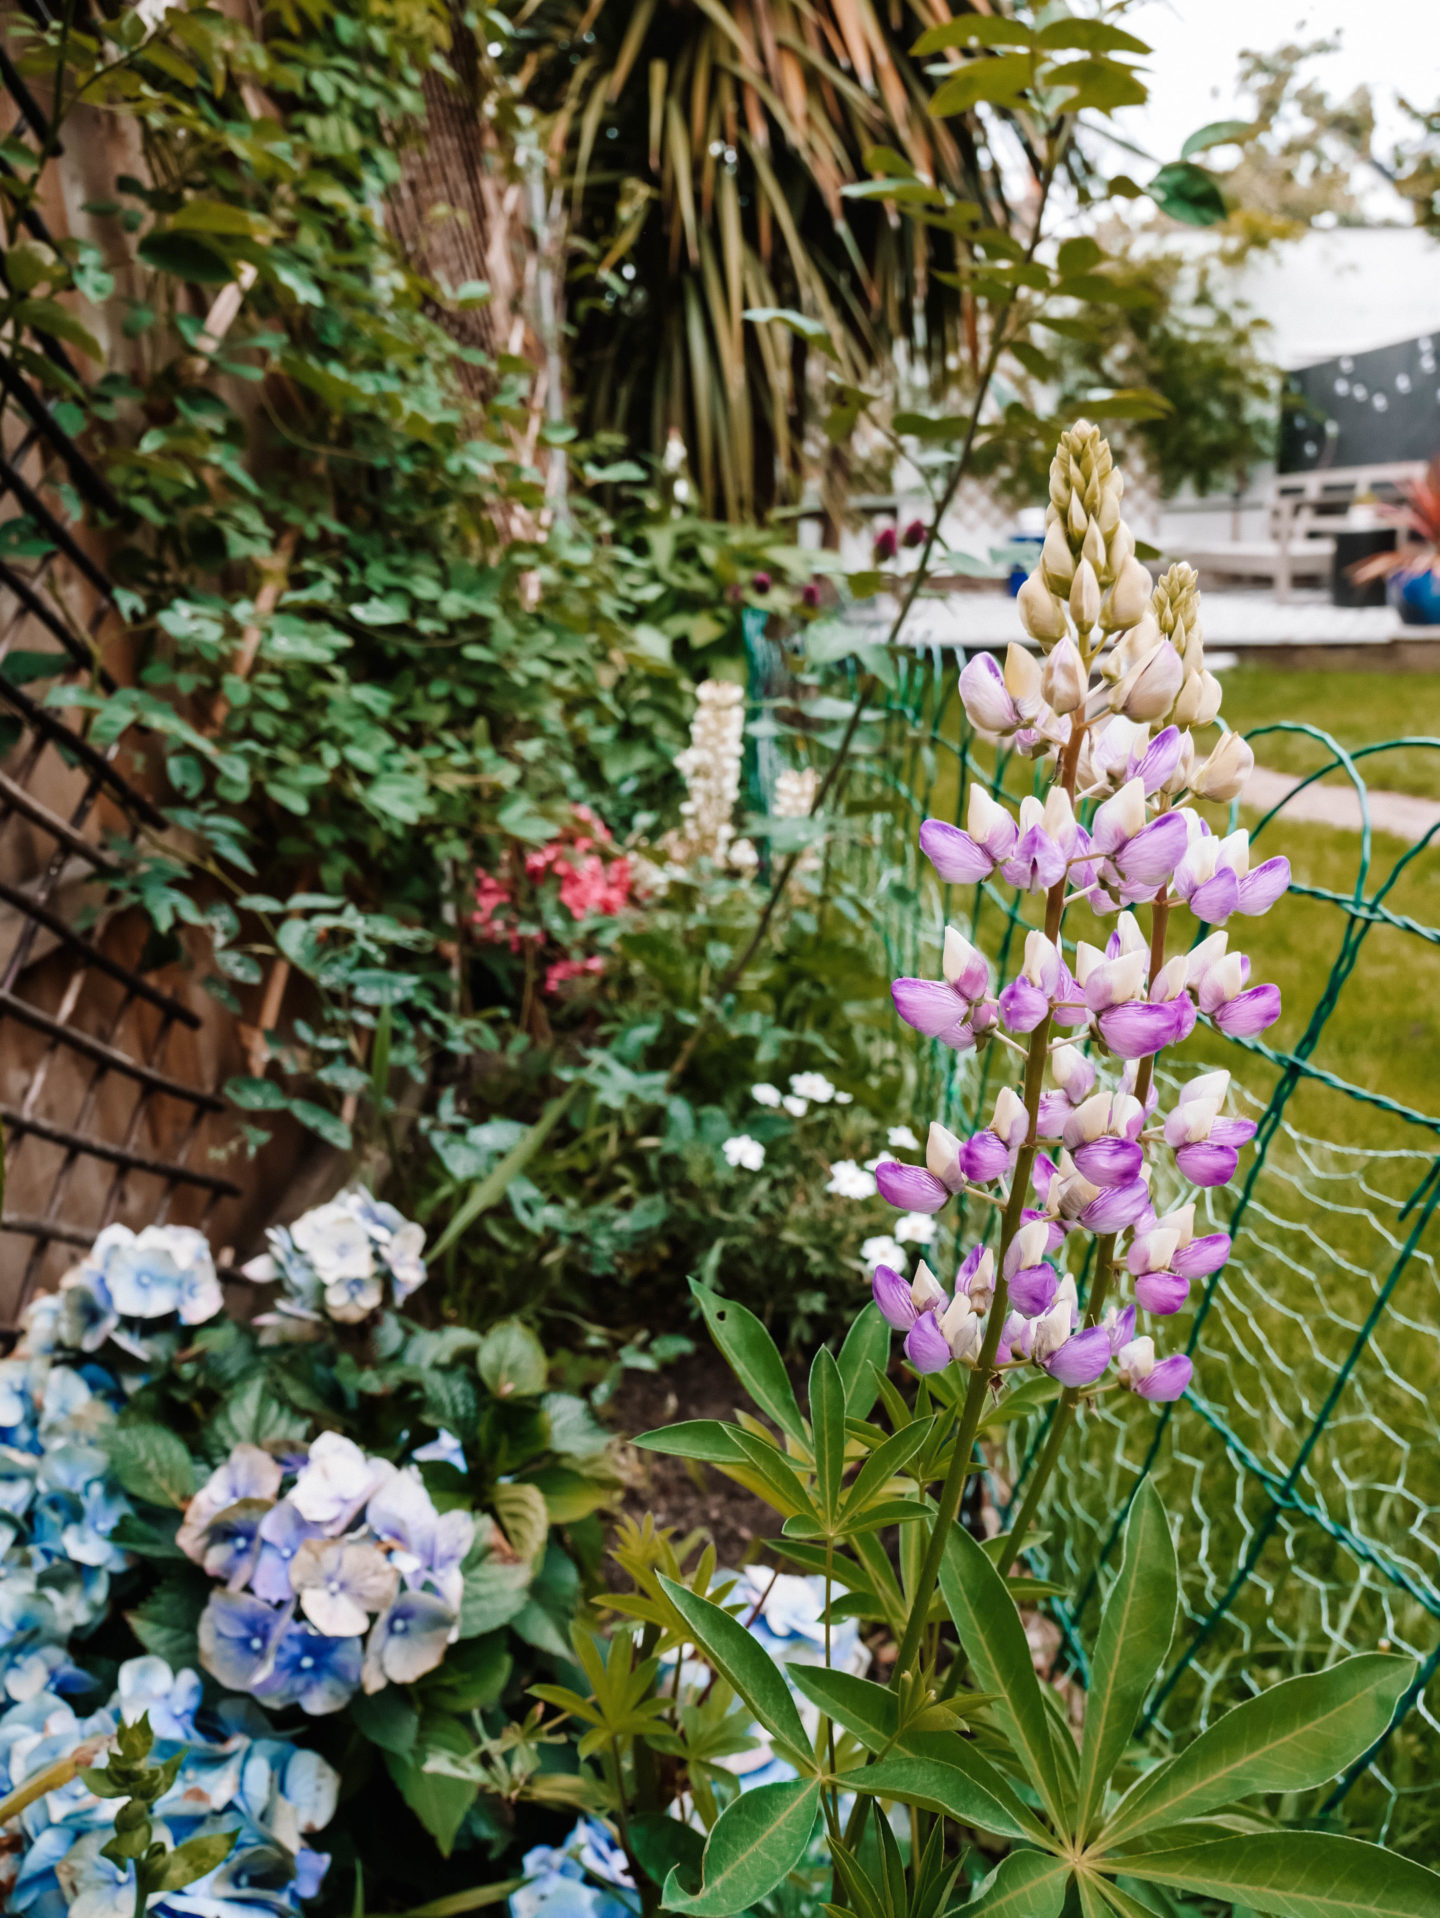
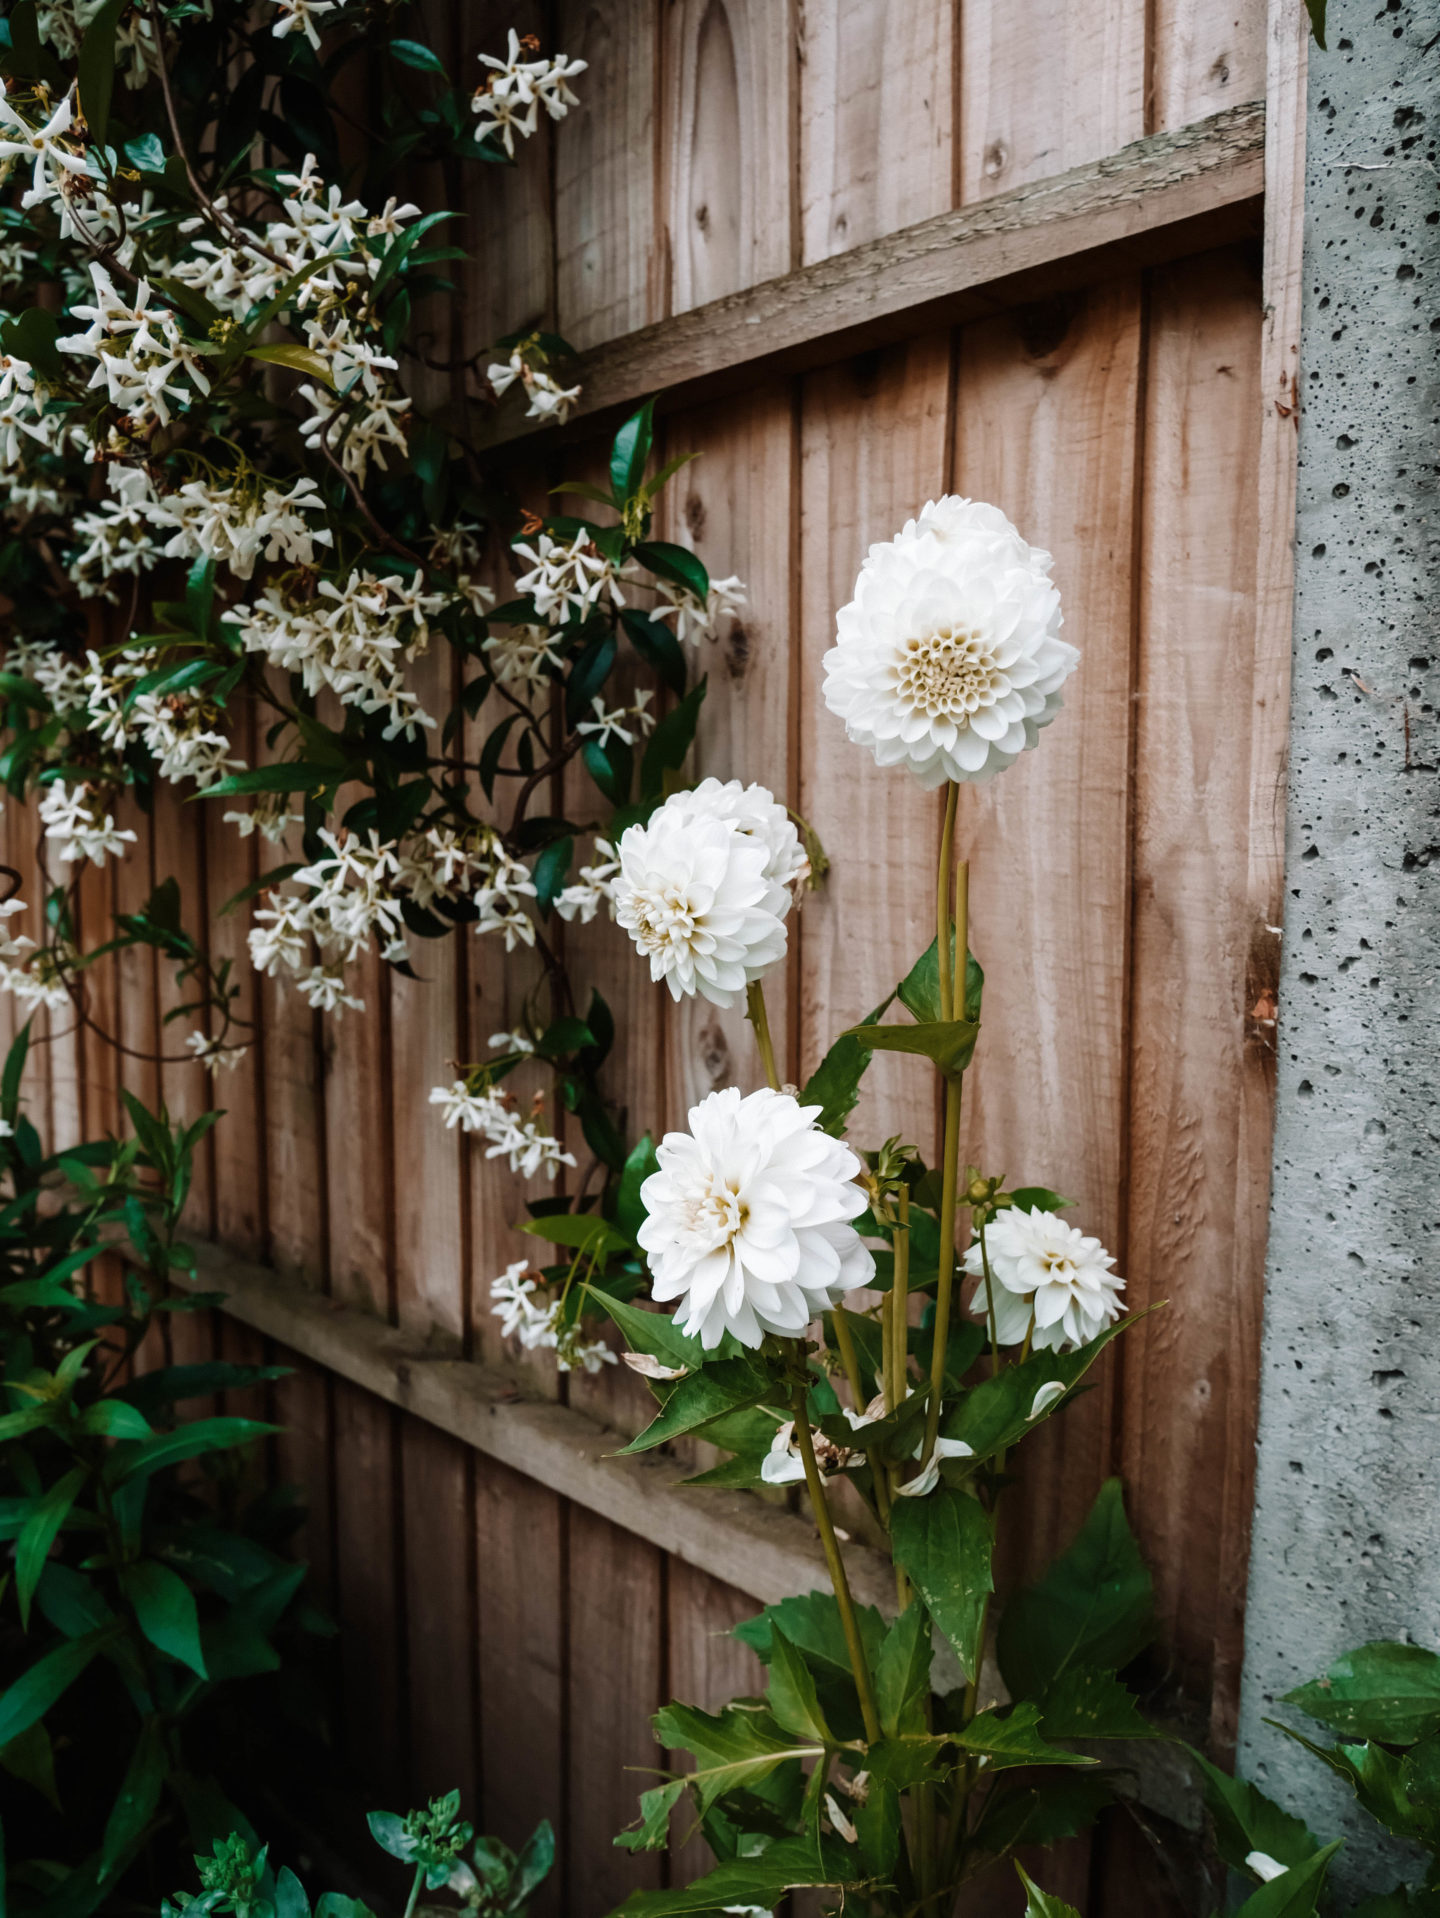
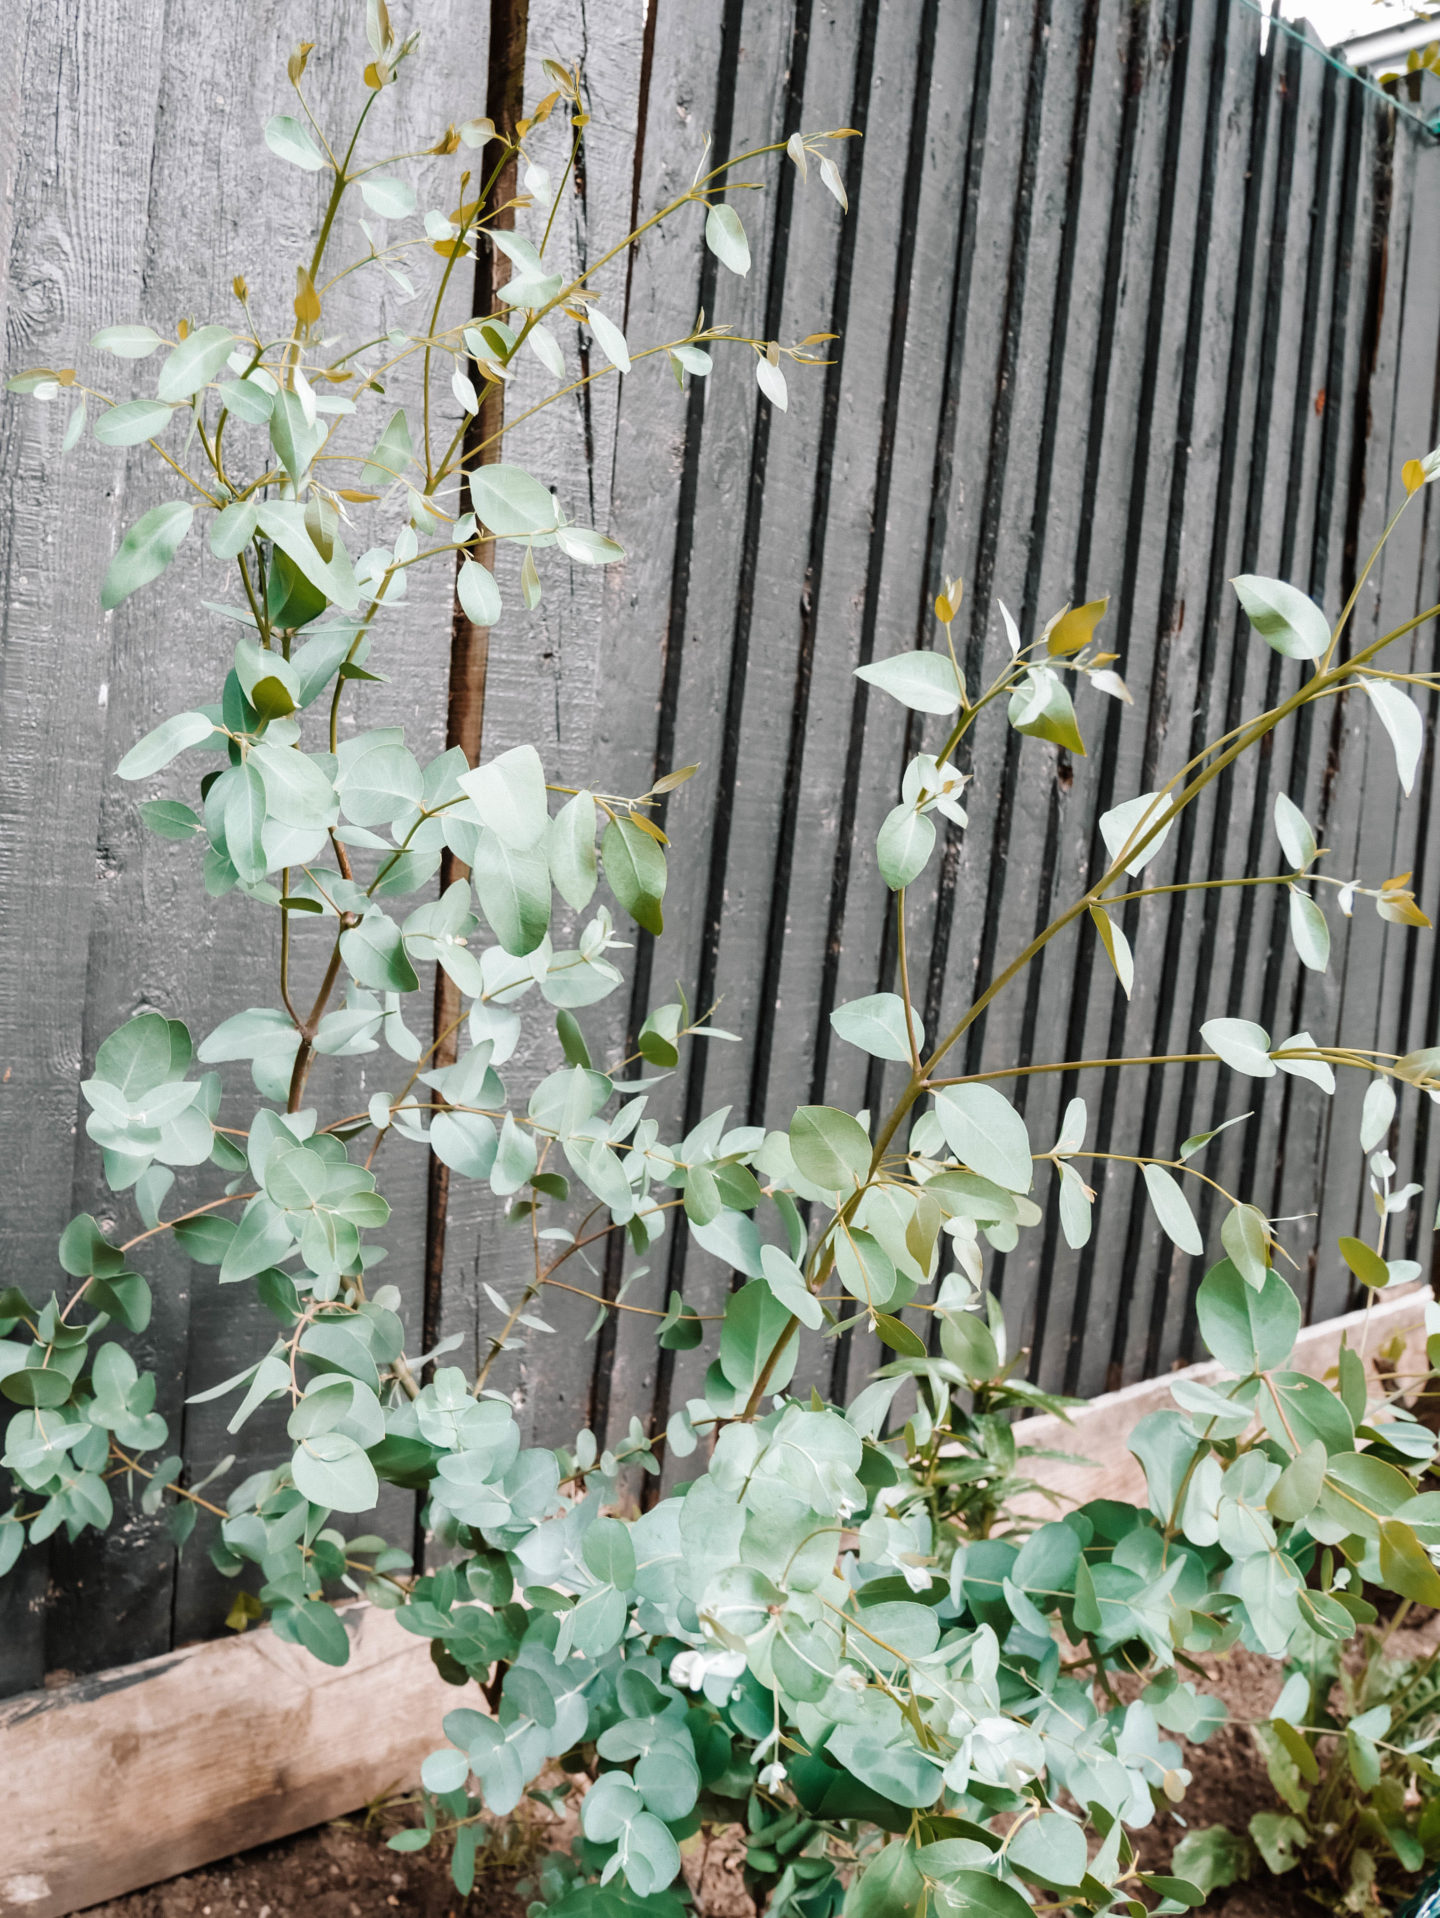
Phase 1 of the garden project was to weed out and cut back a number of overgrown / dead plants. We began by planting a few bulbs before winter and revisited the planting project in spring. Phase 2 we added more bulbs, lavender bushes and camellias. And when I say a few I mean maxing out my credit card each time I went to the garden centre because I believe no one can have too many hydrangea plants. Aside from planting my lavender shrubs slightly too close to each other, I’d say the borders are looking perfectly full, with enough room to keep blooming. We wanted a real mix of plants and flowers that would give a lovely enchanted feel. Hydrangeas, foxgloves, lupins, hollyhock, dahlias, clematis and camellias.

Our plants were purchased from B&Q, Gardening Express and Morden Garden Centre.

Freddie also went to work on the grass. Our grass was patchy and in places it seemed that no matter what seeds we put down grass would never grow. Tired of the lacklustre lawn Freddie took it upon himself to dig it up, remove the roots and start again. Much to my disapproval during the process it actually worked and the luscious grass is something to behold. For the full grass blog post you can check out the tips and tricks for a perfect lawn here.


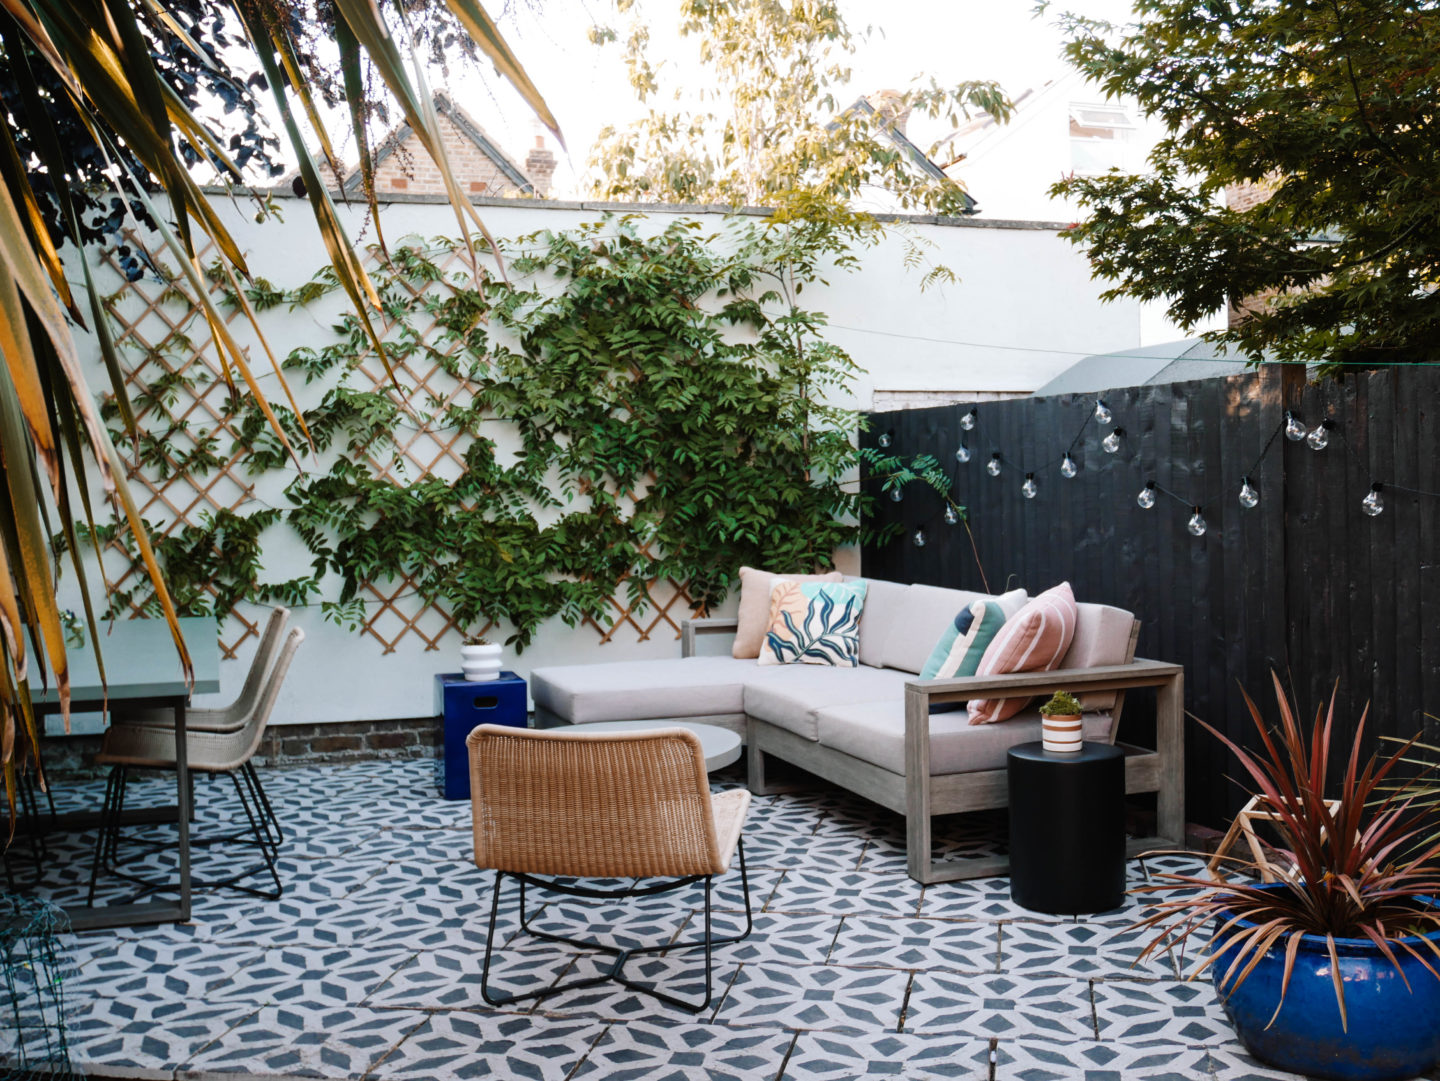
Patio:
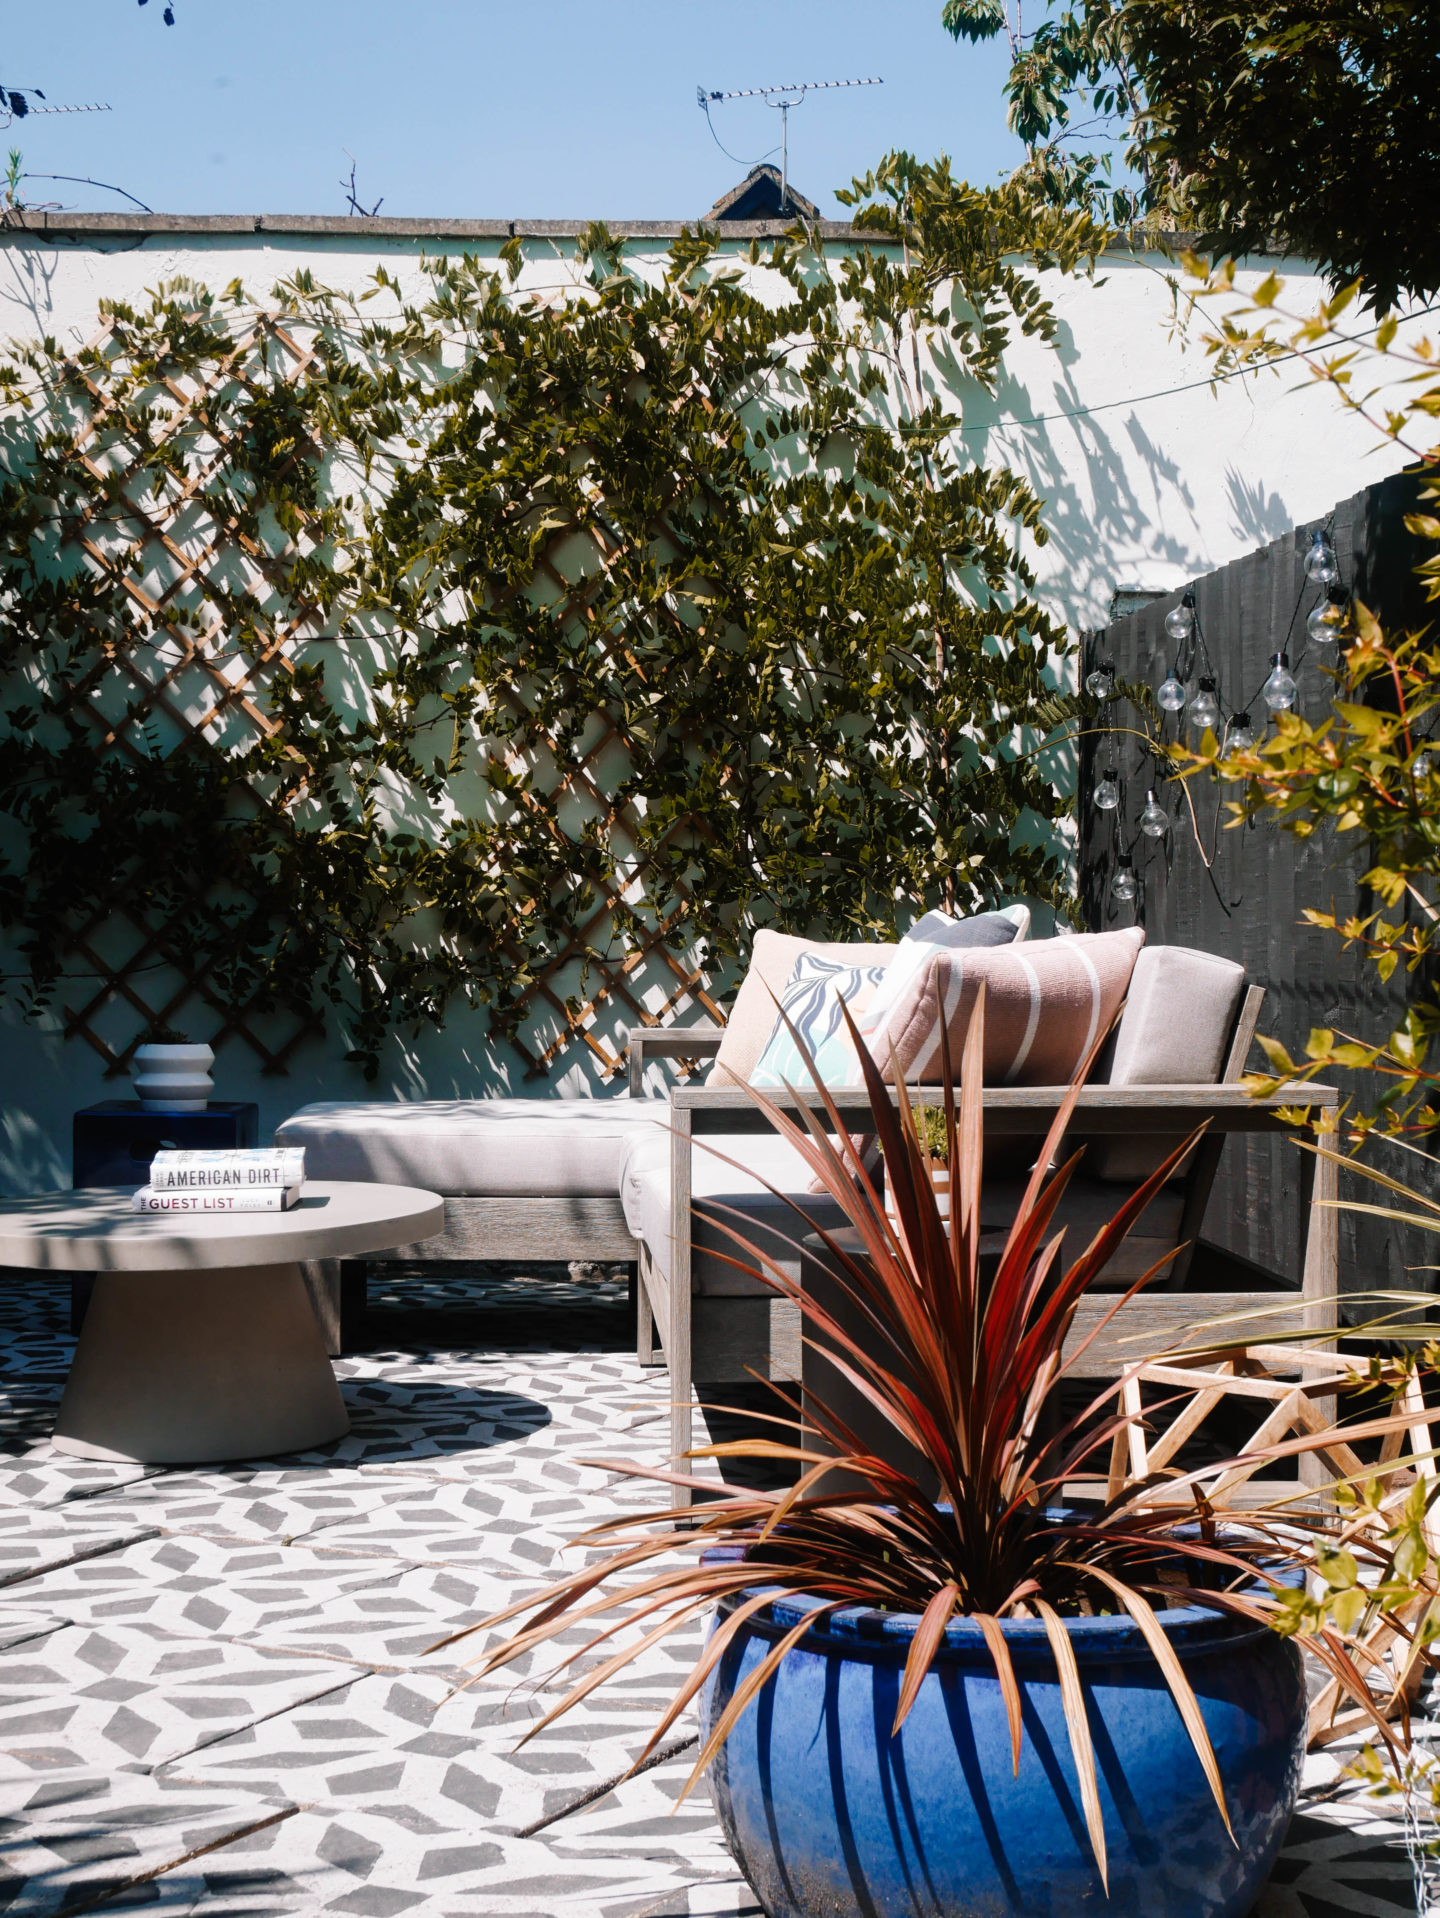
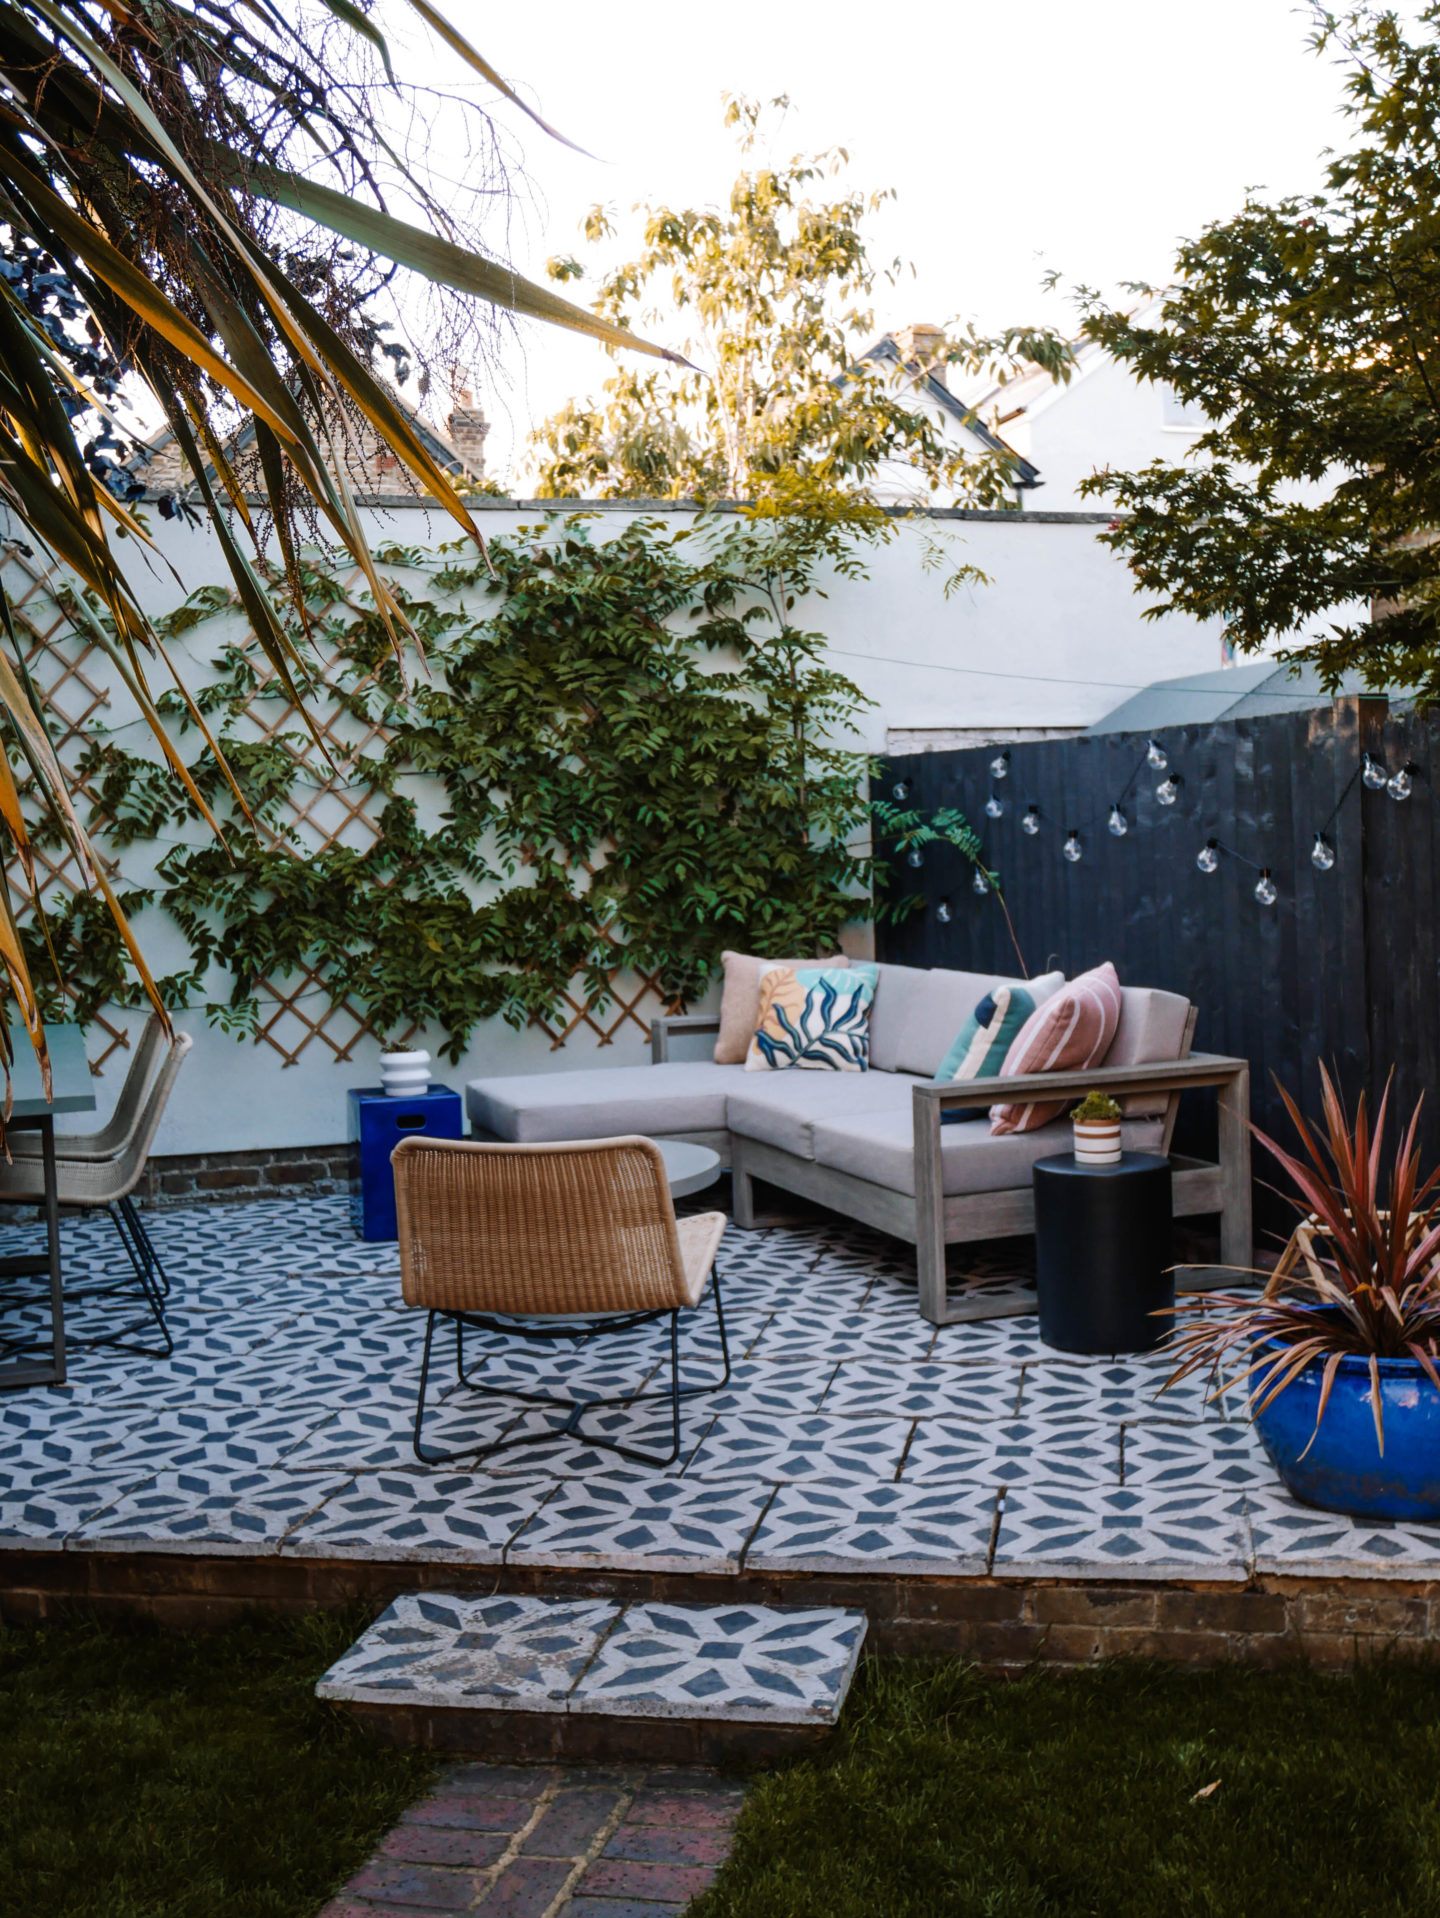
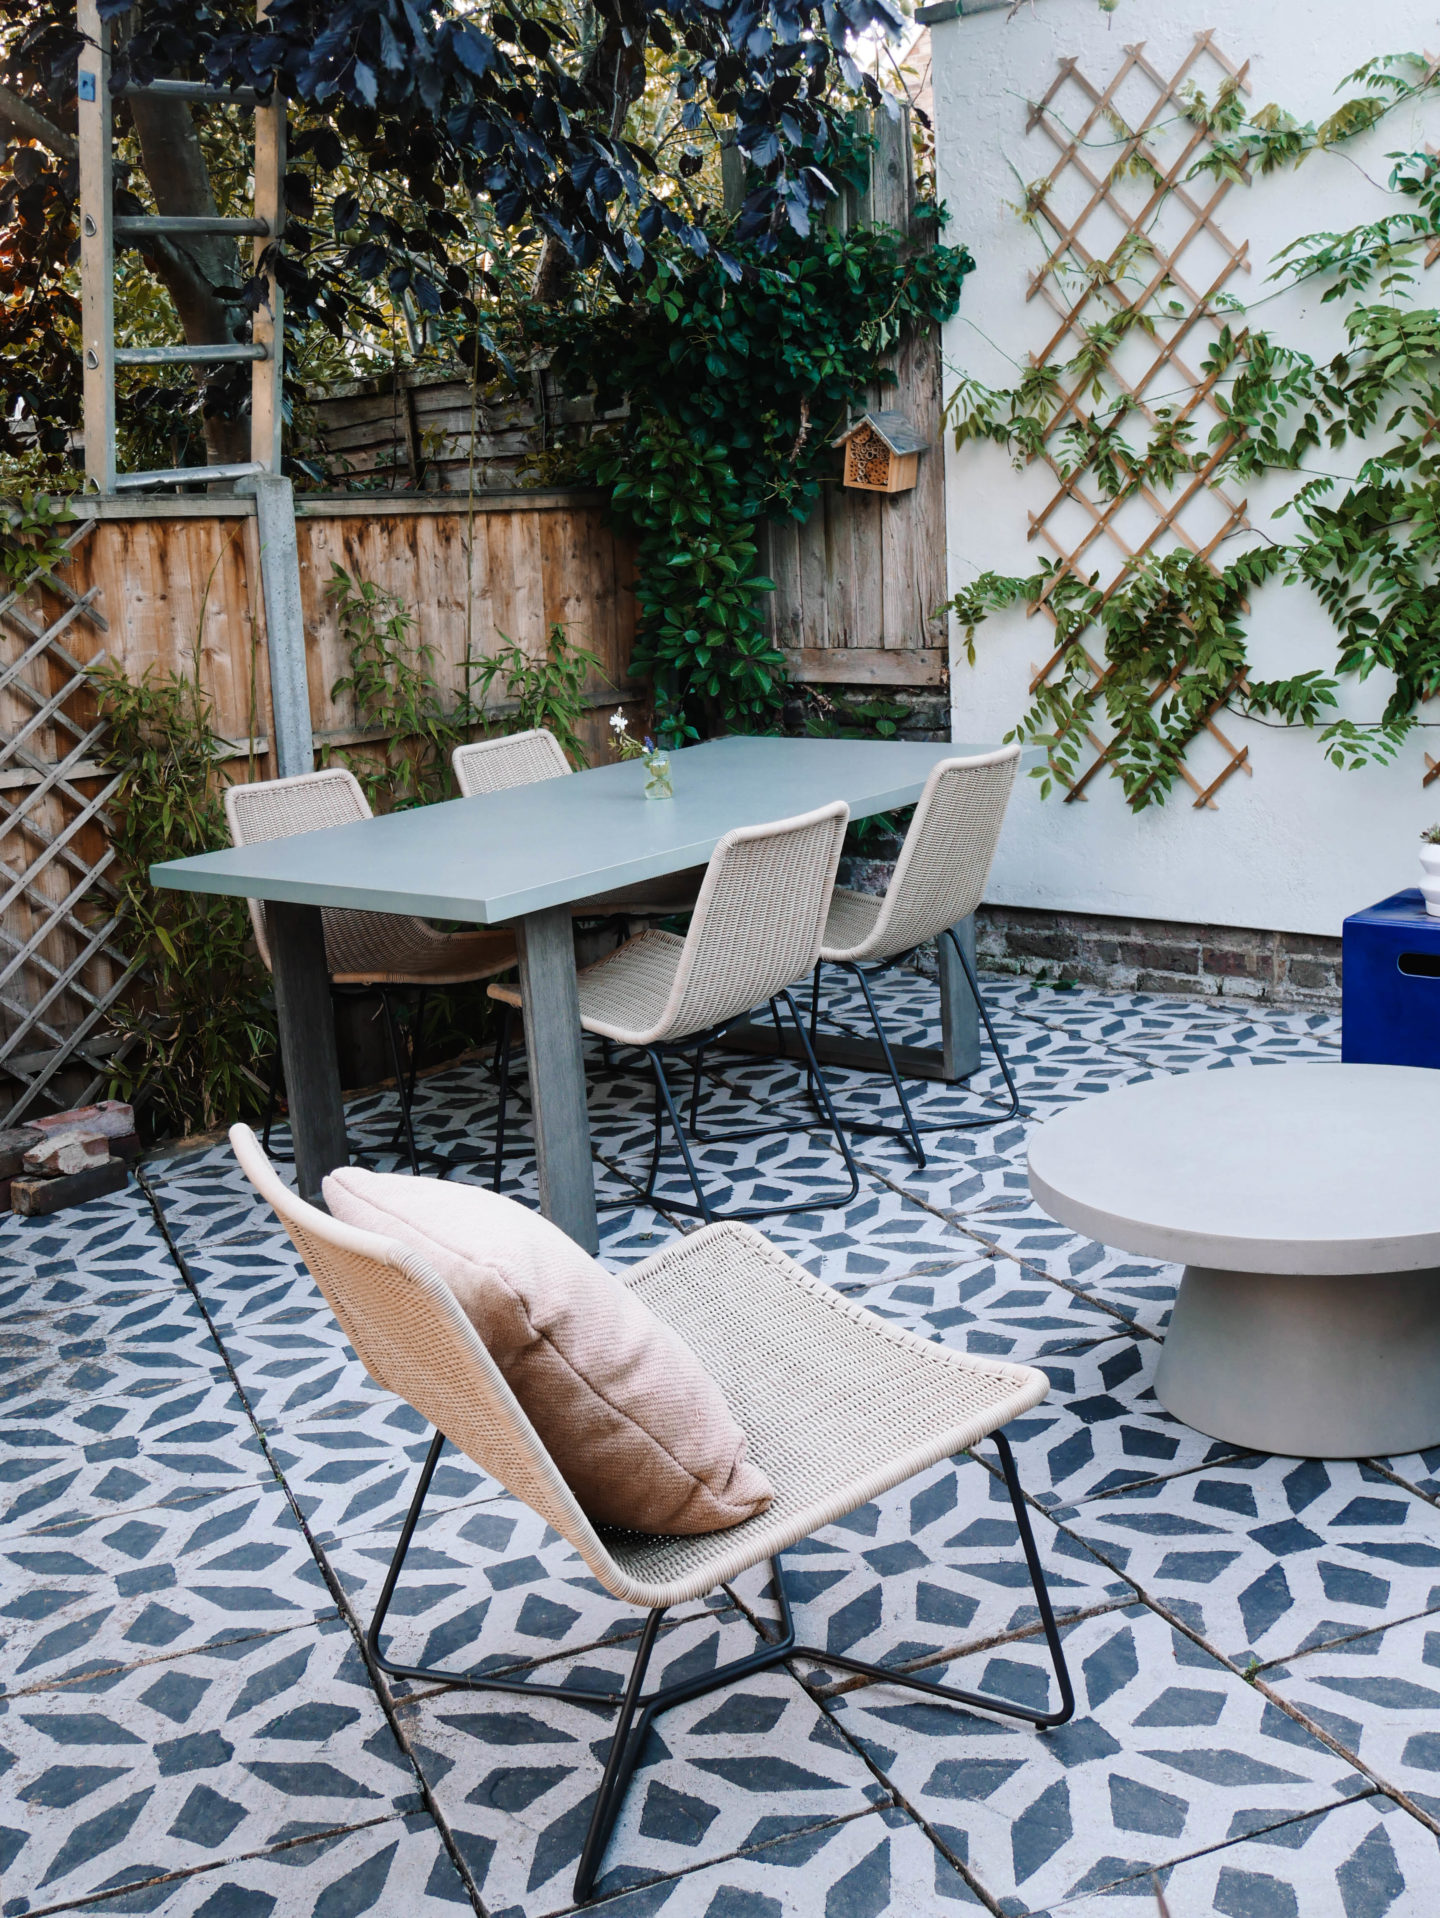
After cutting the plants back and removing the previous owners mouldy gazebo we realised our little sun spot at the back of the garden had huge potential and deserved more than the mossy covering it was previously sporting. Cue the patio and wall upcycle. Painting the patio was a risk that paid off. It really is the most drab to fab part of this overhaul. For a weekend’s work and less than £100 spent it was absolutely worth doing. You can read the full patio stencilling tutorial here with links to all the paint, stencils and tools we used.

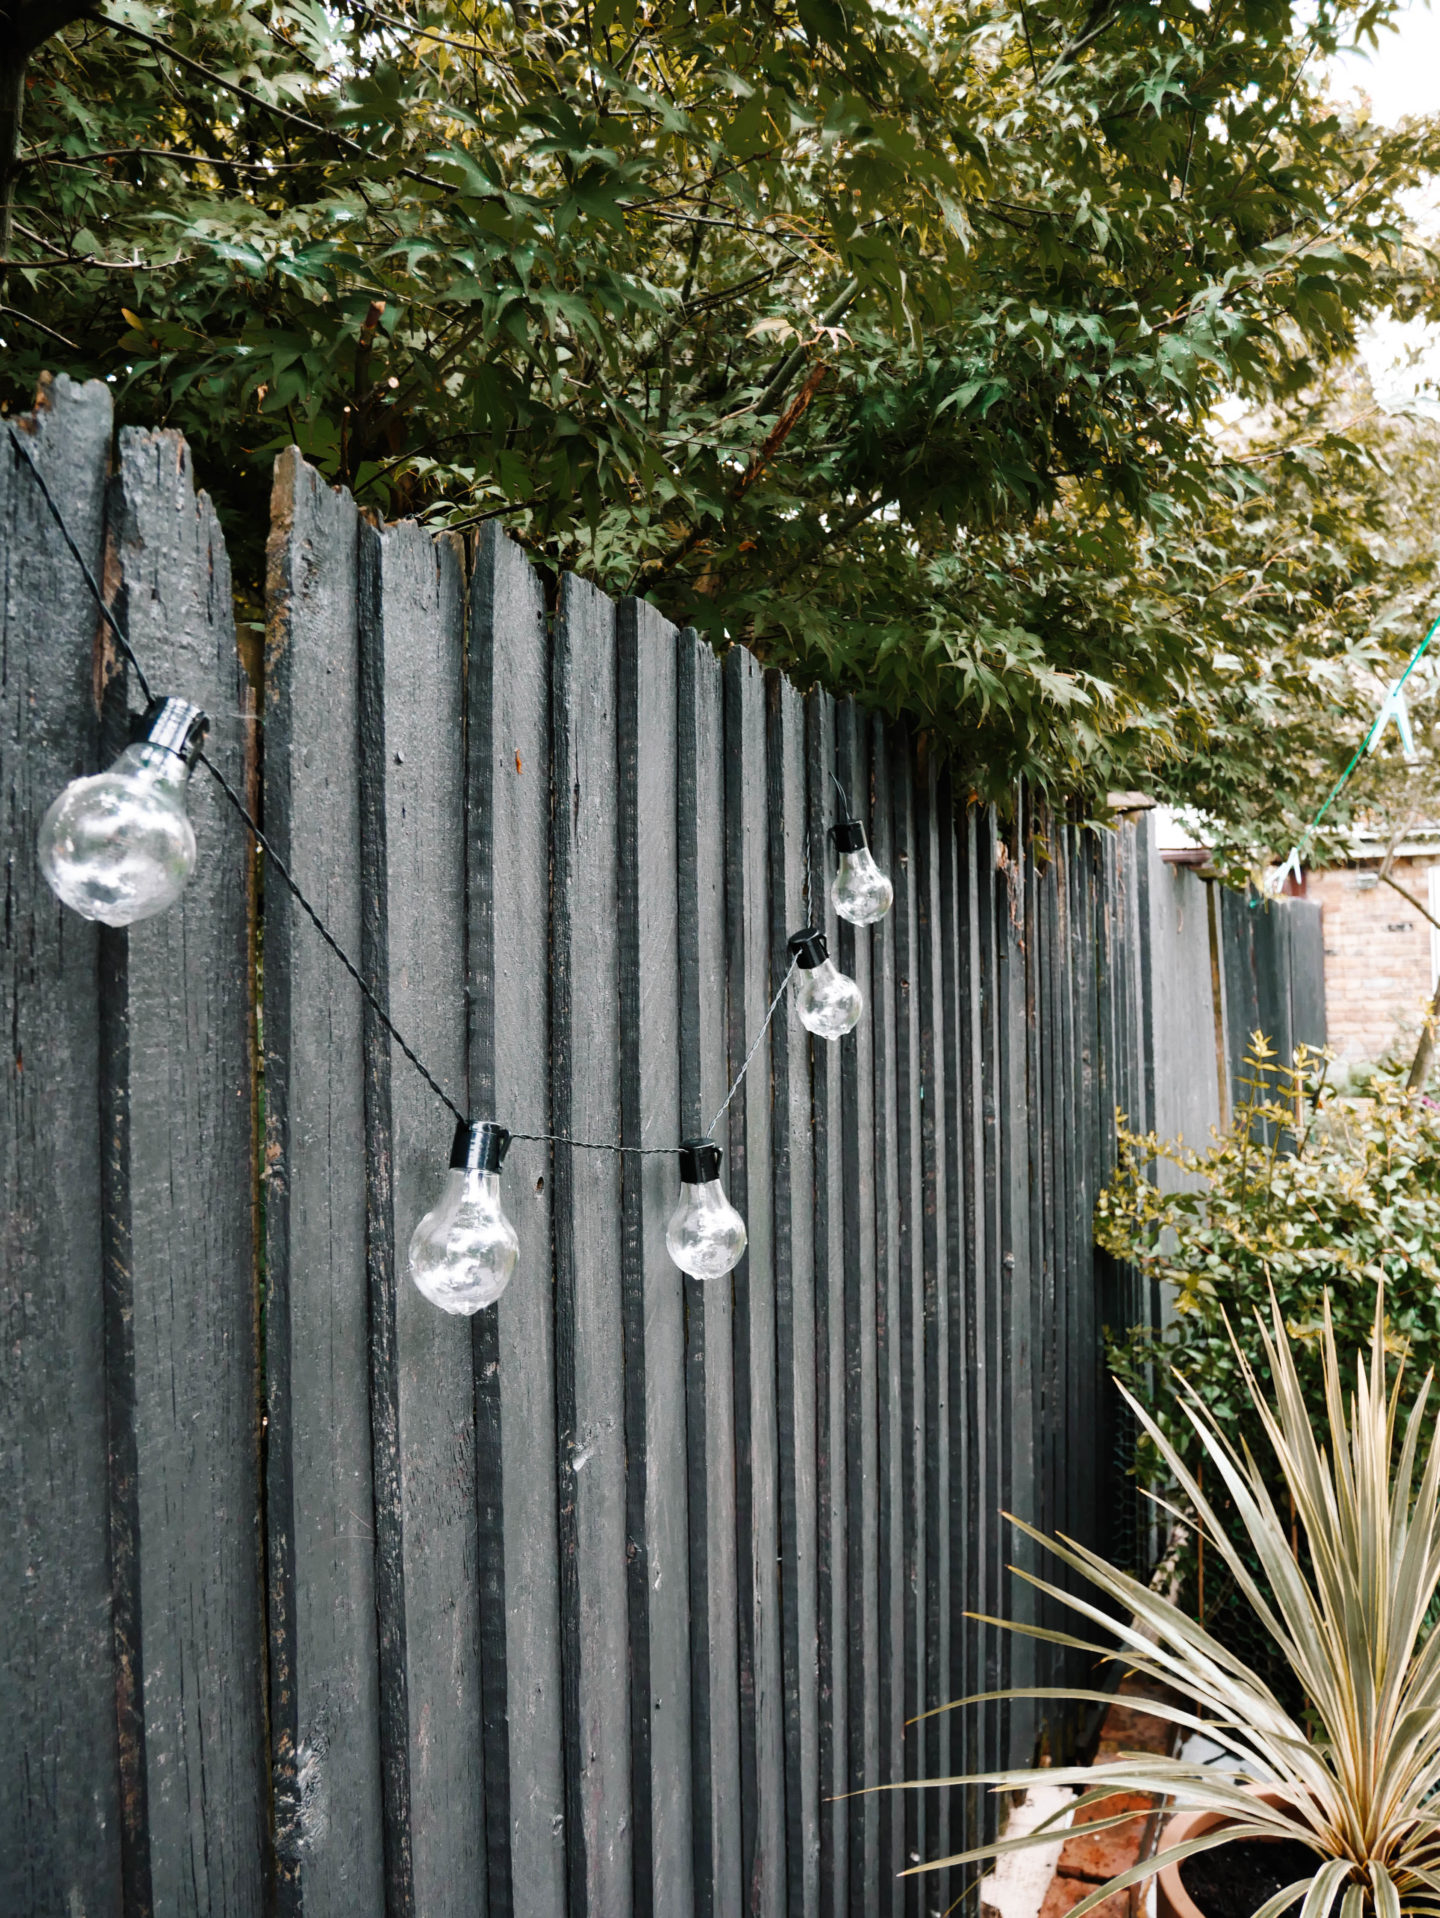
Wall / Fence:
After scrubbing down the moss covered wall and fence we spruced them up with a lick of paint. Neutral shades worked perfectly here. Is black a neutral? Let’s roll with it. At this point we hadn’t picked garden furniture but knew the patio was being stencilled and wanted to have the colours blend into the background enough to allow the stencilled paving stones and plants to be the wow factor here.
Wall colour: B&Q Smooth Masonary paint in “BRECKENRIDGE”
Fence colour: Valspar exterior wood paint in “NEVERMORE”
Furniture:
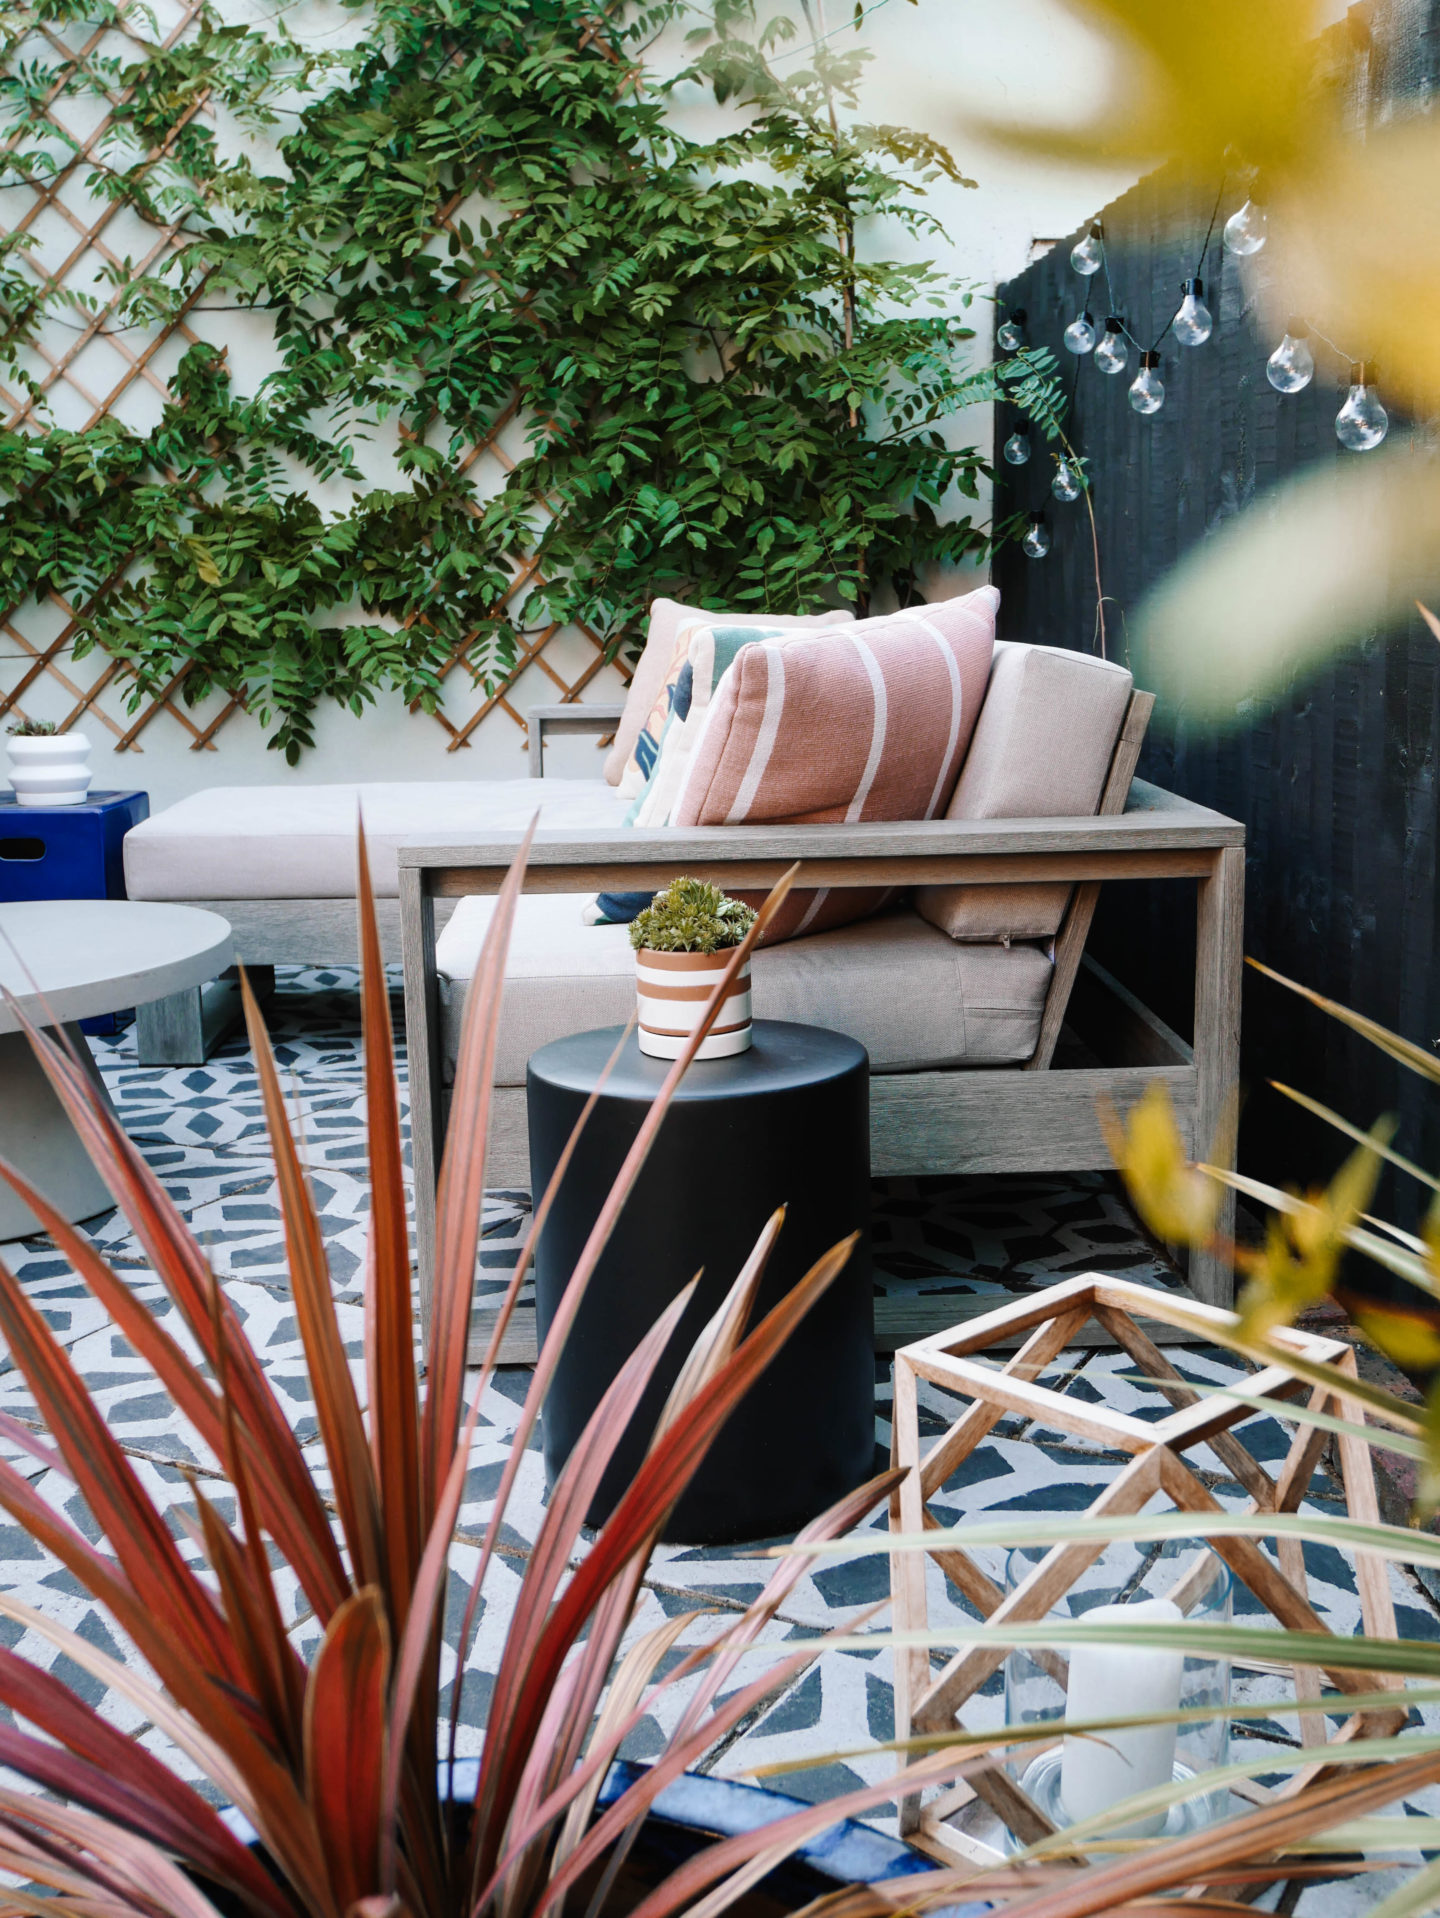
Finally time to furnish our masterpiece! Once the garden had been perfectly primed and we had a base to work with the real fun begins. I worked with West Elm’s free online design service to help me choose the perfect garden look. Maggie from the Kingston store talked me through options to create a chilled out Ibiza vibe. She created mood boards with furniture and accessories that would work perfectly against our stencilled patio, black fences and the greenery of our wisteria covered wall. I worked with Maggie before on our living room design so I fully entrusted her vision here as I’ve seen her creativity come to life before.
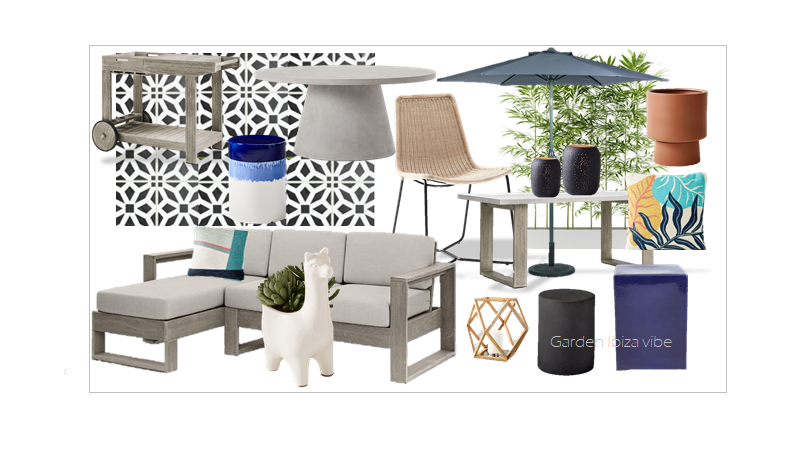

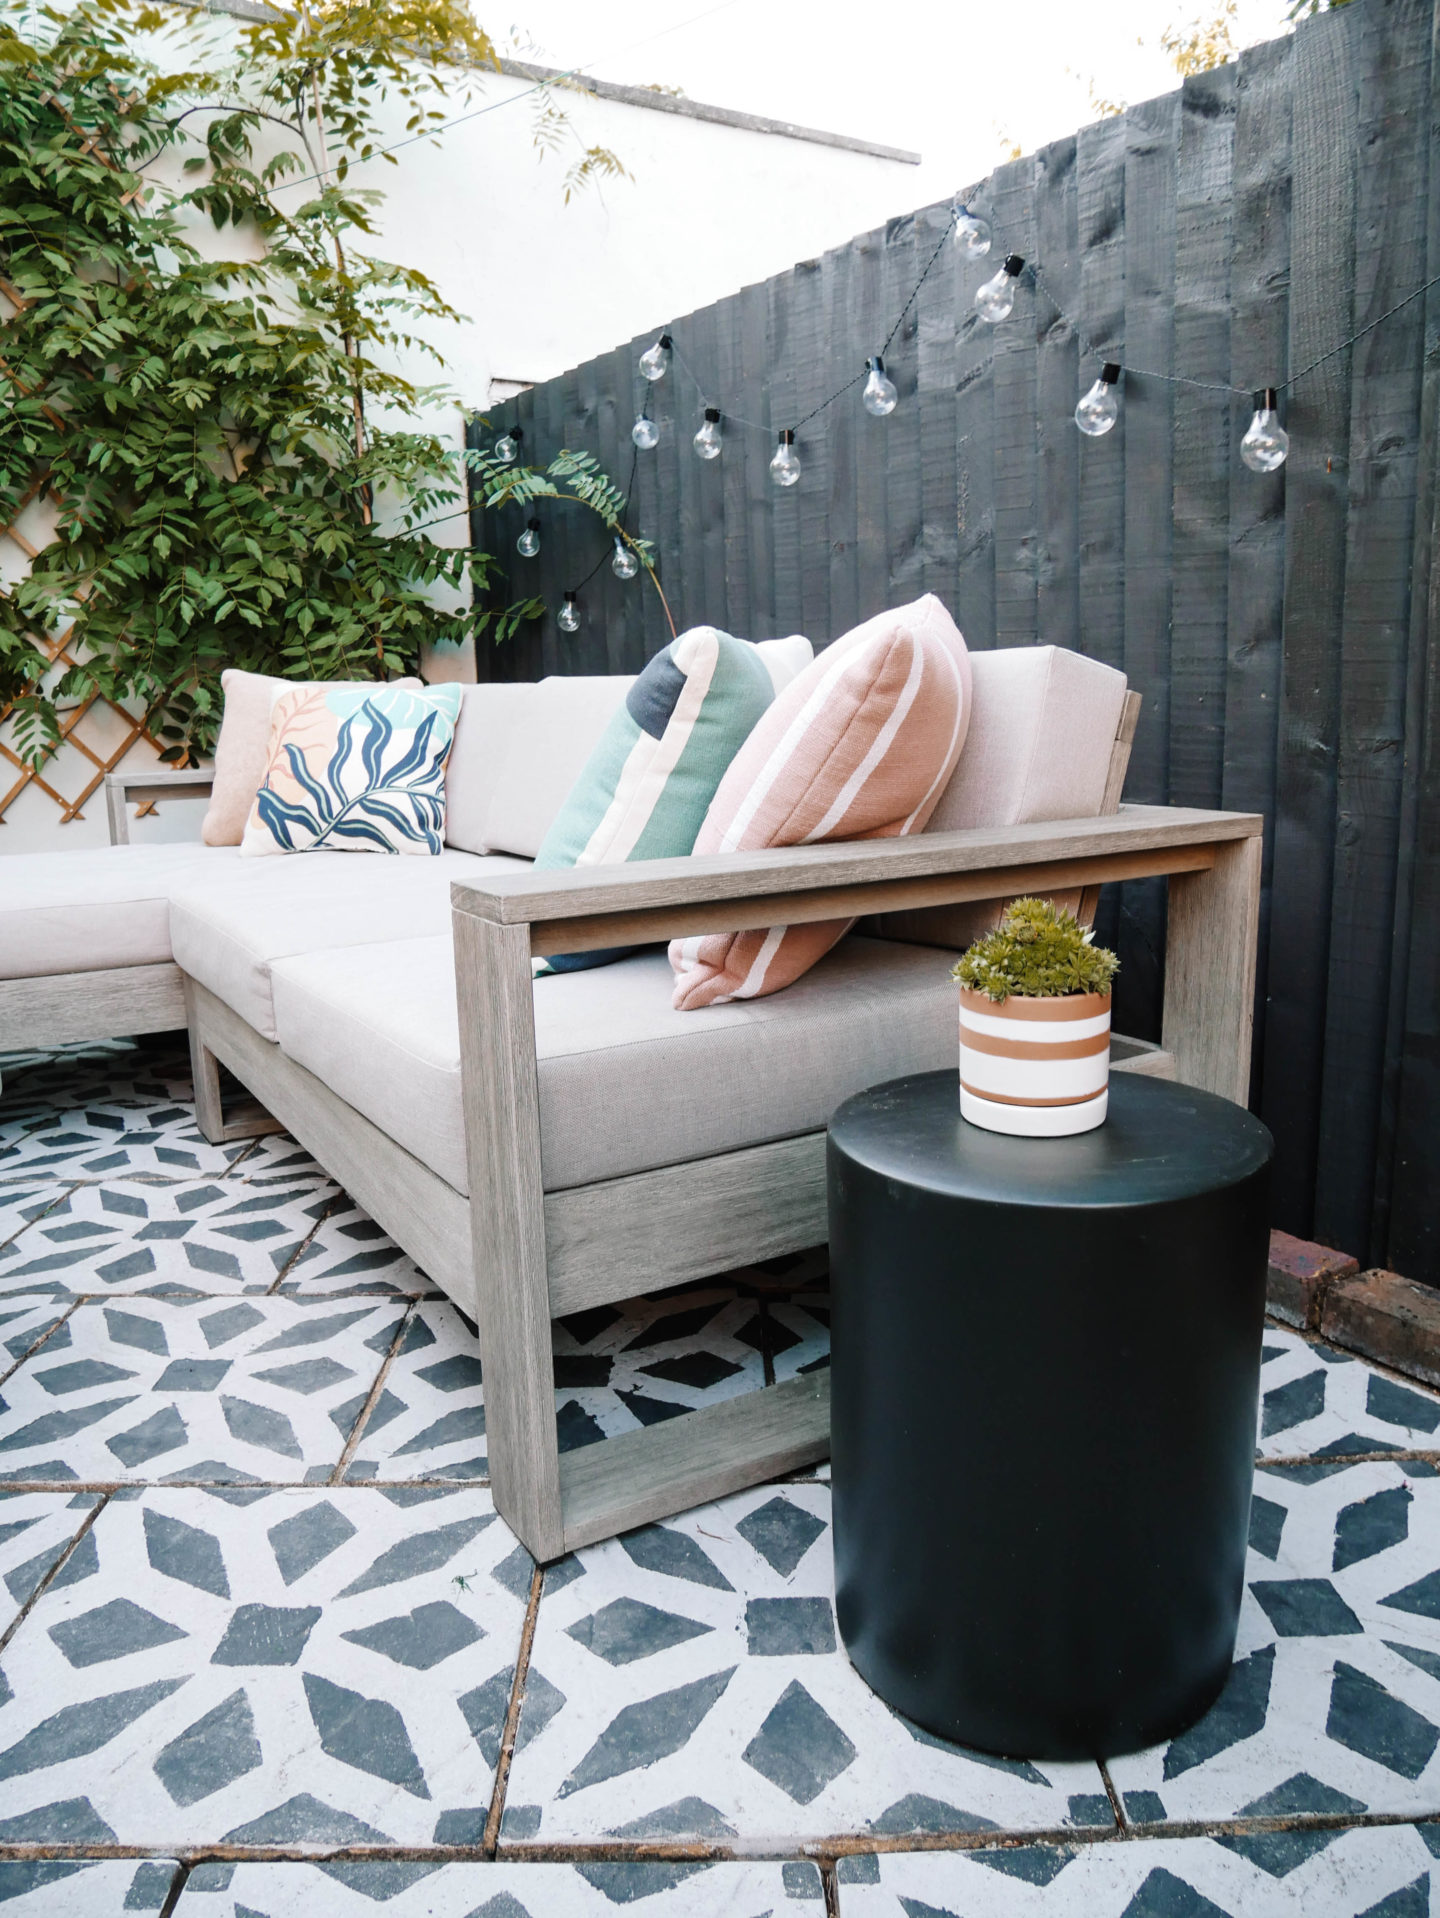
We started by choosing the main pieces and then accessorising around them. The Portside sectional sofa was the first “must have” item. It’s the perfect neutral palette, a chunky enough frame to feel sturdy but still has the simplicity and minimalist look of more refined pieces. The sectional is sold out however the Portside two seater is available.
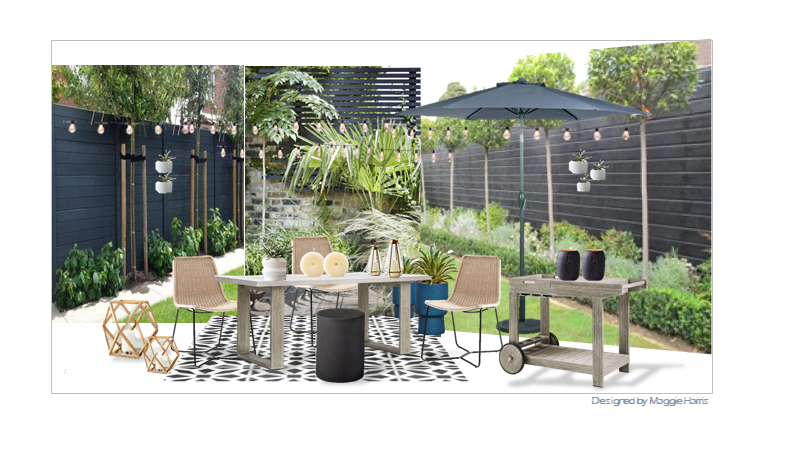
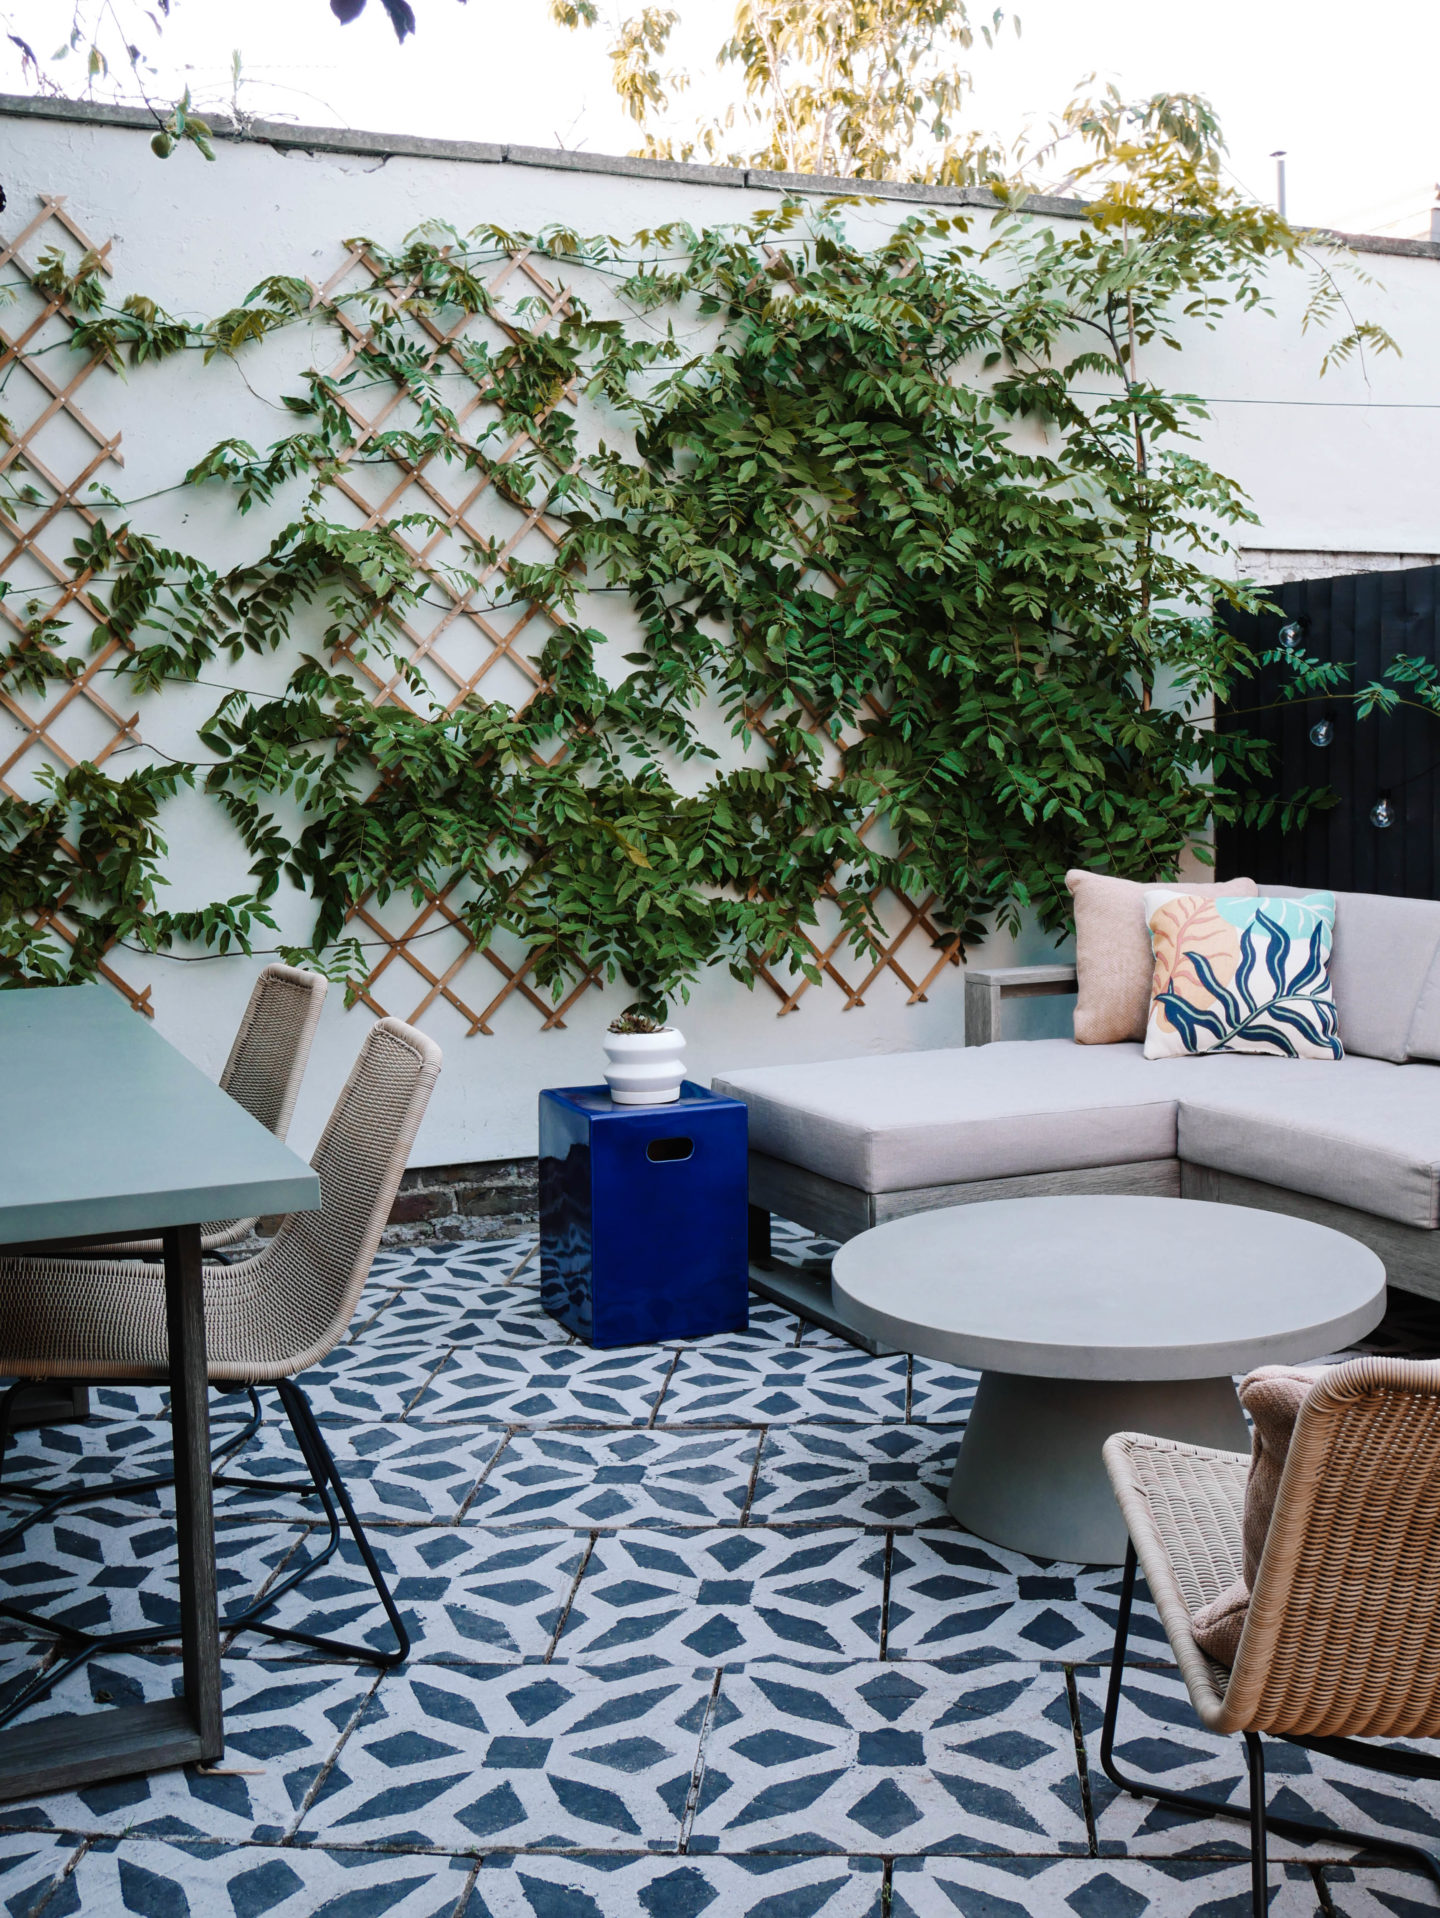
Another must have item was the concrete outdoor dining table in weathered grey.

Another simple and timeless piece that will work in any outdoor garden furniture setup. Even though the patio isn’t big we wanted to be able to split it seamlessly into two sections and having a dining area as well as a lounging area. The two pieces worked perfectly to help zone the space.

Both being similar shades of light grey, Maggie was keen to incorporate other neutral tones to balance out the palette. The Garden Slope dining chairs and lounge chair were the perfect accompaniment here.
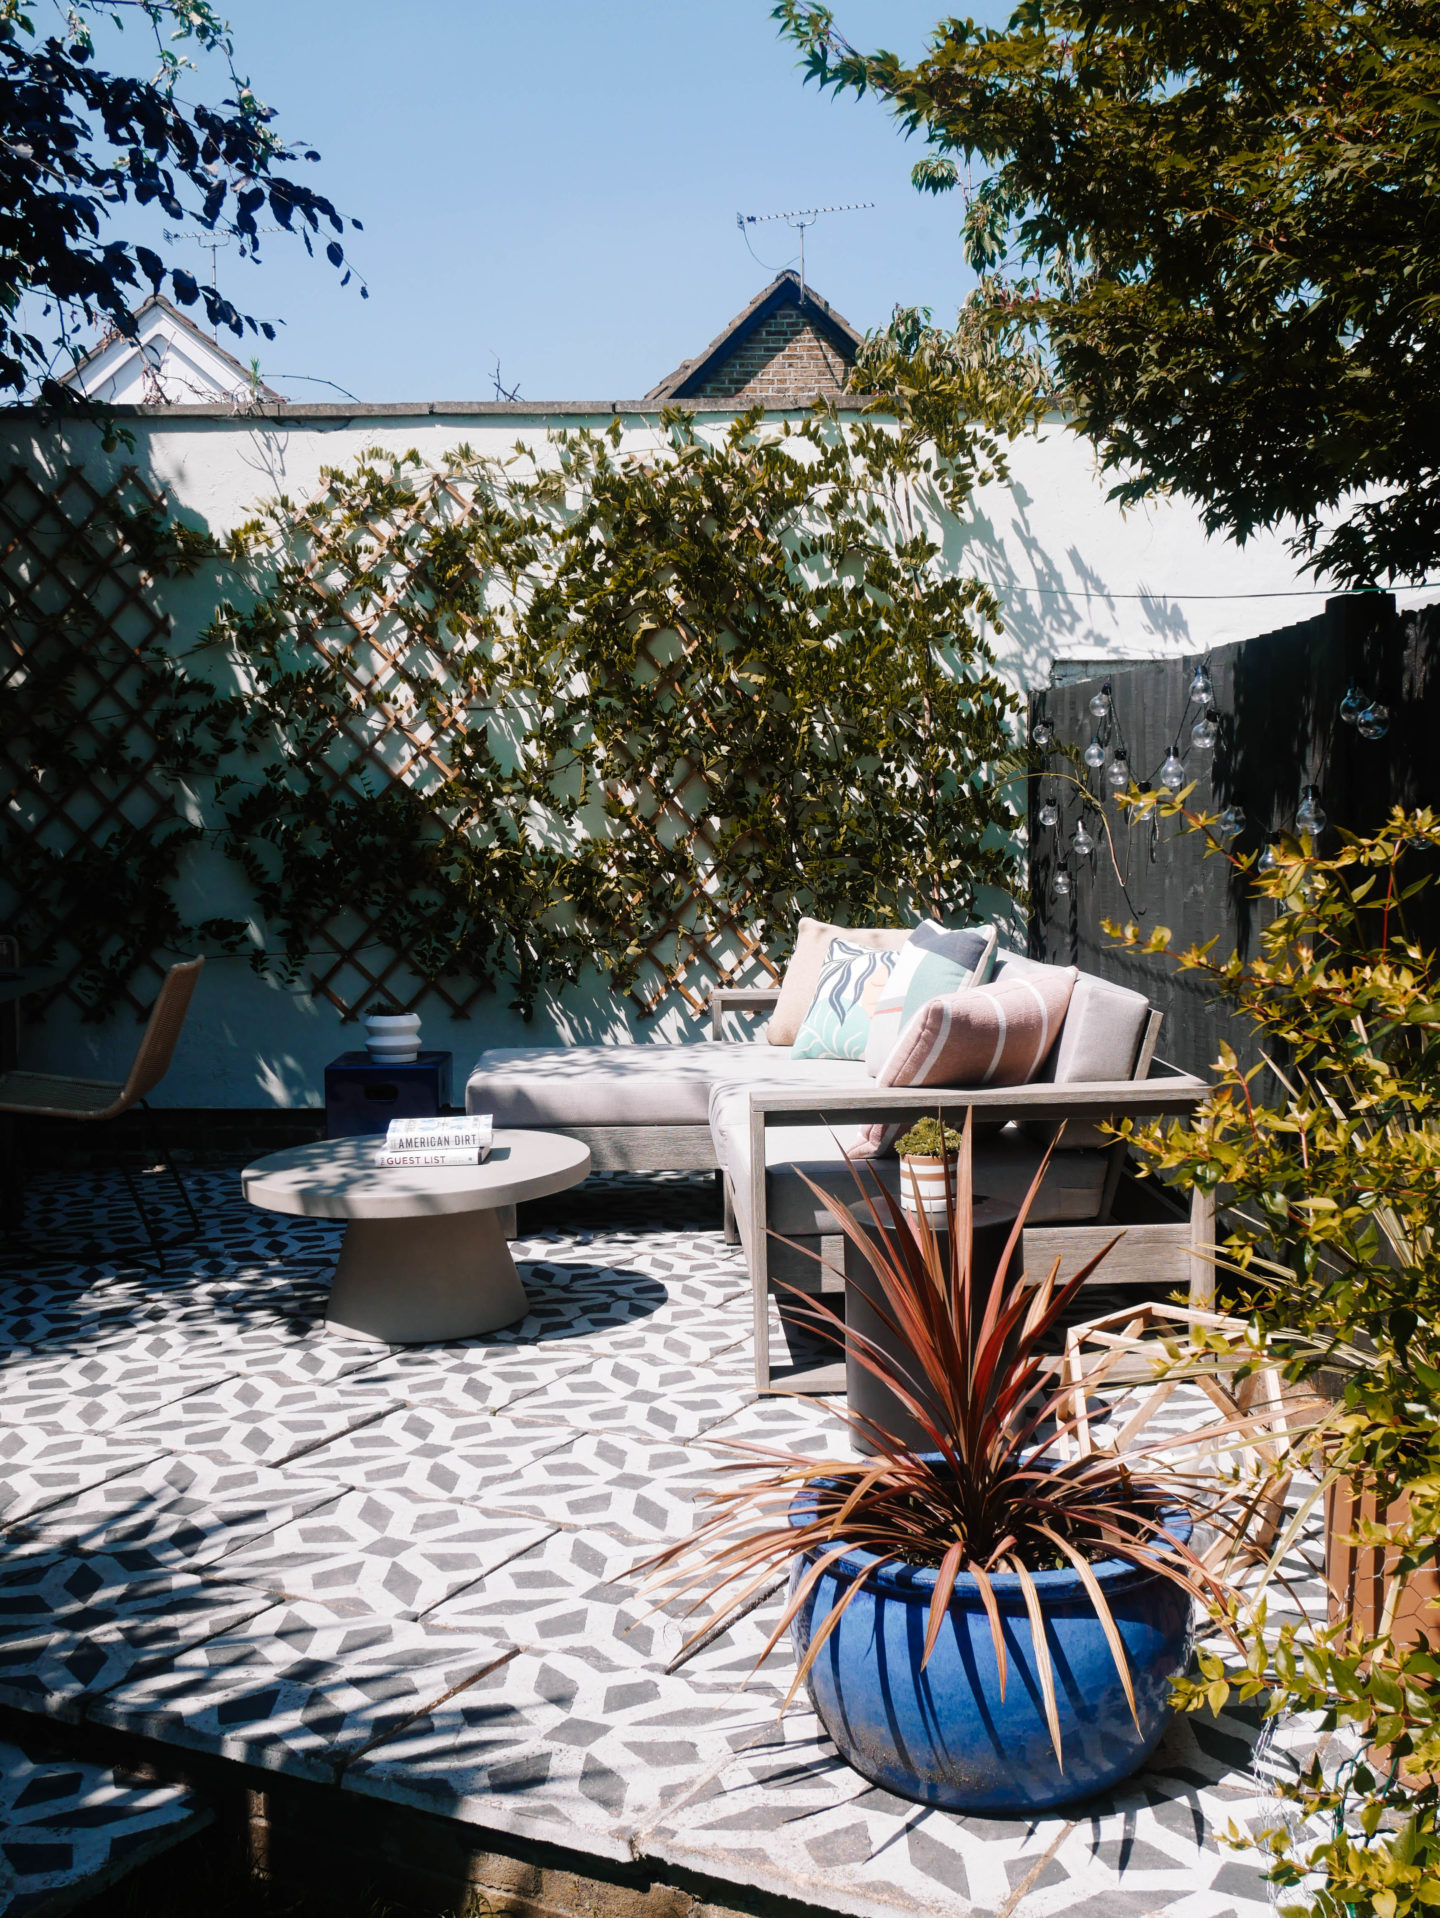
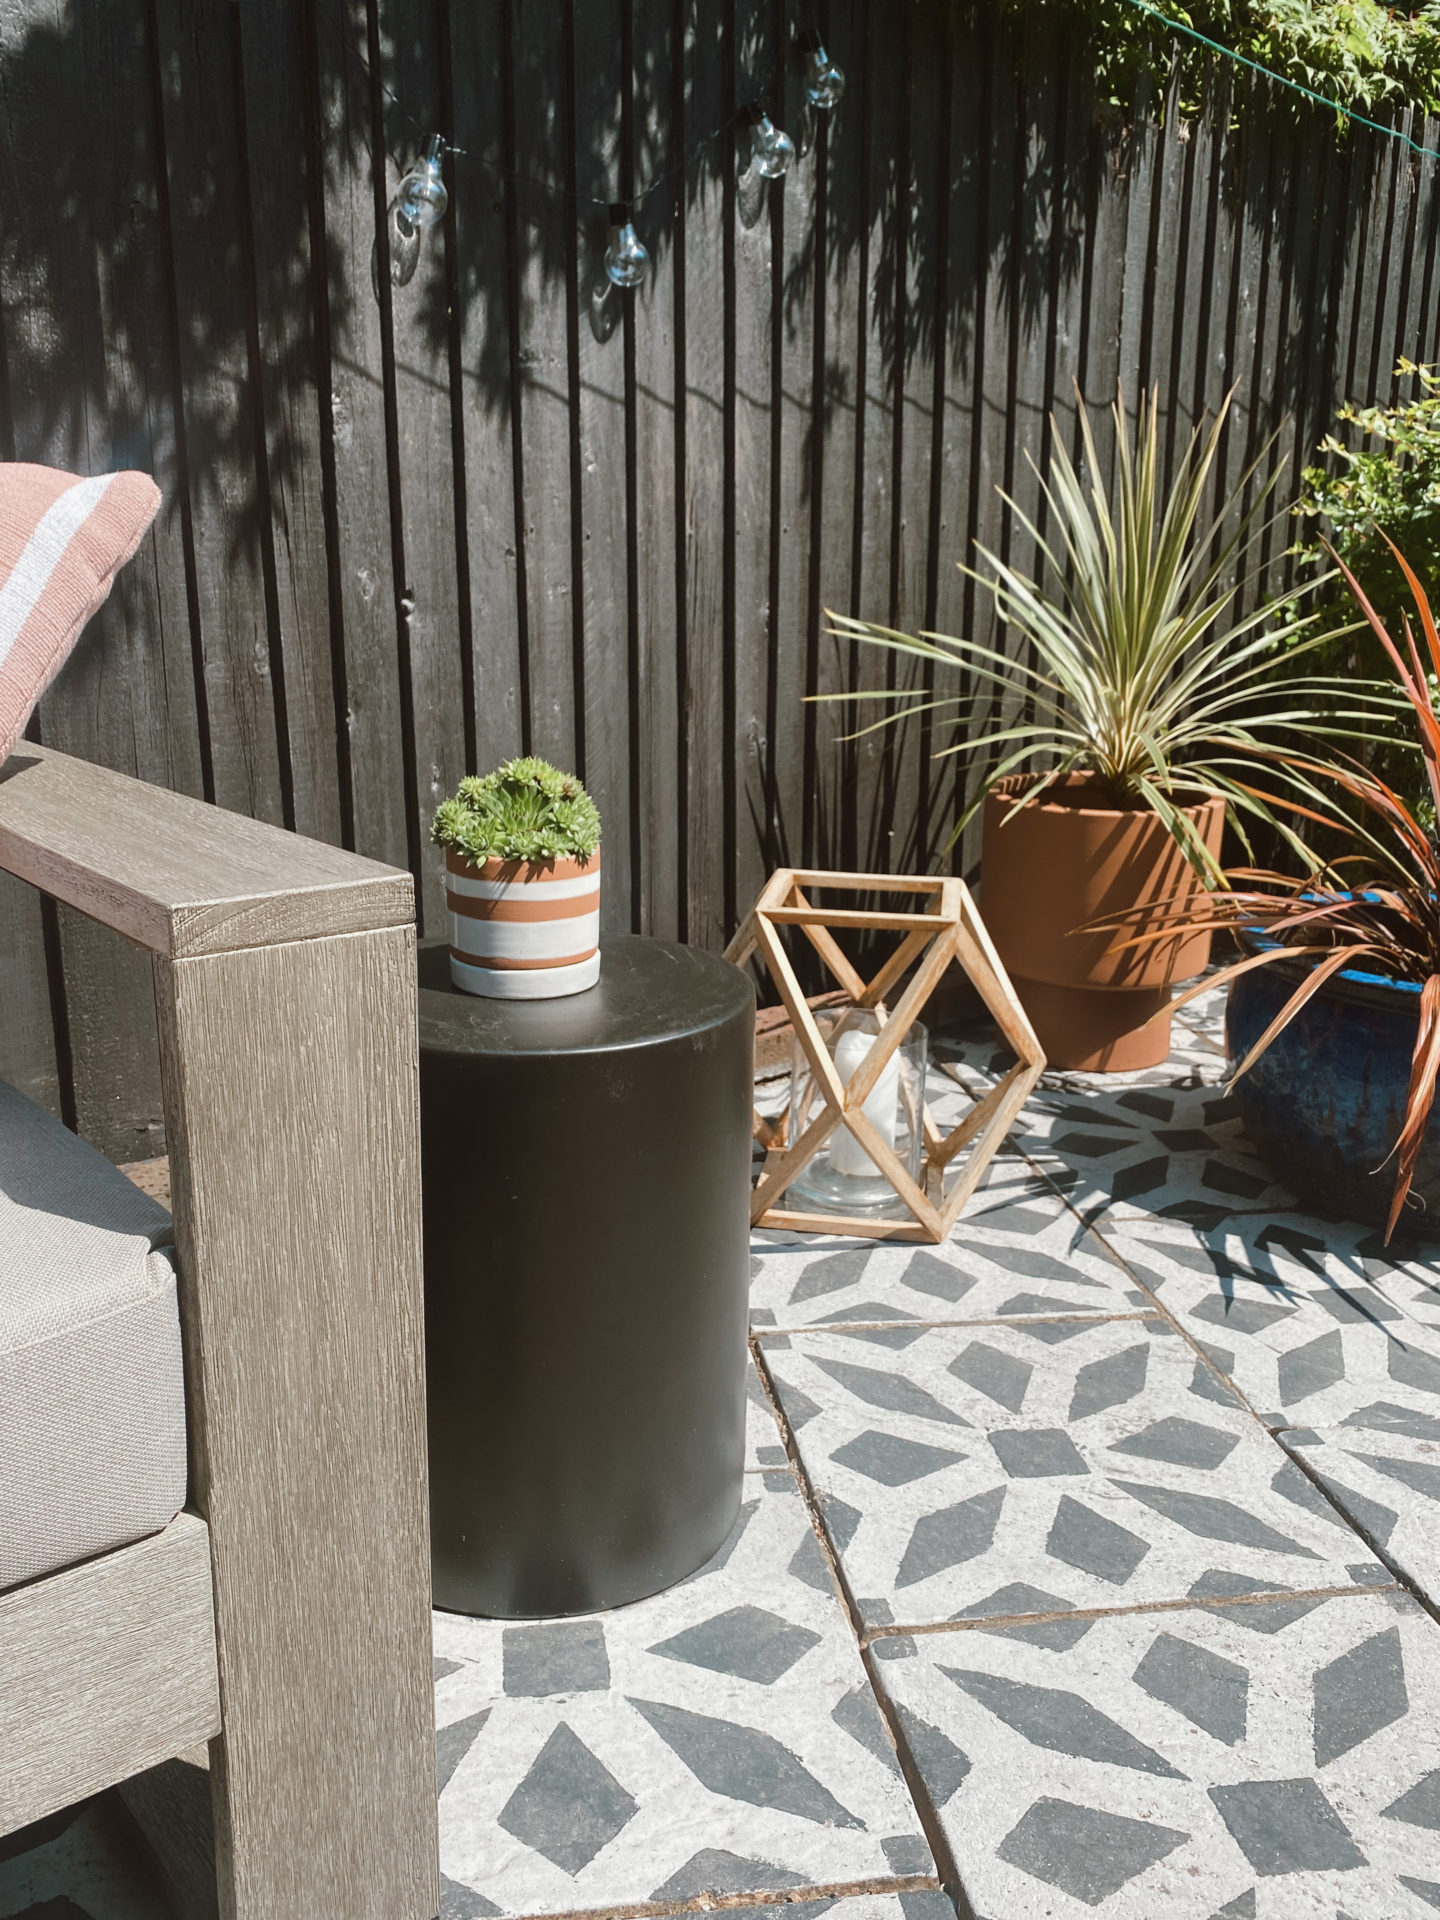
Terracotta plant pots and angular wood candle holder also remain simple, neutral and balanced in the scheme. Now it was time to add a splash of colour to the setup to make it feel a bit more vibrant. I already have a deep cobalt blue plant pot and figured the Blue Ceramic Side Table was just the perfect addition here. The Simple Stripe and Colour Pop garden cushions also fitted the bill.
We also opted for the ultra chic Black Spool Side Table
The wonderful thing about both our side tables is they double up as additional seating round the table. We opted for four dining chairs and if we ever have more guests we can easily seat six. This was a genius suggestion from Maggie because we didn’t want to crowd the area yet want it to be as functional as possible. On the smallish patio area we’ve managed to successfully create a spacious seating and dining area.

The overall look is absolutely Maggie’s vision come to life and I am in awe of the little slice of paradise we’ve created in our back garden.

Click here for the West Elm outdoor dining collection.
To finish the look we added solar festoon lighting on the fence and a few palm plants.
Also our little Bee Hotel is linked here too. Masonry bees like to come visit and nest here.

You can also check out my before and after garden overhaul vlog here.
Enjoyed this post? Pin me for later!


You’ve both done such a lovely job with the space. Looks perfect for enjoying the evening sun!
thank you so much! x
Hi, congratulations! Beautiful job! Very inspiring! What are you using for the cross-hatch on the wall with the climbing plants. Are those artificial plants? Can you provide links?
Author
they’re real and they’re being hung by a trellis we got at B&Q